Proactive vs Reactive User Onboarding for SaaS – All You Need to Know
User onboarding is critical for a number of your SaaS metrics – but to do it correctly, you need to understand the difference between proactive vs. reactive onboarding.
While proactive user onboarding is best used for new user activation, reactive onboarding comes in handy at later stages of the user journey and is critical for user engagement, retention, and pushing upsells.
In this post, we will explain the differences between proactive and reactive user onboarding, their individual benefits, and when to use each. This will boost your onboard user design – and help you avoid those costly mistakes.
Let’s jump right in!
Try Userpilot Now
See Why 1,000+ Teams Choose Userpilot
What is Proactive User Onboarding?
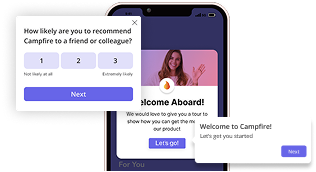
Proactive user onboarding is where you make the first step and proactively guide the user towards certain actions/ outcomes, in-app. The user does not need to have performed any action, in-app, at this point to trigger an experience.
Example built with Userpilot below:
With this type of onboarding, the user will gain the quickest understanding of the value of using your SaaS product.
When to use proactive onboarding?
Proactive onboarding is mostly used for new user onboarding. This is because it’s designed to prompt and guide the new user toward Key Activation Points.
Key Activation Points are the 2-3 actions a user needs to perform to receive real value from using your SaaS product. As a result, the user will be up for continuing their proactive onboarding experiences. It is a significant benefit, as the user is being shown how to use your software more quickly and effectively.
At the same time, it’s best to be mindful that first-time users are always at risk of becoming overwhelmed, even when presented with a small number of unfamiliar product features. That’s why it’s not a good idea to squeeze every single one of your product features into the learning process.
Requirements for a successful proactive onboarding flow
To be successful with proactive user onboarding, you need to know the ideal user journey for a specific segment of your users; similarly, for mobile experiences, Userpilot now allows you to target specific user segments to personalize their initial journey. This includes how long it should take the user to get from point A to point B, and what milestones should occur along the way.
With that user journey map in hand, you design interactive, digital “signposts” – the proactive onboarding leading the user towards key activation points.
Think of Proactive User Onboarding as the perfect, pre-planned roadmap. You will know exactly the route your user needs to take when they jump from their “Aha!”- or “I get it” moment – to being activated and engaged users.
Despite its top-down nature, proactive user onboarding doesn’t have to be linear. The product tour is still hugely popular in SaaS, with 38% of SaaS products still using one, according to the State of SaaS Onboarding Report, 2022.
But you don’t have to create a traditional, boring and non-interactive product tour. Users really hate these tours, and are easily put off from continuing their onboarding experience when they need to remember step 3 before taking step 1:
Here’s an example of a linear product tour from a SaaS email marketing newsletter:
A typical product tour will show you every step to take, but here’s the thing – it doesn’t stop. It simply carries on to the next step, regardless of whether the user has actually completed any of the actions needed each time.
Often, a tour will relentlessly go through explaining an entire product in at least 10 steps or more. It’s no surprise that new users become easily overwhelmed and confused by the non-stop flow of information. They simply lose interest on day one and will quickly disengage.
Unfortunately, product managers who use product tours run a real risk of delivering a negative first-time user experience (FUTX)…
When new users are unable to obtain “early value”, they almost instantly disengage. It often leads to a lower 1st day / 1st-month user retention rate. Users will lose interest in trying to understand how to use your SaaS product without that “AHA moment” to trigger active engagement.
But why should you use proactive user onboarding instead of product tours?
Increasingly, product managers turn to the interactive walkthrough as an alternative to a basic product tour.
The interactive walkthrough is different from a product tour. Each step of the walkthrough requires the user’s participation before the next step is shown. Here, the user is not overwhelmed by nonstop information. Instead, they are allowed to complete the walkthrough at their own pace.
The process couldn’t be more straightforward:
- The user is shown STEP 1.
- User completes the action required in STEP 1.
- Completion of user activity in STEP 1 triggers a custom ‘experience’ (STEP 2).
Here is an example of using a social media scheduler for the first time. It requires linking accounts (STEP 1) before scheduling a first post (STEP 2).
Benefits of Proactive Onboarding
Wondering if you should invest in proactive onboarding? Here are the key benefits:
- Shorter Time To Value (STV) – or promptly delivering the vital “aha” moment. New users are given what they are looking for with meaningful examples.
- Higher Day 1 Retention – because the new user knows what your service is expected to deliver. They get to experience your promise of value – the meaningful “aha” moment – faster.
- Reduced Costs of customer support and customer success – Proactive onboarding is self-paced and reduces the number of problems users bring to you.
Proactive onboarding examples
Convinced you should try proactive user onboarding? Let’s see some examples in action!
Postfity, a social media scheduler, built its proactive onboarding in the form of an interactive walkthrough, purpose-built in Userpilot.
The Postfity interactive walkthrough, built with Userpilot, starts with a welcome screen.
The first proactive action carried out by Postfity is to nudge a user to connect with their social media channel. They are then prompted to start scheduling their posts.
The first action of connecting to their account is now completed, and the new user is guided to the next step of scheduling their first social post:
The Userpilot dashboard enables Postfity to see how many users have completed each of the two steps. Completing both steps confirms that the user is activated.
Postfity can also use Userpilot to A/B test new features of its walkthrough to see if small improvements can be made.
How to build a proactive onboarding flow step by step?
The key to building a good, proactive onboarding flow is “automatic interaction”. The user needs to quickly obtain value from continuing with their engagement, and the onboarding process starts immediately at the welcome screen.
Firstly, create a microsurvey to segment your audience by their goals, which will also be Key Activation Points.
Secondly, tag features – a functionality available in Userpilot – or ask your developers to create ‘custom events’. These are points, at which, you will know when user actions have been completed – the key to successful user onboarding to your SaaS.
Prompt the user to complete STEP 1 – the first key activation point.
When STEP 1 is completed, the onboard user should be shown a ‘success’ message…
The user should then be nudged forward to STEP 2 – the second key activation point.
Best proactive onboarding tools – what to look out for?
The most effective proactive user onboarding tools will enable you to build powerful, interactive walkthroughs based upon:
- Custom events – identified onboard user actions completed at Key Activation Points.
- Feature tags – no coding required, UI selectors only.
As pointed out earlier – it’s crucial to avoid an onboarding tool that only offers linear, time-based product tours. Focus on selecting user onboarding with interactive walkthroughs.
The good news here for product managers is that Userpilot allows you to build fully interactive walkthroughs.
Userpilot offers:
- Onboarding checklists – experiences leading to Key Activation Points can be brought together in one place, enabling new users to revisit them “on-demand”.
- Easy setup and use for your product team – no coding required to build your interactive walkthrough, unlike in tools like Walkme or Pendo.
- Micro surveys built into your experiences – with good segmentation and targeting capabilities for building a welcome screen to separate users by role:
Now that you know everything about proactive onboarding, let’s learn more about reactive user onboarding flows.
What is reactive user onboarding?
Reactive onboarding is where you wait for the user to make the first move.
It’s the user action that triggers their experience, and you ‘react’ to their in-app activity.
A distinguishing feature of proactive onboarding is that you create reactive user onboarding for “secondary onboarding” – pushing the users further down their user journey by helping them discover advanced features of your product.
Reactive user onboarding also offers opportunities to drive upsells for premium user plans.
Benefits of reactive user onboarding + when to use it
Reactive user onboarding is subtle and tends to remain in the ‘background’. This reacting to the user’s onboarding actions means users progress along their discovery journey of your SaaS only when they’re ready and in their own time.
Over time, the user who interacts with your reactive experiences will adopt more features as they increasingly derive more value from your product.
The long-term results from users discovering more and more value from your product are higher user satisfaction, engagement, and retention. Usage-based pricing also leads to higher product adoption, faster upgrades by more users, and expansion revenue.
Reactive onboarding examples
In this particular reactive onboarding example, Hubspot ‘reacted’ to how a user was copying and pasting.
The reactive onboarding modal asked: “Tired of copying and pasting?” and suggested using their email templates.
The modal was immediately followed by an interactive walkthrough and the user was shown how to use the email templates.
How to build a good, reactive onboarding flow
So how to start building reactive onboarding experiences? What information do you need to include for designing an effective reactive onboarding flow?
- Define the secondary features the users should adopt at further stages of their user journey
- Decide which in-app actions should trigger experiences pushing the user to adopt the secondary features
- Create in-app experiences triggered by the right user actions based on custom events/ feature tags
- Set goals for each experience to measure the success of your secondary onboarding efforts:
A great example is Postfity reminding users they can adopt a secondary feature of the social tips calendar. This tooltip appears when the user’s posting frequency declines:
Best reactive onboarding tools – what to look out for?
If you’ve decided that reactive onboarding is the way you want to go then you need to know what ‘must-have’ features you should look out for when selecting the best reactive onboarding tool for your SaaS onboarding:
1. Event-based triggers – waiting for the user’s action to deliver their next experience.
2. Detailed segmentation capability – where key information is obtained from user fields completed in the welcome screen survey.
3. Customised interactive walkthroughs – pinpointing the user’s progress along the onboarding process.
4. Goal setting – measures how effective your walkthroughs are in prompting users to complete activation.
Coincidentally, Userpilot also offers all of the above functionalities!
Want to create proactive and reactive experiences without coding? It looks like it’s time for you to get a Userpilot demo!
Conclusion
If you’ve gotten this far, I hope you now know the difference between proactive vs reactive onboarding and see the benefits of both!
To maximize user activation, engagement, product adoption, and user retention – you should use a combination of both, at the right time.



![What are Release Notes? Definition, Best Practices & Examples [+ Release Note Template] cover](https://blog-static.userpilot.com/blog/wp-content/uploads/2026/02/what-are-release-notes-definition-best-practices-examples-release-note-template_1b727da8d60969c39acdb09f617eb616_2000-1024x670.png)

