Product managers, have you ever wondered what user story mapping is? Let’s shed some light on this.
User story mapping is a simple method for converting your vision of a product into a roadmap that allows broad team collaboration and enables your entire team to see the bigger picture, how everything connects, and how to plan the minimum viable product. It is the power to spec out multiple users and goals and to clearly display the entire process while following a natural, narrative flow of the user’s journey.
The product design process always begins with understanding the problem and the user’s goals. A user story map allows you to see the journey of the customer, what to build first and allows you to identify the high-risk tasks or requirements to better allocate and understand your entire product. It allows you to frame problems and identify solutions as you map the full scope of the product.
Furthermore, a user story map is accessible because you can visually explore and collaboratively plan how to break up the product design process into stages.

Try Userpilot Now
See Why 1,000+ Teams Choose Userpilot

When to use it
User story mapping can be applied to an already existing product or used to establish and maintain a brand-new product. Regardless of the stage at which you use it, however, working with your team to outline the user journey can help you find a balance between identifying the product’s features and building them.
Why is it important to create a user story map for your product?
- Your customers need a simple way to confirm product goals.
- It allows you to get your teammates aligned, making it easier to plan.
- Your team members benefit from a straightforward platform.
- Team members can get access to the entire scope of the project and see and add valuable ideas.
- Compatible with agile methods for development.
- Developers can see the entire specification for the product.
- You can identify the minimum viable product.
- The team can save time and resources by identifying what not to build.
- You can easily adapt, move, and adjust future sprints to fit in with requirements.
Shared understanding is one of the major bonuses of user story mapping. Allowing all team members to provide input to the full project removes overlap of tasks and requirements, allows you to refine the project, and saves time.
Have you ever experienced a time when a department or team member announces a new requirement at a crucial point in the development cycle? Think about all the extra work that is required – work that has not been planned or budgeted for. User story mapping helps avoid this, as each team can map their own segment of the project. It, therefore, helps you gain control of your entire product.

Steps to get started
First, it’s important to find a platform or tool on which to undertake your user story mapping. We recommend FeatureMap, but there are many other tools available out there.
Creating a user story map can take time, but you can follow a clear and logical process to make it easy. With an efficient start, you’ll be ahead in no time. This could be a solo task, however, the advantage of a user story map is that it can be used as a tool to generate discussions with your wider team. Don’t be afraid to spend the time now in order to save even more time later for the entire project.
It should be noted, however, that user story mapping is not a presentation but an involved group activity, so make sure you prepare your team’s expectations in advance of your initial meeting. This way, they will be more able and ready to contribute to the discussions from the very beginning.

Step 1: Frame the journey
Before you start mapping, you should frame the exercise around a common goal. This could be your product vision or the goal of a specific feature you’re mapping out.
One of the simplest ways to do this is just to ask: What does our product do?
If this feels too big or gets too unwieldy, think about some constraints you can add to your user story mapping session:
- What? – What problem are you trying to solve? What product do you want to build, or what feature do you want to add?
- Who? – Is there a specific user or user group you’re building for? Who are your potential customers?
- Why? – Why build this for the user? What is the benefit to your team and company of building this feature or product? How will this product give value to the bottom line?
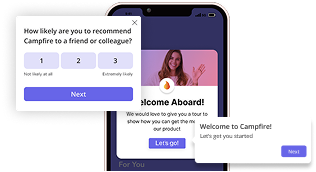
Understanding your users is key here; for mobile applications, for example, you can customize and launch in-app surveys of different types to gain insights into the mobile app experience.
Talk it through and make sure everyone in the team understands the vision and overarching goal of the user story mapping session.
Assign each team to outline their own requirements, as this helps identify overlaps and gaps in your planning. Be aware that you may find very varied views within the team, but this will only serve to highlight the project’s sticking points – an invaluable advantage in these early stages.
Step 2: Build your user story map’s backbone
The backbone of your map describes the entire journey of your project as high-level tasks or steps from start to finish. Don’t get too detailed – that comes later. Go wide, not tall. Discover your goals and map your journey.
As an example, let’s say you’re building an interface that helps a user buy a song track. At the highest level, the steps they take are:
- Sign up for an account
- Search for the track by genre/year/artist/album
- View/listen to the song track
- Enter payment information
- Buy track
- Download track
- Interact with social/stars/review of track
You can go into more depth with each feature or step later and expand the list with subheadings, cards, and individual descriptions. Each team member will have their own approaches to help with this, such as design, back-end, marketing requirements, and finance.

Your product is probably a lot more complex than this example, however. Here are a few ways to help identify your map’s backbone:
- The expert details the journey: Ask a subject-matter expert to describe the problem step by step. How do they tackle it? What steps do they take and what tasks do they perform?
- Everyone creates cards and inputs on the map: Get each team member to write their own cards and detail their journeys. Everyone can input the steps that need to be taken and add them to the map. Don’t worry about duplicates now, as they may highlight misunderstandings or be used to merge tasks, thereby creating a better project flow.
- Everyone solves problems: Discuss and collaborate with your team to collect possible solutions and put all user stories under the related steps.
Once complete, think about the ideal user flow. Does the map fit and cover all steps of the journey?
What if you’re working with an existing backlog? If you have a backlog full of well-written user stories, you can simply add them to your map.
Step 3: Identify and group your cards
As you look through the steps your user takes, you’ll start to notice some common steps that can be placed within groups. In user story mapping, we call these activities.
Your activities are listed above the user steps (or epics) to make up your user story map’s backbone.

As an example, let’s build on our previous interface for users to purchase a song track and build out the steps for 2. Search for a track by genre/year/artist/album.
We can break this step into several cards:
- Search for a track
- Search for an artist
- Search for an album
- Search within a genre
- Search for a genre
- Search tracks within a year, or search for a specific year.
These could all be individual tasks within the “Search for a track” group. Grouping in this way allows us to identify user steps with relative ease, thereby creating user stories that correlate to a user goal.

Step 4: Prioritise your activities and cards
Your map and its backbone are how your users move through your product. Each of the sections is an equally important building block in the product as a whole. The user story map allows you to easily see the whole picture and work with your team to find the best minimal viable product. As such, you can easily identify what activities and cards have the highest priority while allowing other sections to be arranged in sprints.
With your user story map prioritized vertically, you can create horizontal layers that represent your minimum viable product to full release.
A good practice is to ensure that each layer creates value across each user and activity.
That’s it.
You have your user story map, which can be converted into a roadmap for users, stakeholders, and team members.
Going forward: maintaining your user story map
Maintaining a user story map is probably the easiest and most intuitive stage of mapping.
Each time you view a map, you can see the whole picture and understand your team with ease. Checking on your progress is easy when you have a living, breathing, evolving map.
The product manager can ensure cards and tasks stay on track, assign deadlines to individual tasks, and adjust workflow carefully based on aggregations of budget estimations or time estimations.
In FeatureMap, for example, you can assign dates to tasks, cards, or groups to keep track of progress. You can assign cards to individual team members and add progress status to each card. FeatureMap also has aggregations available that allow you to estimate the budgets and times of individual cards and aggregate them to the higher-level cards above.

Maintaining a user story map will allow you to continue with an organized approach and improve your management and team communication
Which tools are the best?
Tools such as Trello can be great for tasks or quick lists, but it falls flat when you need more than just columns. User story mapping utilizes an agile methodology, incorporates sprints, and gives you a broader view across the entire project.
Solutions that incorporate an entire suite of extra tools can be a nightmare to onboard for your team. Mira can be good, and sometimes ideal, for a whiteboard approach, but becomes a little unwieldy after initial setup.
FeatureMap is a tool designed by engineers specifically for user story mapping and product owners. It doesn’t require extra integration, nor does it require you to change your current solutions. An easy plug-in, FeatureMap offers a structured board to allow your team to easily get mapping.
You can get started with FeatureMap easily, and you can check out our templates for some great foundations.
Happy mapping!
[/vc_column_text][/vc_column][/vc_row][/vc_section]


