The Analytics Black Hole or The Bottleneck: What’s Stopping you from Solving Your Users’ Pain? + Grab our FREE User Journey Template!
In the mission to solve your users’ most significant pain points, a user journey template can be your greatest asset.
Sure, user personas are helpful. But they don’t answer where the sources of friction are coming from as your users explore your product.
Nor are they fluid enough to accurately capture their journey.
Unfortunately, user journey mapping can be a long and arduous process that requires support from all of your stakeholders – meaning multiple meetings and perhaps a workshop (long sigh).
Then, when you finally put together your user journey map and want to optimize your touchpoints and eliminate bad experiences, you can face two barriers:
- The Analytics Black Hole –Can’t see the forest before the trees. You can’t get the right information at the right time to segment accordingly.
- The Bottleneck -Your software developer who is too busy to take on every experiment you want to run.
But wait! Despite the depressing picture we just painted, there is hope.
With the right template and approach, you can map your user journey relatively quickly regardless of your product’s stage.
You can then optimize your journey with no-code in-app experiences to solve their pain points and show them your product’s value.
Try Userpilot Now
See Why 1,000+ Teams Choose Userpilot

What Is a User Journey?
Before we start talking about mapping and templates, we first must understand the basic concept of a user journey.
In fact, a user journey is very similar to a customer journey.
It is the steps that a user will take, the various touchpoints of your product that they hit, and their emotions as they attempt to achieve a goal.
The major difference is that a customer journey includes all their interactions with your company after they have already bought a subscription. It is very high-touch, and various departments, from customer success to sales, get involved.
A user journey is generally low-touch, and most interactions will happen inside the product as the main goal is to convert them into customers.
A typical user journey in SaaS will look something like this:

Source: Userpilot – Identify the pain points in each of your user’s journeys with advanced segmentation analytics. Take action on the gaps with in-app experiences. No coding is required!
However, no user journey is the same, so the steps will differ depending on the business. They may also vary depending on the particular use case for which a person signs up for a product.
It is the story of your archetypal user’s journey, not 100% accurate, but beneficial.
The information that you gather about the user along their journey is the most critical element:
- What the user feels/thinks
- The touchpoints/events that are created
- Objections/friction
- Weaknesses or moments for churn
- Pain points
Now that we know what a user journey is, we can see why it is important to map, and then we can go over to create your own user journey template. Hint: It has nothing to do with buried treasure.
Why Is it Important to Map Your User Journey?
If you were lost in the middle of the woods and had a map that showed you the way out, would you throw it away?
Of course not!
The same goes for software. Most companies wander in a forest of similar solutions until they find a product-market fit.
The way out of that struggle is to provide an unmatched user experience. One that quickly provides value to your users to hit your activation points and convert them into customers.
Then, continue to provide positive experiences that keep users loyal to your product, acquire new ones, and dramatically grow your revenue.
By how much?
In a study by Toptal, they found focusing on customer retention can increase revenue over an 18-24 months period by as much as 80%+, reduce customer acquisition costs by 30%+, and increase total customers by 1.5x.

Source: PointNineCapital
However, improving user experience requires deep empathy with the user’s pain points/problems.
Hence, why you need a map to prioritize which problems are the most important to your users along their journey and the scope of the solutions to implement.
A user journey map can also show you:
- Show where to allocate the budget. By looking at the journey map, you can see the points of churn and where to invest time and resources.
- Define the projects you want to launch. Put your product experiences into the context of each step of the journey.
- Identify opportunities to change the journey. Simplify complicated steps or eliminate steps that can make the experience better.
- Drive alignment across your team. Everyone is on the same page where pain points fit in the grand scheme of things.
Now that we know the benefits of mapping your user journey, let’s see how you can create a user journey template regardless of the product stage!
How to Create a User Journey Map
Since mapping user journeys is so dependent on your product and business, we decided to ask a couple of product experts about their methods for drawing up user journey maps.
Depending on your artistic ability, you can either draw up one with good ol’ fashion paper and pencil and even include post-it notes or use a dedicated tool.
On The Fly
So we can all agree that knowing your user journey is critical to growing your product. But what if you are just launching a product and figuring out the stages and activation points for the first time? How can you create an accurate user journey map quickly that will last you in the long run?
“The answer is, you don’t always have to” – says Katy Magrane, a Digital product Specialist with her own consulting agency.
“You don’t need to know the whole journey. You just need to guess the first step. Then you can put that first step out there and test it!”

Source: Miro.com
What type of product are you mapping for? Which part of the process? Discovery of the product, onboarding, or use of the product once the user has been acquired?
Let’s say you are in the onboarding phase, and you’ve proven you can drive sign-ups.
The users who’ve signed up have the capacity and willingness to pay (or otherwise contribute to monetization), you’re in the perfect position to:
- Know what prompted the customer to sign up. You can then figure out where they see the product’s value and what they have a burning desire to do next/first!
- Place as little resistance as possible between them and that priority task.
- Generate a prototype of your user journey template to illustrate the next steps you think represent that path of least resistance to test it before committing to code.
Using Proto-Personas
So now that we understand the fastest way to start mapping your user journey, we also wanted to know how to incorporate research in a simplified manner.
People often get caught up in making an accurate journey, and it gets way too complicated.
We asked our product manager, Andy Shamah, to look back at one of the first user journey maps at Userpilot.
“We started by developing a hypothesis for the different types of personas (I love to name them proto-personas) that would have interest in using our product.”

- After going through various iterations because of similar pain points, I’d develop several working proto-personas.
- I would then draw a customer journey map for each one of them (This is just as a reference).
- I would then use a user-analytics tool like Full-Story and watch users go through their journey, monitor each reaction, and take notes.
- Based on my observations, I got a more granular view of my personas – i.e., what jobs they need to do, my product pillars, what pain points I solve for them, the focus touchpoints, and what are the opportunities.
- I will then craft the most ideal user journey that includes the various touchpoints, stages of accomplishments, and user emotions for each stage.

Source: Userpilot-Map your user journey and get the tools to increase adoption rates and user retention.
Speaking of product adoption:
Many companies will go through a customer mapping process that demands rigorous research and a detailed customer understanding.
Since your user journey exists mainly through one channel, you can utilize your product analytics software, session replays, and segmentation to map it in a meaningful way -without spending time in various meetings.
You now know some techniques for mapping your user journey and the benefits. Let’s look at how to test them and track them for optimization.
Optimizing Your User Journey
Step 1-Identify Pain Points
The first step to optimizing your user journey and creating your user journey template starts in your trial version.
Here you can distinguish the most common paths to activation among your users and establish your baseline metrics.

Source: Funnelventures.com
Next, you will want to identify any friction points that may occur while watching your users go through the sign-up and onboarding phases.
They may never click your email verification link. Some users get at the first screen they are shown inside your product, stay for a couple of seconds, and quickly close their browsers. There will always be some users who don’t come close to your activation point.
They can be:
- Promising signals
- Concerning signals
- Activation signals
The point is to record the interactions and track the events. Then hypothesize reasons for those frictions in your user journey.
Why is your product so painful to use?
Come up with a couple of reasons why users aren’t seeing your product’s value and write them down.
Now design a couple of experiments to see if you can bridge the gap between what your user expects from your product and the value received or perceived.
Can’t think of any to implement? Or maybe you don’t have any time off of your product roadmap. Don’t worry, we got you covered.
Step 2 – Bump Users to Activation: Welcome Screens and Showing Journey in Checklists
One of the many reasons you see a user not completing their onboarding is that they never got a proper introduction.
If as soon as a user signs up and all they see is an empty dashboard, you could be throwing your users into a situation where they feel overwhelmed. They might not know where to start.
You could also have some experienced users with products like yours and want to just jump right in.
To fix both of their journeys, you could fill an empty state or present the new user with an interactive welcome screen that lets the user decide where they want to go.

Source: Marketmuse.com
You give the user the power to meet their own expectations based on how they want to use your product. You are also getting more information about their use case to tailor their path to the activation point.
For example, for the users not familiar with your product, should get a checklist covering how to use the main features that will bring them to the ‘AHA! Moment’.

Source: Userpilot- Start creating checklists like this and give your new inexperienced users an interactive tour that will leave a lasting impression.
For more experienced users, you could give them a much simpler checklist. One that covers your first activation point and then shows them the advanced, new, or secondary features.

Source: Userpilot-Personalize your checklists to fit each user’s unique journey.
The next experiment covers bringing pointing your user’s attention in the right direction to optimize your user journey template.
Step 3 Bump Users to Paying Customers: Tooltips, and Driven actions
Once you have shown your users their way to the activation point, you will want to watch their behavior as they engage with your product.
What are the core features that your most active users engage with? Are there any patterns between segments? What are your disengaged users missing?

Source: Userpilot- Start discovering which users you want to focus on to optimize your user journey.
Asking these questions will help you determine what to implement to address the users’ pain points at different stages of their user journey.
You can design product experiences for your most active segments that show them quick tips to get even more value out of your core features.

Source: Userpilot-Increase your conversion rates by introducing your active users to your secondary features. Time feature announcements and show off your product. Book a free consultation today!
You can also design experiences for disengaged users to capture their interest again.
Try A/B testing whether tooltips make more sense for the feel of your product.

Or – if your users need a bit more hand-holding to get to the ‘AHA!’ moment – you can use driven actions to show them exactly what to do:

If you are unsure where to start, another option is the first-click test.
Show the user a screen and highlight two options. This test is so useful because a user has close to an 87% chance of completing an action correctly if their first click is done right. If they make a mistake with their first click, they’ve only got a 46% chance of accurately completing the task.

Source: Userpilot. Experiment with what bridges the value gap for your users with slideouts, checklists, modals, tooltips and more. See the various possibilities for doubling your activation and conversion rates
With your experiments implemented, you are ready to track their success.
Step 4: Setting up goals and confirming the success
You certainly could manually track your user journey through session recording as they advance from activated to paying.
However, this can be somewhat time-consuming to set up all the variables and triggers to know which stage of the journey your entire user base is at.
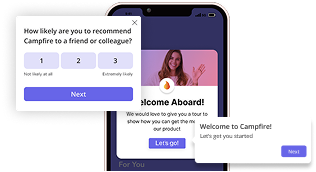
A quicker way to track your user journey solutions’ impact is to set goals for what success looks like on your user journey map. It might be a high NPS score.

Source: Userpilot
It might be engaging with a particularly key feature or completing the onboarding checklist.

Source: Userpilot -Define your product’s success with goal tracking and advanced user segmentation! See all the analytics possibilities through a quick call with a product specialist.
Each journey is unique so setting up multiple goals for several different personas is an excellent idea to see where your users stand.
Once you find out which experiences move the needle further, you can stick with those as part of your engagement strategy.
You are then ready to do the whole thing over again and continue to optimize your user journey template. In other words, rinse and repeat.
Free User Journey Template
Click the link above for your own free user journey template!
Source: upboard.io
How to Use a User Journey Template for Your SaaS
- Identify your most active users (or the users that you would like to attract). Make sure you thoroughly understand them by building a user persona.
- It is best practice to interview these user segments about their journeys to ensure that you understand their motivations, goals, activity habits, and pain points. This will help you create an empathy map.
- When filling out the template, make each column or journey stage your users’ primary goals they are trying to achieve. Don’t make the steps reflect your own internal processes.
- Next, use your qualitative and quantitative research to fill out the rows. These include touchpoints for each stage, pain points, emotions, weaknesses, influences, questions, and user tasks.
- Start with your touchpoints and tasks as these are the easiest to identify, and then go into pain points and emotions from your empathy map. This will make it easier to know where the weakness and questions are.
- Above all else, keep it simple.
- The final step is to outline opportunities for improvements and decide what experiments you will run.
Wrapping Things Up
Remember, the user journey template is the way to spot the pain points, not the solutions. If the template doesn’t result in actions being taken, it has been a waste of time.
Take your time to study your user persona, and understand their emotions and reactions to your product experience. Figure out precisely the task they are trying to complete and design a journey that helps them solve it the quickest way possible.
This leads to a better user experience and retention to augment your product growth. Start experimenting today without the analytics black hole or developer bottleneck, and you will see how little it takes to bump users in the right direction.
Want to improve your user journey and create product experiences code-free? Get a Userpilot demo to get started!


