New to Mixpanel and unsure how to make sense of its documentation?
This guide will walk you through how Mixpanel docs are structured and how to use them to set up reliable event tracking from the ground up. You’ll see how Mixpanel works in practice, what’s involved in configuring events and user data, and when the tool is a strong fit for your product. Along the way, we’ll also look at situations where teams start looking for a more all-in-one approach to driving adoption, engagement, and retention from a single platform.
What are Mixpanel docs?
Mixpanel docs are the official documentation pages that explain how to use Mixpanel’s analytics features, from creating events to configuring event properties, managing user profiles, and reviewing event data.
Most of the docs are public and organized by feature, with examples, images, tables, code snippets, and links that show how different parts of the platform fit together. Because the docs are public, teams can also contribute updates or fixes over time, with documentation changes typically submitted and reviewed through Mixpanel’s GitHub repository.
Key Mixpanel terms you’ll see throughout the docs
When you open Mixpanel’s documentation, you immediately run into terms like events, properties, event data, and user profiles. For non-technical teams or anyone new to product analytics, this language can feel abstract at first. Let’s quickly go over it so you don’t get confused:
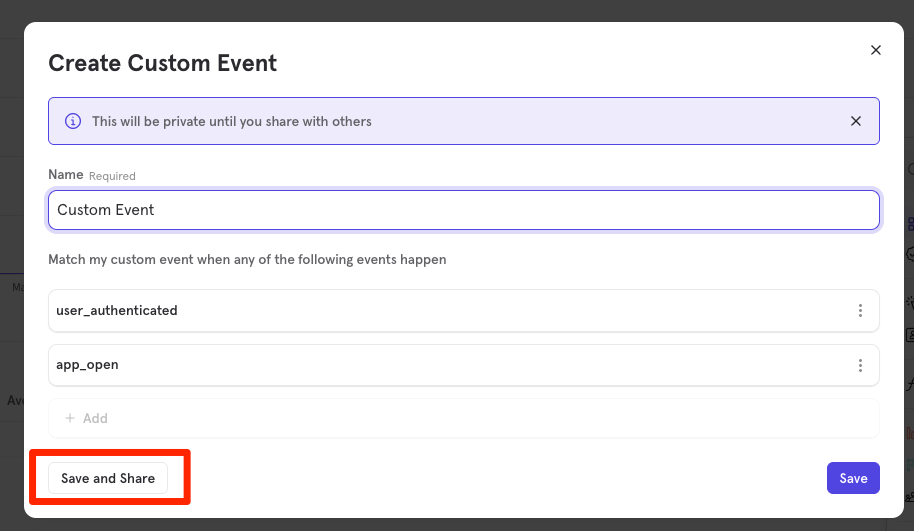
- Events: These represent user actions, such as clicks, page views, or form completions. When you create an event, you’re deciding which actions are important enough to track and how Mixpanel should recognize them across your product. In cases where similar actions are tracked separately, Mixpanel allows teams to merge related events into a single one. For example, interactions like clicking to expand an in-app card or viewing an animated GIF can be grouped under one event if they represent the same underlying behavior.
- Event properties: These include details like date, page name, feature, plan type, or any description that adds context and explains what happened. For example, when a user clicks a button, Mixpanel can record not just the click itself, but also where it happened, which feature was involved, and when the action occurred.
- Users and user profiles: Mixpanel ties events to users through user profiles, which store user-level information like email, role, location, or plan type. This gives events continuity over time, allowing you to analyze behavior at the user level instead of treating each action as an isolated moment.
- User properties: These are the attributes stored on a user profile and used to group or segment users. In the docs, they appear whenever you see references to cohorts, segmentation, or groups of users, since they define who an event belongs to and how users are categorized.
How Mixpanel works behind the scenes
Now that you’re familiar with the key terms, it helps to understand how Mixpanel actually works in the background, since the docs assume this flow without always spelling it out.
At a basic level, Mixpanel operates as an event-based analytics system:
- When a user performs an action in your product, such as clicking a button or viewing a page, your tracking code sends an event to Mixpanel.
- That event is sent with additional context, which can include properties like date, page, feature, or plan type, usually packaged in a JSON request.
- Mixpanel links the event to a user profile, either by an anonymous ID or a known user ID, so actions can be analyzed over time rather than as isolated moments.
- Once events are ingested, they become available for reports, user funnels, cohorts, and dashboards, where teams can filter, segment, and discover patterns across groups of users.
This background process explains why the Mixpanel docs focus so heavily on setup, configuration, and validation. If events are sent incorrectly, properties are inconsistent, or users aren’t identified properly, the issues surface later during analysis and make it difficult to trust reports, segment users accurately, or draw clear conclusions from the data.
Set up Mixpanel the right way using the docs
Ready to begin tracking customer data?
Mixpanel’s documentation lays out a fairly straightforward process to help you get started, but it can feel overwhelming if you don’t know where to begin. I’ve broken it down into seven clear steps to show how teams typically move through the docs, from initial setup to usable insights, and where it’s worth slowing down to avoid issues later.
Step 1: Create your account and set up your first project
To start using Mixpanel, you’ll need an account, an organization, and at least one project, since Mixpanel collects and analyzes data at the project level. When you sign up without an invite, Mixpanel prompts you to create a new organization, and your first project is created automatically as part of that setup.
Once you’re in, set up your projects in a way that keeps tracking clean from day one. Mixpanel recommends creating a Development project to test tracking changes before you push anything to Production, which saves you from polluting real data when you’re still validating events and properties.
If you need to create additional projects, you’ll do it from the projects area inside your organization settings, and you’ll typically need an admin or owner role to create a new one.
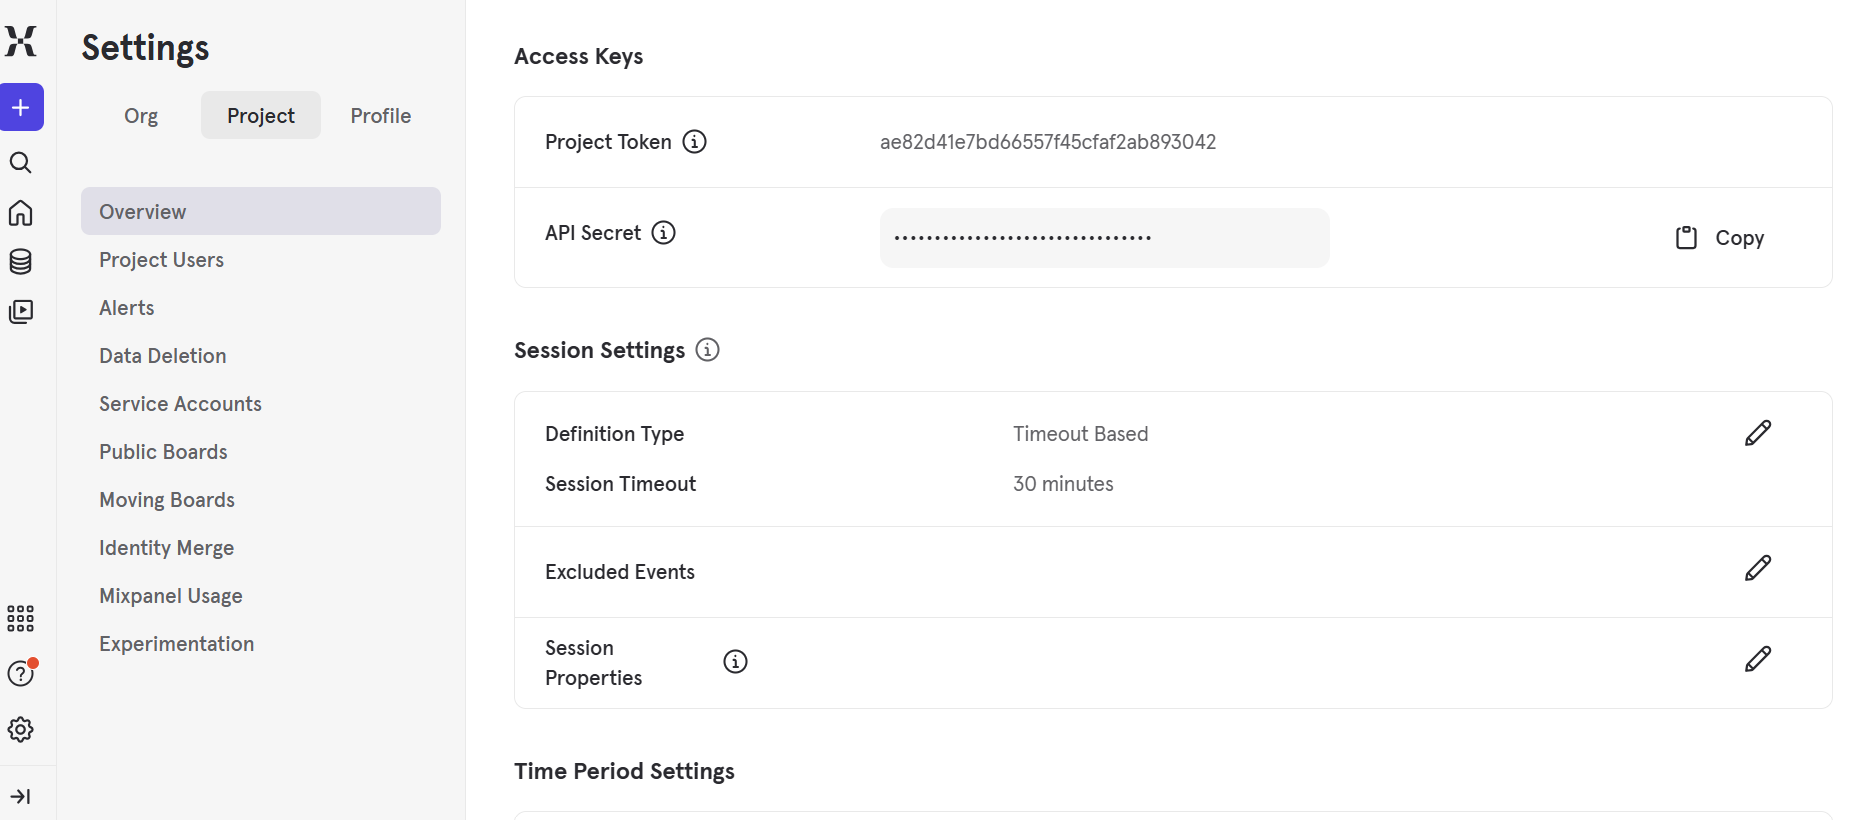
Before you move on to implementation, grab the one identifier your product will need to send data to the right place: the project token. Every Mixpanel project has a unique token used for collecting data, and it’s meant to identify the destination project, not to act as a secret or authorization key.
You can find each project’s token in the project settings under Project Settings, where Mixpanel lists the token alongside other identifiers you may need later for implementation.
Step 2: Implement and configure event tracking
Mixpanel tracks data through events sent from your product using its SDKs or APIs. In practice, this means adding tracking code to your application and deciding which user activities are worth recording. As mentioned earlier, common examples include clicks, page views, form submissions, or feature usage. Each event is sent as a request, usually in JSON format, and includes the event name along with any relevant context.
Event names should be consistent and descriptive, since they’ll appear everywhere later, from reports to analytics dashboards. While you can always edit event names or properties later, doing so after data is already flowing often creates confusion and cleanup work.
That said, naming an event something vague like “Button Clicked” can quickly become a problem once your product has dozens of buttons. A clearer name like “Signup CTA Clicked” or “Export Report Clicked” makes it obvious what the user was doing without extra explanation.
You’ll also need to decide which details to include with each event, such as page name, feature, plan type, or other attributes that explain what happened. These choices directly affect how flexible your analysis will be later and how easily you can answer questions about usage across features or groups of users.
Step 3: Test and validate your event data
Once events are firing, the next step is making sure the data you’re sending into Mixpanel is actually correct.
Start by triggering the events you’ve just implemented and checking that they appear in Mixpanel as expected. Pay close attention to event names, timestamps, and any contextual details you’re sending along. It’s common to see issues at this stage, such as duplicate events, tracking errors, or missing properties.
Validation also means reviewing whether events reflect real user behavior. An event might fire correctly from a technical standpoint, but still be misleading if it triggers too often, fires on page load instead of user intent, or lacks the context needed to understand what happened. Catching these issues early makes later analysis far more reliable.
Step 4: Work with user profiles and analyze behavior
With validated event data in place, the next step is tying those actions back to users so you can understand behavior over time rather than as isolated moments.
To do this, you’ll need to create user profiles, and the process usually follows a simple pattern:
- Identify users when they become known: This typically happens when someone signs up, logs in, or completes an action that lets you reliably recognize them. At that point, you assign a unique identifier so Mixpanel can associate future events with the same person instead of treating each action as anonymous.
- Use a stable, unchanging identifier: The identifier should come from your own system, such as an internal user ID, rather than something that can change over time, like an email address. Using unstable identifiers often leads to duplicate profiles and fragmented data, which makes long-term analysis unreliable.
- Add user-level details to the profile: Once a user is identified, you can attach profile properties like role, plan type, location, or account status. These details live on the profile rather than on individual events, which means they stay current as the user’s situation changes.
- Create or update profiles outside live tracking when needed: Mixpanel also lets you create profiles through file imports, data syncs, or server-side updates when an SDK isn’t available. Remember, the goal is always the same: make sure every event reliably points back to a single user.

Step 5: Export data or extend Mixpanel with APIs
As your use of Mixpanel grows, you may reach a point where in-app reports and dashboards aren’t enough on their own. This is where data export and APIs come into play.
Mixpanel allows you to export event data to files or external systems, which is useful when you need deeper analysis, long-term storage, or integration with other tools. Some teams export data to spreadsheets for ad-hoc review, while others send it to a data warehouse where it can be joined with information from other sources. These exports rely on the same event and user data you’ve already configured, so any gaps or inconsistencies tend to show up quickly once the data leaves Mixpanel.
APIs and automation extend Mixpanel beyond manual analysis. They’re often used to pull data programmatically, trigger workflows, or connect Mixpanel with Userpilot and other platforms.
Note: While powerful, these options usually introduce more complexity and ongoing maintenance, which is why many teams only turn to them after their core tracking and analysis are well established.
Is Mixpanel the right fit for your needs?
Not every team needs or wants this level of control over tracking and analytics. How well Mixpanel fits ultimately depends on your product complexity, team structure, and how much time you’re willing to invest in maintaining your data over time.
The table below helps clarify when Mixpanel tends to work well and when another tool may be a better fit.
| When Mixpanel is a good fit | When to consider switching |
|---|---|
| You have a product with complex user behavior that requires detailed event tracking | You want faster answers without managing a large event schema |
| You have engineering support available for ongoing tracking changes | You want to iterate without relying heavily on engineers |
| You’re comfortable defining and maintaining events and properties over time | Event naming, cleanup, and validation are becoming a recurring burden |
| You need flexible, low-level control over how data is collected | You prefer higher-level insights with less configuration |
| Analytics has clear ownership within your team | Analytics competes with other priorities and lacks clear ownership |
| You’re primarily focused on analysis rather than in-app action | You want insights that directly power in-app experiences and decisions |
Consider switching to Userpilot
If your goal is to understand user behavior and act on it without maintaining a complex tracking setup, Userpilot offers a more product-led approach. Instead of centering everything around large event schemas and ongoing configuration, Userpilot focuses on helping product teams capture insights and turn them into in-app experiences with far less technical overhead.
The platform is especially well-suited for teams that want analytics to support activation, adoption, and retention directly, rather than living in a separate analysis layer.
Here’s why most teams switch to Userpilot:
- Simpler tracking with fewer events: You can track meaningful user actions without defining and maintaining hundreds of custom events, which reduces setup time and long-term cleanup.
- Built for product teams, not just analysts: Userpilot makes insights accessible without deep analytics expertise or constant engineering involvement, making it easier to iterate quickly.
- Analytics connected to in-app action: Userpilot allows you to trigger in-app messages, guides, and experiences based on real-time user behavior. This closes the gap between insight and execution, and helps you drive better user engagement.
- Faster time to value: Userpilot lets you access useful insights and run experiments sooner, without spending weeks refining event names, properties, and schemas.
- Lower maintenance over time: As your product evolves, Userpilot requires less ongoing effort to maintain clean and actionable data.
Ready to switch? Book a demo to discuss your needs today.
Userpilot strives to provide accurate information to help businesses determine the best solution for their particular needs. Due to the dynamic nature of the industry, the features offered by Userpilot and others often change over time. The statements made in this article are accurate to the best of Userpilot’s knowledge as of its publication/most recent update on December 28, 2025.
About the author