Amplitude docs are often the first place teams land when they want to understand how Amplitude works, how to set it up, and how to make sense of the data it produces. Whether you’re trying to track your first event, figure out how user properties work, or understand why a report looks the way it does, the documentation is designed to be the source of truth.
In this guide, I’ll walk you through what Amplitude docs cover, how they’re structured, and how to use them effectively if you’re setting things up on your own. I’ll also look at where teams tend to struggle, what the documentation doesn’t fully solve, and why many product teams eventually look for tools that go beyond analytics to provide built-in engagement and retention capabilities.
Try Userpilot Now
See Why 1,000+ Teams Choose Userpilot
What are Amplitude docs?
Amplitude docs are the official documentation hub for teams using Amplitude to understand user behavior and make sense of product analytics data across web and mobile experiences.
At a high level, the documentation covers how Amplitude works as a product analytics platform, including how event tracking is structured, how user properties are defined and updated, and how teams can analyze behavior patterns, funnels, retention, and experimentation results over time.
How Amplitude documentation is structured
Amplitude Docs are organized to help teams move from orientation to execution without needing to explore the entire platform upfront, and the fastest way to make sense of it is to start with how the documentation is grouped.
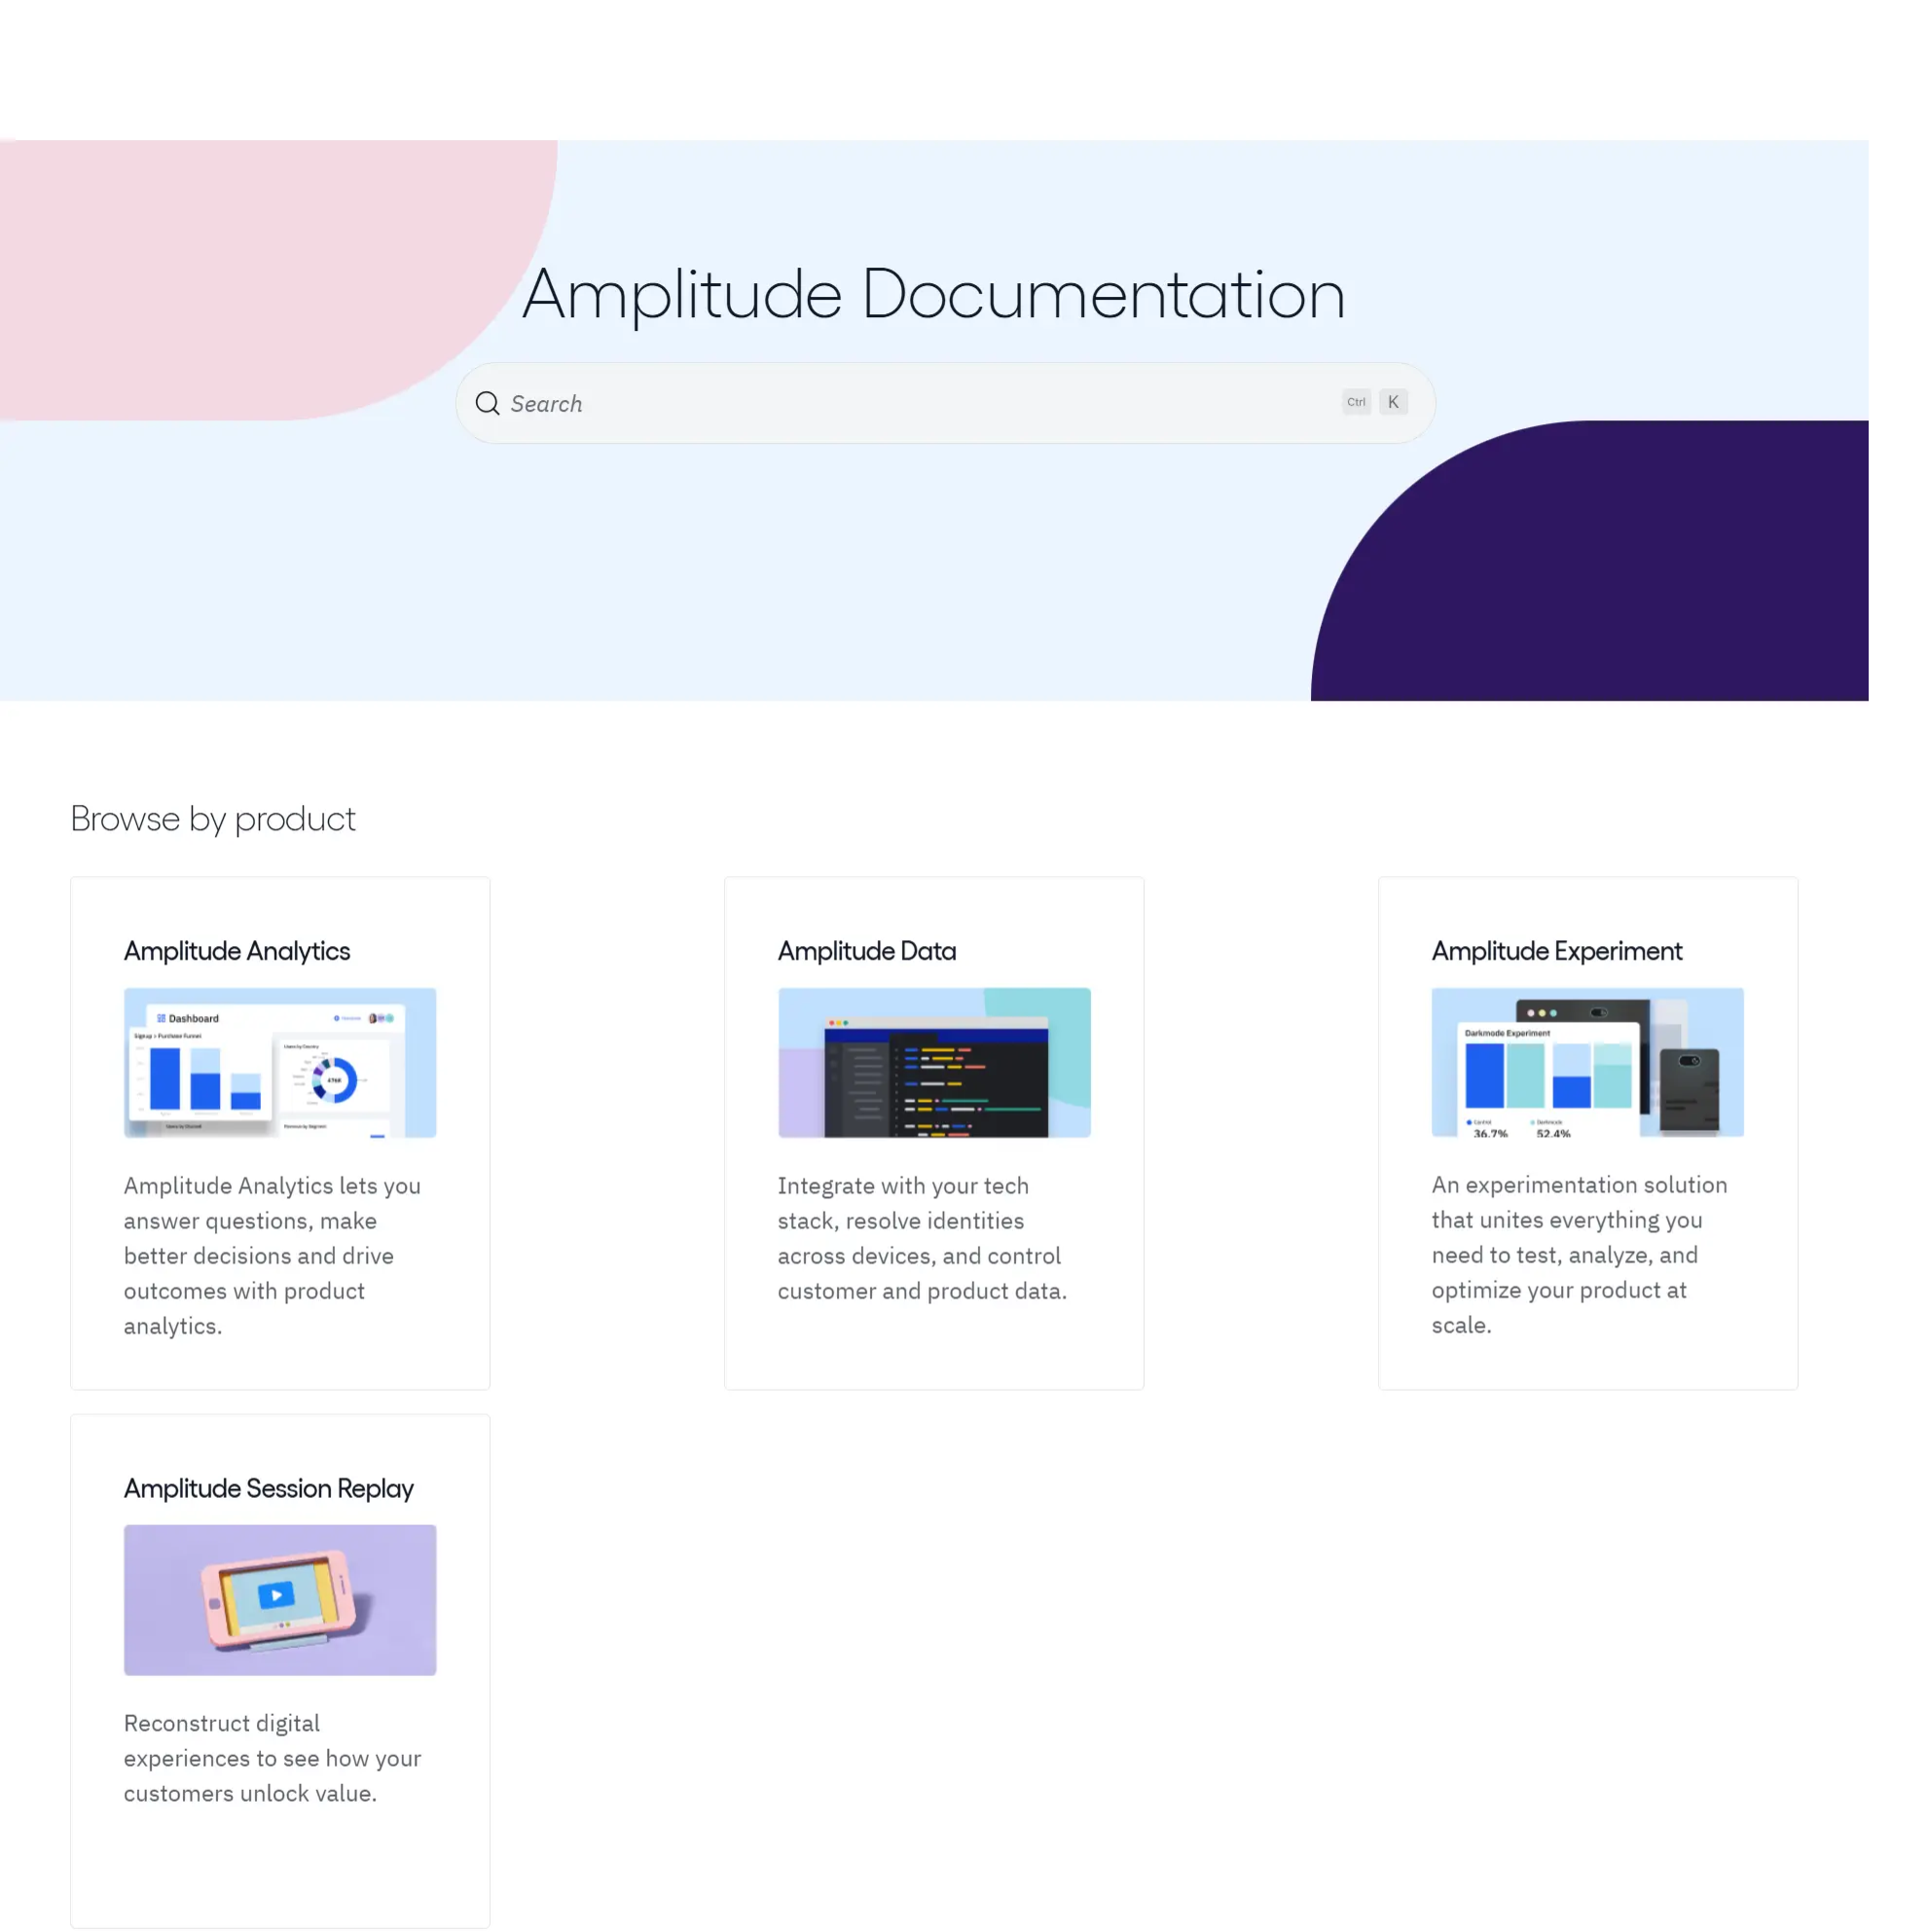
- Product-based organization: At the highest level, the docs are split by product, with sections for Amplitude Analytics, Amplitude Data, Amplitude Experiment, and Session Replay, which signals what part of the platform you’re working in and what kind of problems that section is meant to solve. This is especially useful for teams that only use part of the Amplitude suite, since it lets them ignore entire sections that aren’t relevant to their setup.
- Consistent internal structure: Inside each product area, the documentation follows a similar pattern. Most sections begin with getting started guides that explain prerequisites like setting up an Amplitude account, creating a project, and understanding how data flows into the platform. From there, the docs move into SDKs and tracking guidance, covering event tracking, tracking plans, user properties, and identity management in more detail.
- Analysis and developer layers: Once data collection is in place, the focus shifts toward analysis features such as charts, user funnels, and behavioral cohorts used to interpret user behavior and revenue data. For more technical teams, separate sections cover APIs and developer-focused topics, including API keys, authentication, and advanced use cases that involve setting up an Amplitude connection to other tools or syncing data to a data warehouse for deeper analysis.
![]()
Looking for an Alternative to Amplitude to Drive Engagement? Try Userpilot!
Amplitude’s event tracking and user properties explained simply
Most confusion with Amplitude starts here, not because the concepts are unusual, but because they’re tightly connected and often explained separately in the docs. Once you understand how events, users, and properties relate to each other, the rest of the platform becomes much easier to use.
At its core, Amplitude is built around a small set of ideas:
- Events are actions: An event represents something a user does or something that happens in your product, such as signing up, clicking a button, completing an onboarding flow, or upgrading a plan. Events are the raw building blocks of product analytics, and everything you analyze in Amplitude ultimately traces back to event data.
- Users are the actors behind events: Every event is associated with a user, either anonymously or through a known user ID. When a returning or existing user is identified correctly, their past and future events can be tied together into a single profile, which is essential for understanding user retention and long-term behavior.
- User IDs define identity across time and devices: The user ID is the stable identifier Amplitude uses to recognize the same person across sessions, browsers, or devices. Before a user is identified, Amplitude relies on device IDs to track activity, which is why users can appear as separate profiles until identity is resolved.
- User properties describe who the user is: User properties are attributes attached to a user profile, such as plan type, role, signup date, or company ID. These properties don’t describe what happened, but who the user is when events occur, which is what enables meaningful segmentation and cohort analysis.
- Event properties describe context around actions: Event properties add detail to a specific action, such as which feature was clicked, which page a user was on, or which plan they upgraded to. They help you answer more precise questions without creating dozens of separate events.
- Events are immutable, properties evolve: In Amplitude’s data model, events are recorded at the moment they occur and generally can’t be changed afterward. As a result, mistakes in event naming or structure are baked into historical events, while user properties remain flexible and can be updated over time as users or accounts change.
Getting started with Amplitude using the docs
If you don’t want to do the setup alone, Amplitude offers Professional Services that can help with initial setup and more complex implementation work.
That said, you can do the whole first-pass setup yourself using Amplitude docs. Here’s a practical path to connect Amplitude to your product:
Step 1: Create an Amplitude account
Start by setting up your Amplitude account and then creating a project, since projects are where your analyses live and where your product data is sent.
In Amplitude’s model, each project has its own API key, so you want to create the project you actually plan to use before you instrument anything.

Step 2: Decide what your first “good enough” tracking plan looks like
Before you install an SDK, choose a small set of events that reflect meaningful user behavior, such as account creation, activation actions, core feature use, and purchase or upgrade moments.
Keeping the first pass tight makes it easier to validate event data and user properties, and it reduces the odds you’ll need to unwind a messy event taxonomy later.
Step 3: Find your project’s API key
Once your project exists, the next thing you need is its unique API key, because this is what tells Amplitude where incoming event data should be sent. Every SDK initialization and server-side request depends on this key being correct.
How to locate your API key:
- Open the Amplitude Analytics web app and navigate to your organization settings from the main navigation.
- Go to the Projects section and find the target project.
- View the project details to locate the API key associated with that project.
You may also encounter secret keys at this stage. Unlike API keys, secret keys are not always visible by default and often need to be generated before they can be copied. Access to secret keys is limited to specific project roles, which is intentional, since these keys are used for sensitive operations like server-side API requests or data exports and should never appear in client-side code.

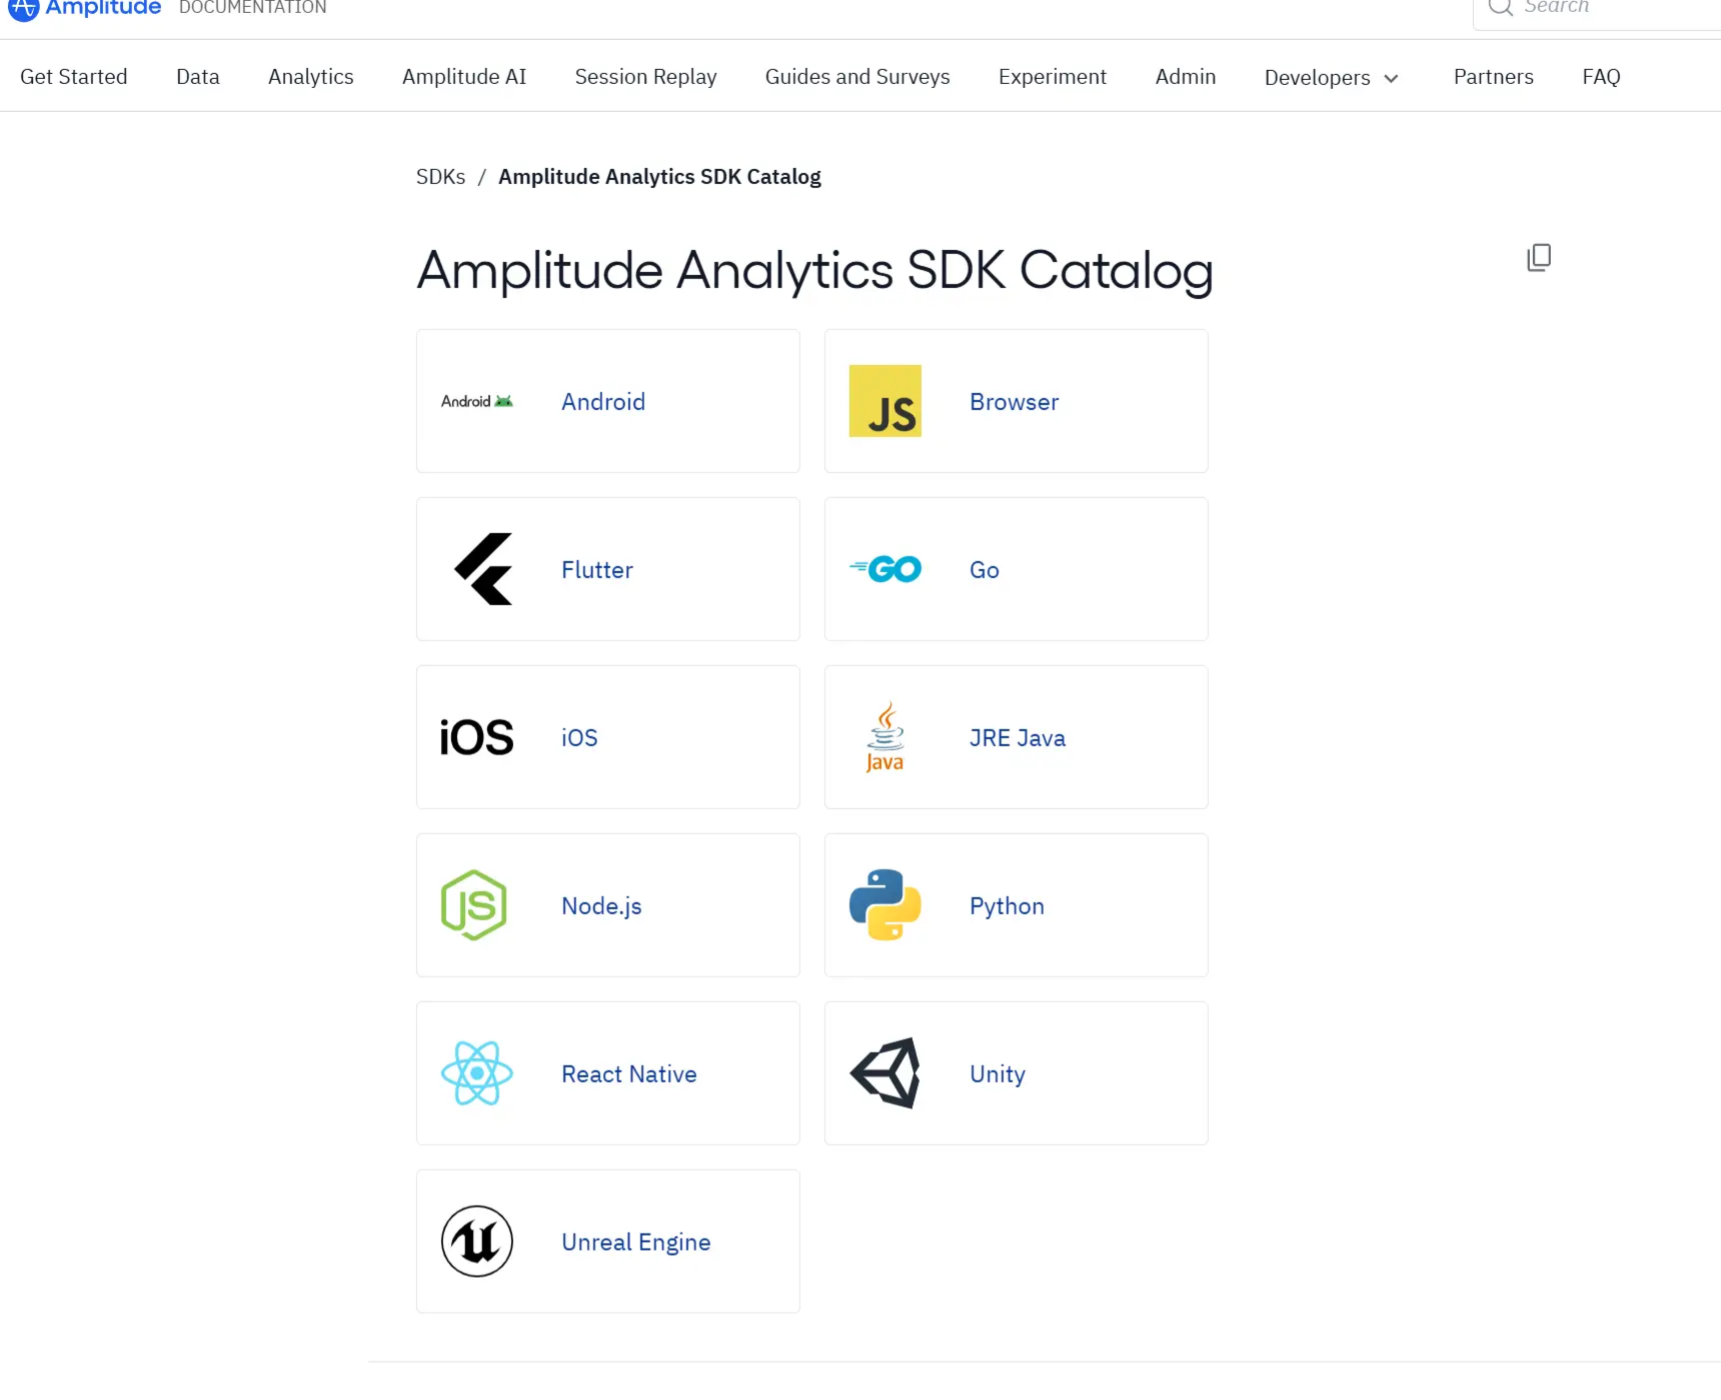
Step 4: Pick the SDK that matches how you send data
Amplitude provides SDKs for different environments, which means the right choice depends on where your event data originates rather than on Amplitude itself. Before installing anything, it helps to be clear about which part of your product will send events first.
If your product is primarily a web application, you’ll typically start with a browser or JavaScript SDK. Mobile apps use platform-specific SDKs, while backend systems rely on server-side SDKs to send events that don’t originate from a user interface, such as background jobs or billing events.
For a first implementation, it’s usually best to instrument one primary surface end-to-end before adding more sources. This keeps debugging manageable and makes it easier to confirm that events, user IDs, and properties are being sent consistently. Once that first data source is stable, you can expand to additional SDKs with much more confidence.
Step 5: Install the SDK and initialize it with your API key
After choosing the SDK that fits your setup, the next step is to install and connect it to your Amplitude project. This is the point where your application becomes capable of sending event data, so the goal here is a clean, minimal setup rather than a fully instrumented product.
Start by following the installation instructions for the SDK you selected, which usually means adding a package dependency, script, or library depending on your platform.
After installation, initialize the SDK using the Amplitude API key from your project. This initialization step establishes the connection between your app and the correct project, ensuring that any events you send are routed to the right destination. At this stage, it’s best to initialize the SDK as early as possible in your app’s lifecycle so it’s ready before user interactions occur.
You don’t need to track every interaction yet. Focus on getting the SDK installed, initialized, and confirmed as active. Once that foundation is in place, adding events and properties becomes a matter of iteration rather than guesswork.
Step 6: Send one test event and confirm it shows up
With the SDK initialized, the last step is to send a single test event and make sure Amplitude actually receives it.
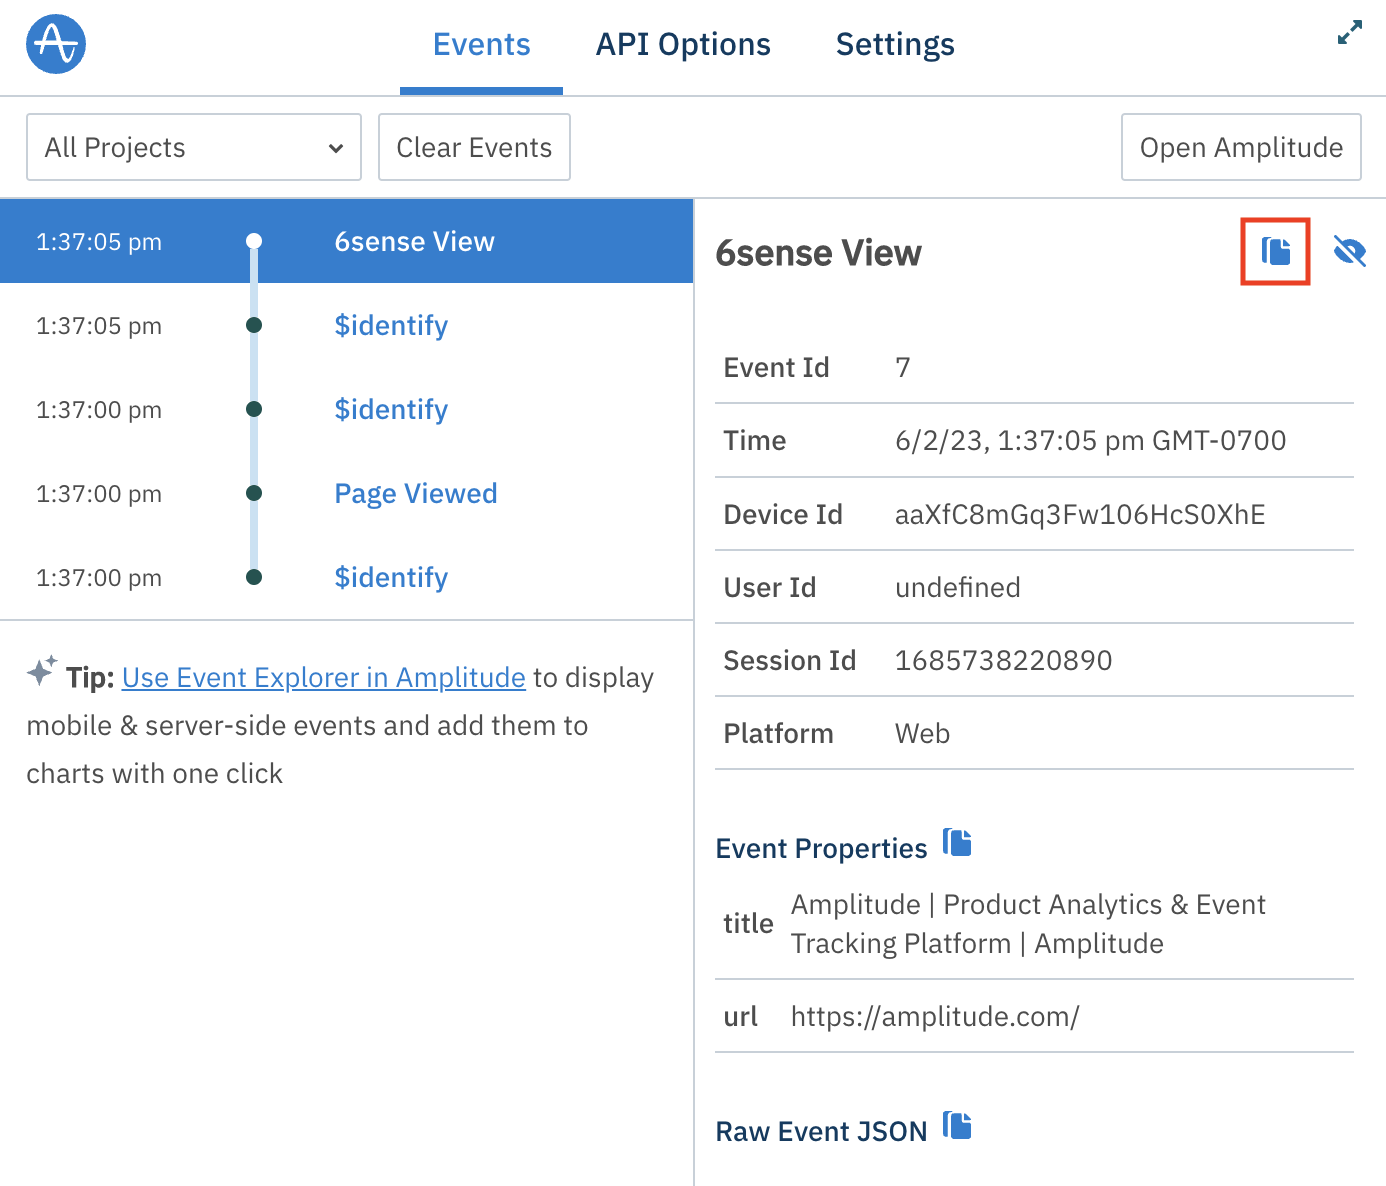
Start with a simple event type that you can trigger on demand, such as a page view, button click, or app load, and send it in the expected JSON format defined by the SDK or API you’re using. Avoid adding properties, filters, or optional settings at first. The goal is not to model your product perfectly, but to confirm that event data can travel from your app to your Amplitude project without errors.
Once the event is triggered, use Amplitude’s debugging and validation tools inside the Analytics web app to check that it appears. These tools are designed specifically for early instrumentation checks and let you see incoming events before they roll up into reports. If the event doesn’t appear immediately, don’t assume something is broken. Event ingestion can be delayed in certain cases, such as when a user is offline or when an SDK batches events before sending them.
When you can reliably trigger an event and see it arrive in Amplitude, you’ve cleared the most important hurdle. From there, you can start layering in additional events, user properties, and structure with much more confidence, knowing the foundation is sound.
Where Amplitude docs get hard for product teams
Amplitude Docs are comprehensive, but that completeness often creates friction for product teams who are trying to move from setup to insight without getting lost in the details. The challenges tend to show up in a few predictable places.
- Documentation depth: Answers are rarely contained in a single page, especially for features that behave differently across Amplitude’s growth and enterprise plans. Understanding one concept, such as how an event flows into a report, can require jumping between SDK references, identity documentation, and analysis guides, which slows progress and breaks focus.
- Technical language by default: Much of the documentation is written for engineers, even when the audience is a product manager or growth lead. Concepts like batching, identity resolution, or SDK lifecycle are explained accurately, but not always accessible for non-technical readers.
- Ongoing dependency on engineers: While Amplitude is designed for product teams to analyze data independently, getting data into a usable state usually requires engineering work. Adding new events, fixing tracking gaps, or updating user properties often means waiting on development cycles.
- Fragmented guidance across SDKs: Documentation is split by platform and SDK, which makes sense structurally but can feel disjointed in practice. Teams working across web, mobile, and backend systems often have to piece together similar concepts from multiple places.
- Slow path from reading to insight: Even when the docs are clear, there’s a lag between understanding what to do, implementing changes, validating data, and finally answering a real product question. For teams trying to act quickly on user behavior, that delay can be frustrating.
Common use cases that Amplitude docs don’t fully solve
Even when teams follow Amplitude docs closely and implement tracking correctly, there’s a point where documentation stops being enough. The docs explain how to collect and analyze data, but they don’t fully address what many product teams actually need to do next:
- Onboarding analysis beyond charts: Amplitude docs show how to track onboarding events and build funnels, but they stop at diagnosis. Teams can see where users drop off, yet the docs don’t help them change the onboarding experience itself or respond in real time when users struggle.
- Feature adoption and discovery: Tracking feature usage is well documented, but acting on that data is not. Knowing that a feature is underused doesn’t explain how to surface it to the right users at the right moment or how to guide them toward value inside the product.
- Turning insights into in-app behavior changes: The documentation focuses on reporting and analysis, not intervention. Once a pattern is identified, such as repeated user friction or stalled activation, teams are left to figure out how to influence user behavior using separate tools or custom engineering work.
- Closing the loop between data and experience: Amplitude docs help teams understand what happened, but they don’t provide mechanisms for responding directly within the product. Bridging that gap often requires additional tools, integrations, or manual processes that live outside the analytics workflow.
Consider switching to Userpilot
Amplitude is a powerful analytics platform, especially when your primary goal is to understand user behavior at scale. But as teams mature, many discover that insight alone isn’t the bottleneck. The harder problem is acting on those insights quickly, consistently, and inside the product experience itself.
That’s where Userpilot comes in. Our platform is designed for product teams who want to turn behavioral insights into visible changes without heavy configuration or constant reliance on engineering.
Here’s how Userpilot approaches the problem differently:
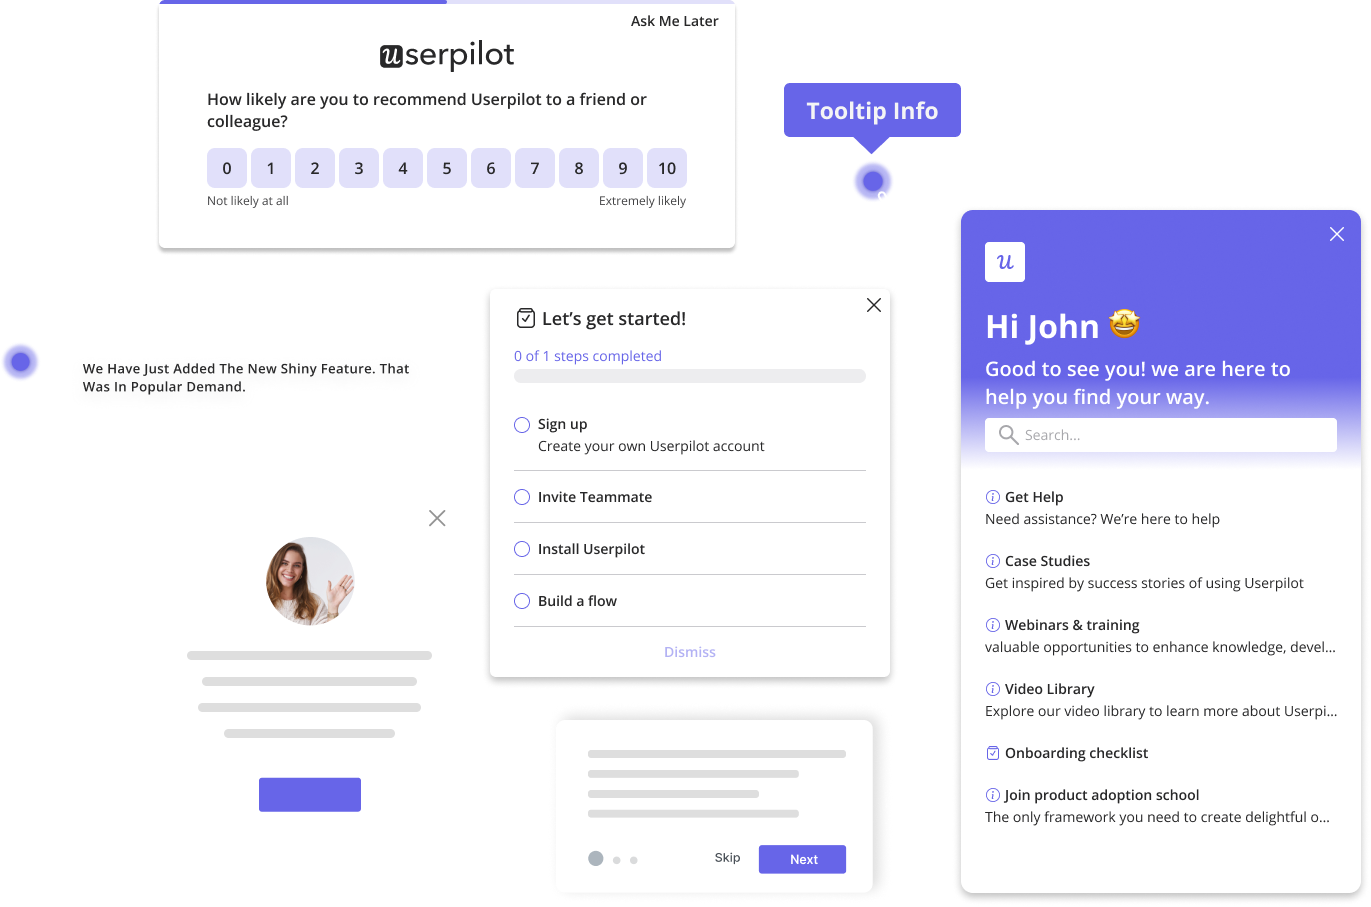
- Move from analysis to action in one place: Userpilot lets you respond to user behavior directly inside the product with in-app messages, guides, checklists, and flows that help users reach value faster.
- Shorten feedback loops: You can test ideas, adjust experiences, and iterate based on user behavior without revisiting tracking plans or waiting on new deployments.
- Empower product teams to work independently: Most workflows can be built and maintained without code, which reduces dependency on engineers and keeps momentum with the people closest to the problem.
- Focus on outcomes, not just visibility: Userpilot helps teams influence onboarding success, feature adoption, and engagement rather than stopping at dashboards that explain what already happened.
- Fit alongside or beyond analytics tools: Userpilot can complement tools like Amplitude by handling the action layer, or take ownership of use cases where speed and execution matter more than depth of analysis.
Ready to see how Userpilot can help your team? Book a demo call today!
Userpilot strives to provide accurate information to help businesses determine the best solution for their particular needs. Due to the dynamic nature of the industry, the features offered by Userpilot and others often change over time. The statements made in this article are accurate to the best of Userpilot’s knowledge as of its publication/most recent update on December 28, 2025.
![]()
While Amplitude Offers Great Features, Userpilot Takes Your Customer Experience to the Next Level!
About the author