How to Create an Effective Onboarding Tour with Userpilot

A good onboarding tour gives new users a clear path to one meaningful outcome. It shouldn’t try to introduce every feature or explain your entire interface in the first session.
In Userpilot, you can build that path as a Flow: a sequence of modals, slideouts, tooltips, and driven actions that guides users inside your product. You can then target the Flow to a specific audience, trigger it at the right moment, and measure whether users complete the activation action it was designed to support.
Getting this right matters because many users never reach that point. Our latest benchmark report found that the average SaaS activation rate is around 37%, meaning most new signups leave before completing the actions that indicate they’ve experienced the product’s value.
I’ll show you how to create an effective onboarding tour with Userpilot, from defining its goal and building the Flow to testing it and measuring its impact.
TL;DR
Here’s the process for creating an onboarding tour with Userpilot:
- Choose one activation action the tour should help users complete.
- Install Userpilot and track the user properties and events you need.
- Create a new Flow on the page where the tour should begin.
- Combine modals, tooltips, slideouts, and driven actions into a short interactive sequence.
- Add segmentation or Flow Logic when different users need different paths.
- Configure the Flow’s audience, trigger, page, frequency, and goal.
- Preview and test the experience before publishing it.
- Use Flow analytics and experiments to improve its performance.
Before creating your onboarding tour, define its activation goal
Start by deciding what users should accomplish by the end of the tour. This should be a meaningful behavior that brings the user closer to experiencing your product’s value.
Depending on your product, that action might be:
- Uploading a document.
- Creating the first report.
- Connecting an integration.
- Inviting a teammate.
- Publishing the first project.
Choosing one outcome keeps the tour focused. It also gives you a meaningful way to evaluate performance later. A high tour completion rate means very little if users finish the prompts but still don’t complete the action that matters.
Customer story · Whale
Whale did exactly that. They picked one action that signals value, which is starting a screen recording, then narrowed its onboarding so new users were guided straight to that button. More first-time users started creating content, and because the Flow only asked for the step that mattered, its in-app Flows hit completion rates around 80%.
You can apply the same principle in Userpilot by assigning a goal to your Flow. Depending on how you track the activation action, the goal can be:
- Visiting a specific page.
- Clicking an element you’ve labeled in Userpilot.
- Performing a tracked event sent through your application.
- Completing a custom event made up of multiple actions.
Once you know the goal, you can work backward and include only the guidance users need to reach it.
How to create an onboarding tour with Userpilot
1. Install Userpilot and prepare your tracking data
Before building the tour, you need to install the Userpilot SDK in your application and identify your users.
Userpilot supports installation through a JavaScript snippet, Segment, or Google Tag Manager. Your developers will usually handle this initial setup, but the product or growth team should first decide which data needs to be passed to Userpilot.
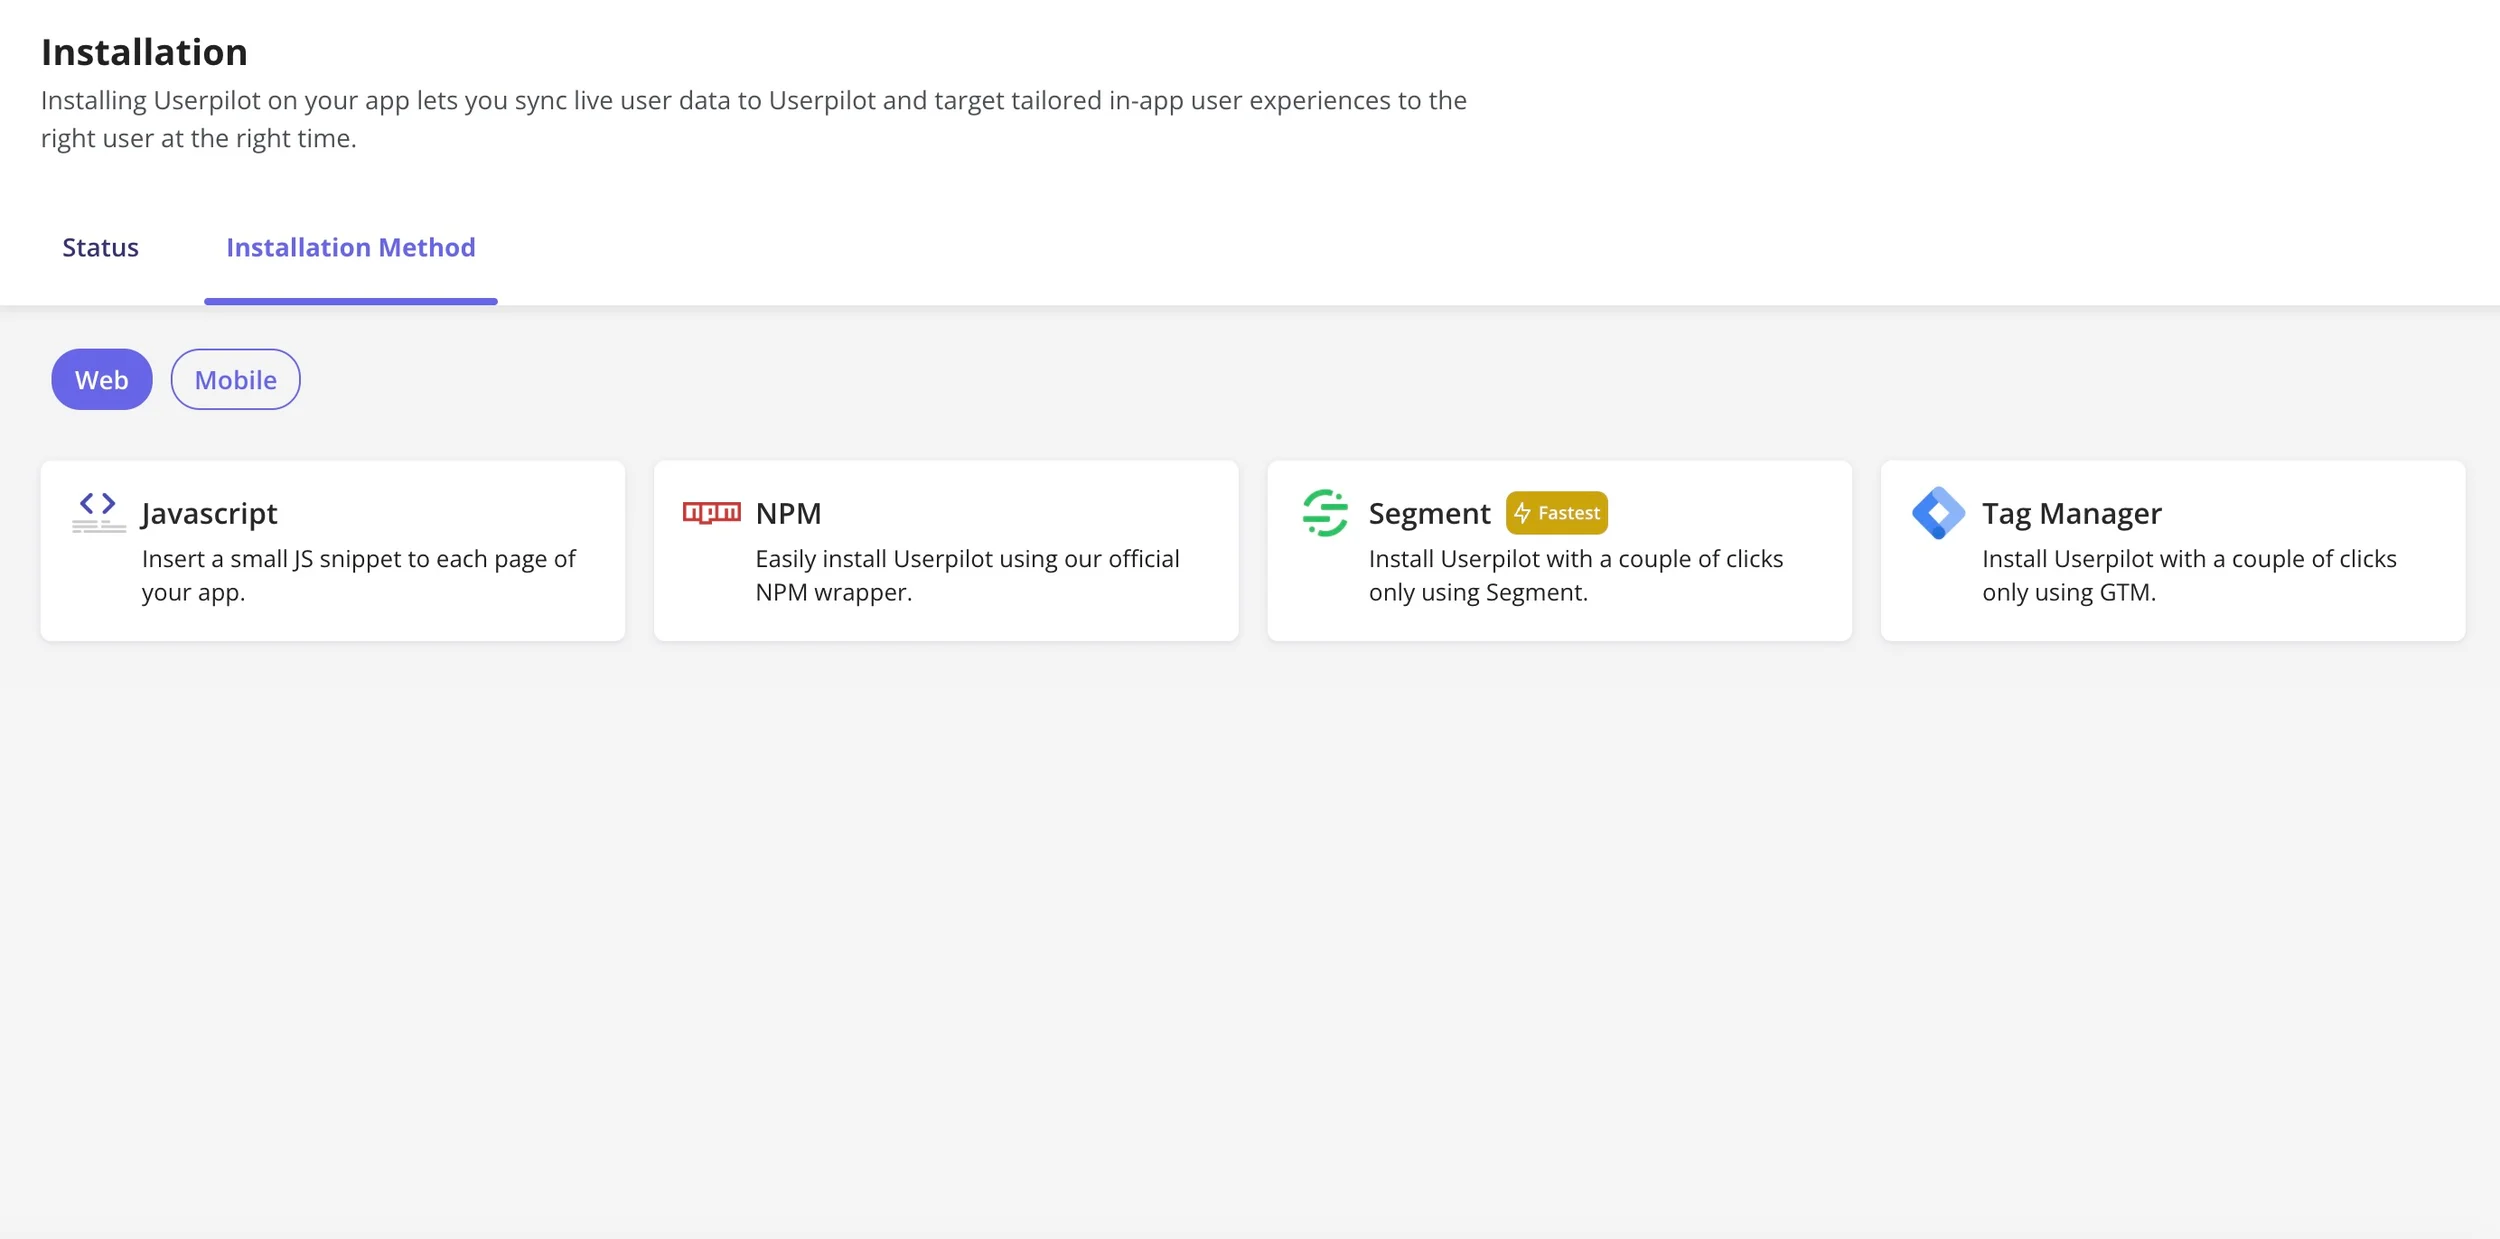
That generally includes:
- User properties: Details such as the user’s name, role, plan, signup date, or selected use case.
- Company properties: Account-level information such as company size, subscription tier, or industry.
- Events: Important actions such as creating a project, inviting a teammate, or connecting an integration.
These properties and events power the targeting, personalization, and measurement you’ll use later. For example, you need to track a user’s role before you can show different onboarding tours to administrators and regular team members.
You should also install the Userpilot Chrome extension. This opens the visual builder on top of your application, allowing your team to create and edit the tour without writing code after the initial installation.
2. Create a new Flow where the tour should begin
In Userpilot, onboarding tours are created as Flows.
You can start building one in two ways:
- Go to Engagement Layer > Flows > Create New Flow in the Userpilot dashboard.
- Open your application and launch the Userpilot builder directly from the Chrome extension.
Once the builder opens, navigate to the page where the onboarding experience should begin. Select Create New Content, click Start Here, and choose Create a Flow.
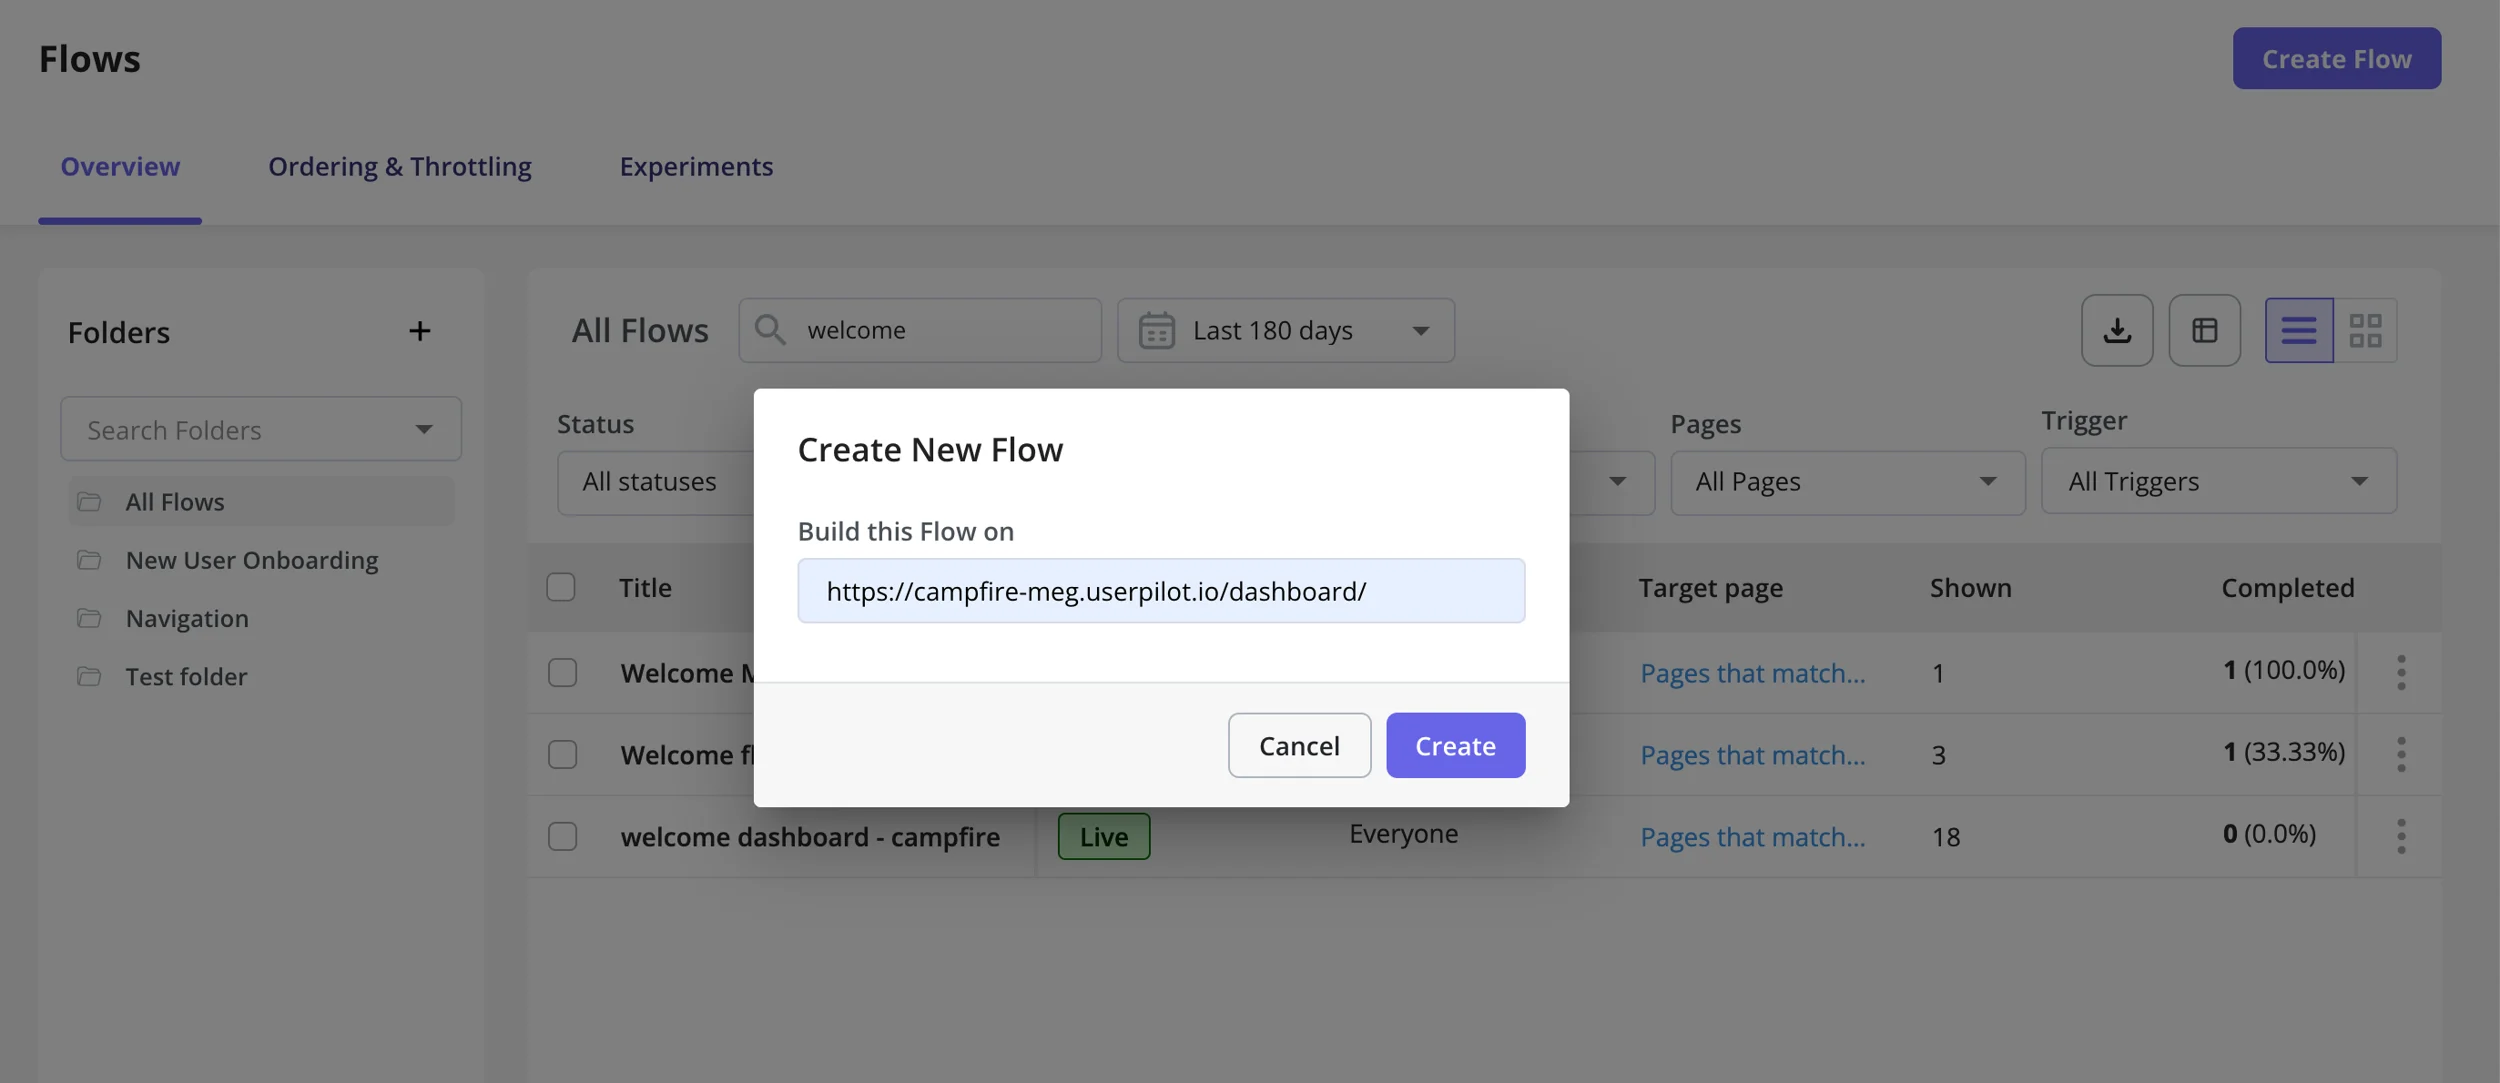
Build the Flow on the page where the first prompt needs to appear. This makes it easier to attach tooltips and driven actions to the correct interface elements and check how each step fits into the surrounding experience.
You can then select a saved theme to keep the Flow consistent with your product’s colors, typography, buttons, and other design choices.
3. Build a short sequence of interactive steps
Userpilot gives you four core UI patterns for building a Flow:
- Modal: A large, centered pattern that asks for the user’s attention. Use it to welcome users, establish context, or ask them to choose a path.
- Slideout: A less disruptive panel that provides supporting instructions while leaving more of the interface visible.
- Tooltip: A small prompt attached to a specific interface element. Use it to explain what an element does or direct attention to the next action.
- Driven action: An interactive step that waits for the user to engage with an element before the Flow continues.
For an onboarding tour, I recommend relying on driven actions wherever users can complete the real task themselves.
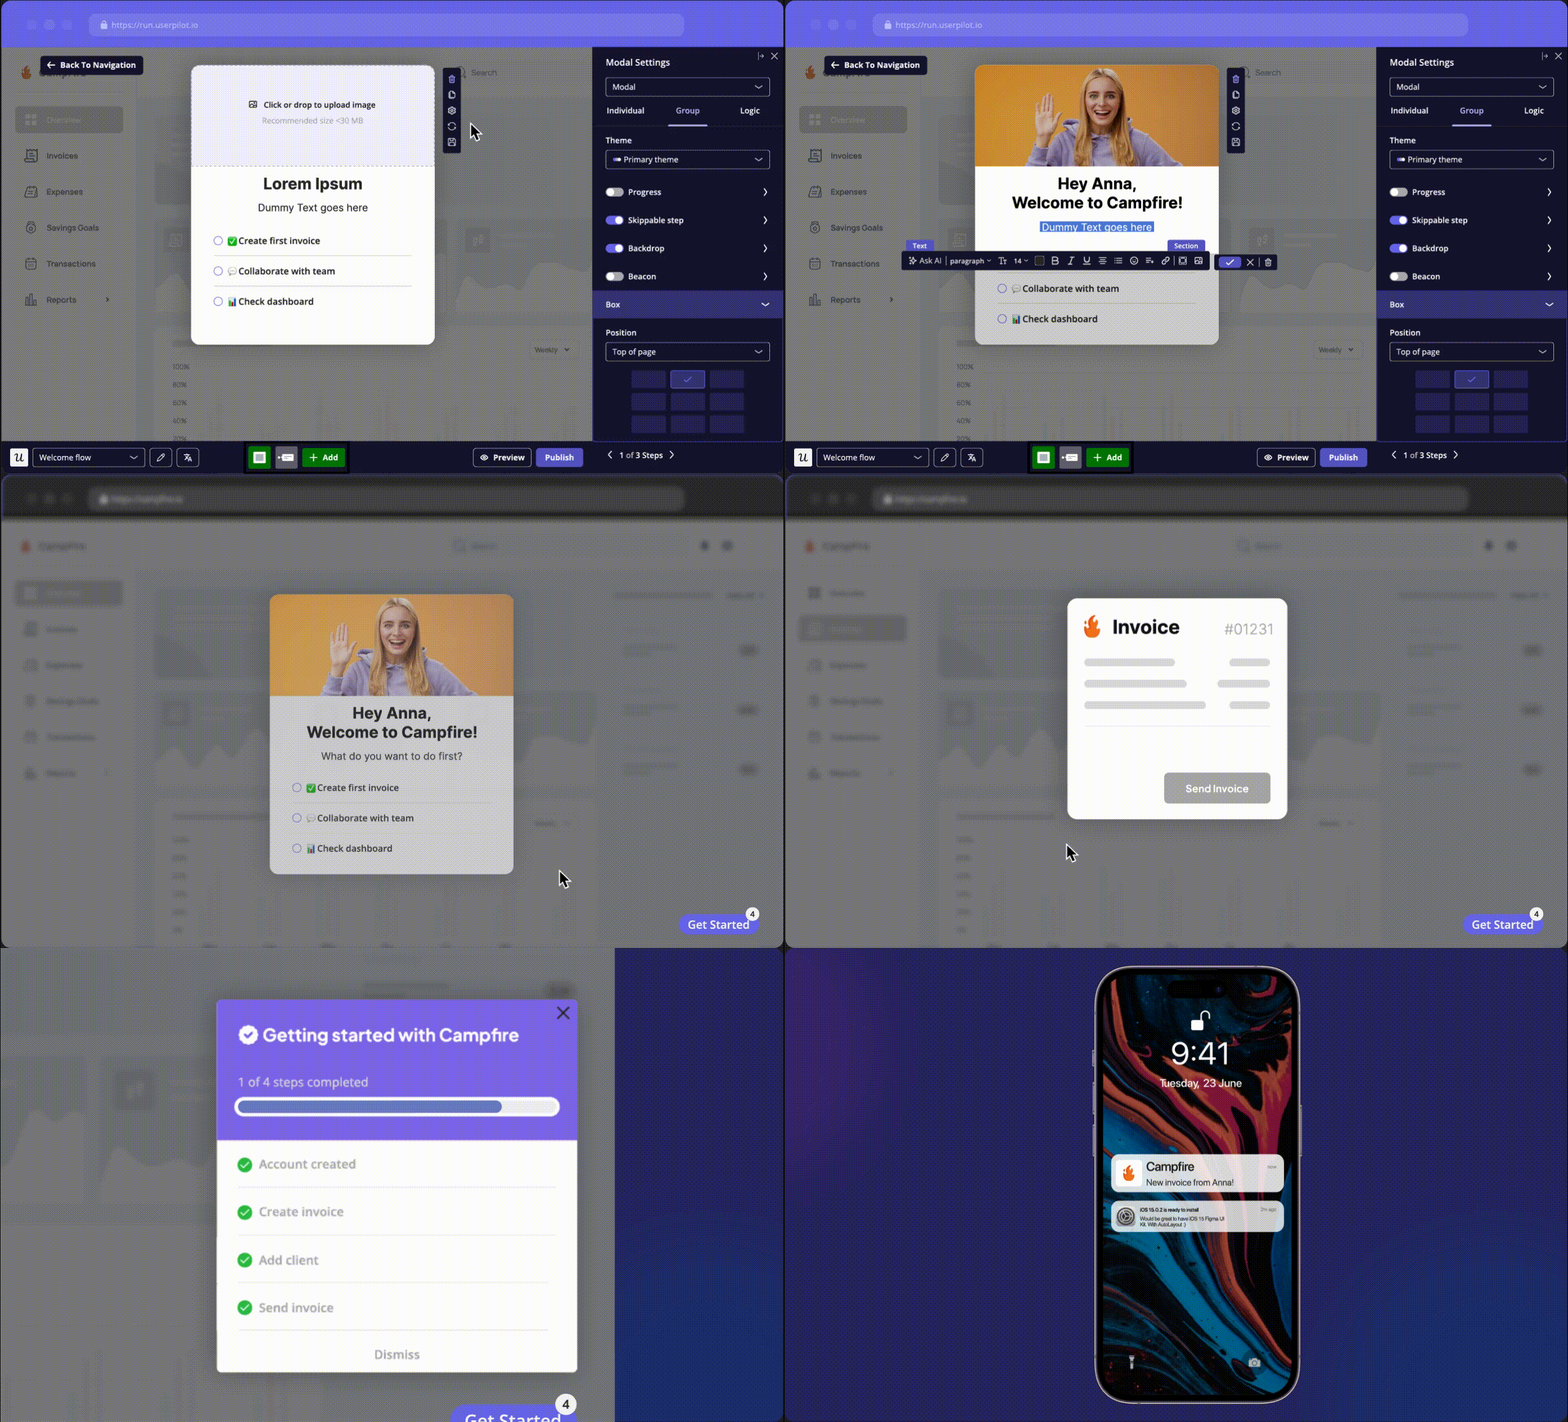
For example, instead of using a tooltip that says, “Click here to upload your CV,” use a driven action that highlights the upload button and waits for the user to click it. The user learns where the action is and progresses toward activation at the same time.
Customer story · The Room
The Room took exactly that approach when new members weren’t uploading their CVs. Instead of a tooltip, it used a driven action that guided users to the upload button and kept triggering for anyone who hadn’t clicked it yet. Within ten days, weekly CV uploads climbed from roughly 200 to over 300 — a 75% increase in the action that actually mattered.
The lesson isn’t that every tour needs the same UI pattern. It’s that each step should help users make progress.
A simple Flow might look like this:
- A welcome modal explains the outcome the user will reach.
- A tooltip points them toward the relevant area of the product.
- A driven action prompts them to complete the key setup action.
- A final slideout confirms their progress and suggests the next step.
Keep the sequence as short as the task allows. When a Flow starts turning into a complete feature catalog, split the secondary guidance into contextual tours that appear later.
4. Add different paths only when users need them
Not every user joins your product with the same goal, role, or level of experience. But personalization doesn’t mean creating a complicated branching journey for every possible variation.
There are two practical ways to adapt onboarding in Userpilot.
Show separate Flows to different segments
Use this approach when different user groups need substantially different outcomes.
For example, a project management platform could create one tour for users managing engineering sprints and another for users planning marketing campaigns. Each segment would see a Flow built around the features and activation steps relevant to its job.
You can create segments using user properties, company properties, survey responses, and in-app behavior. A short welcome survey can help when this information isn’t available during signup.
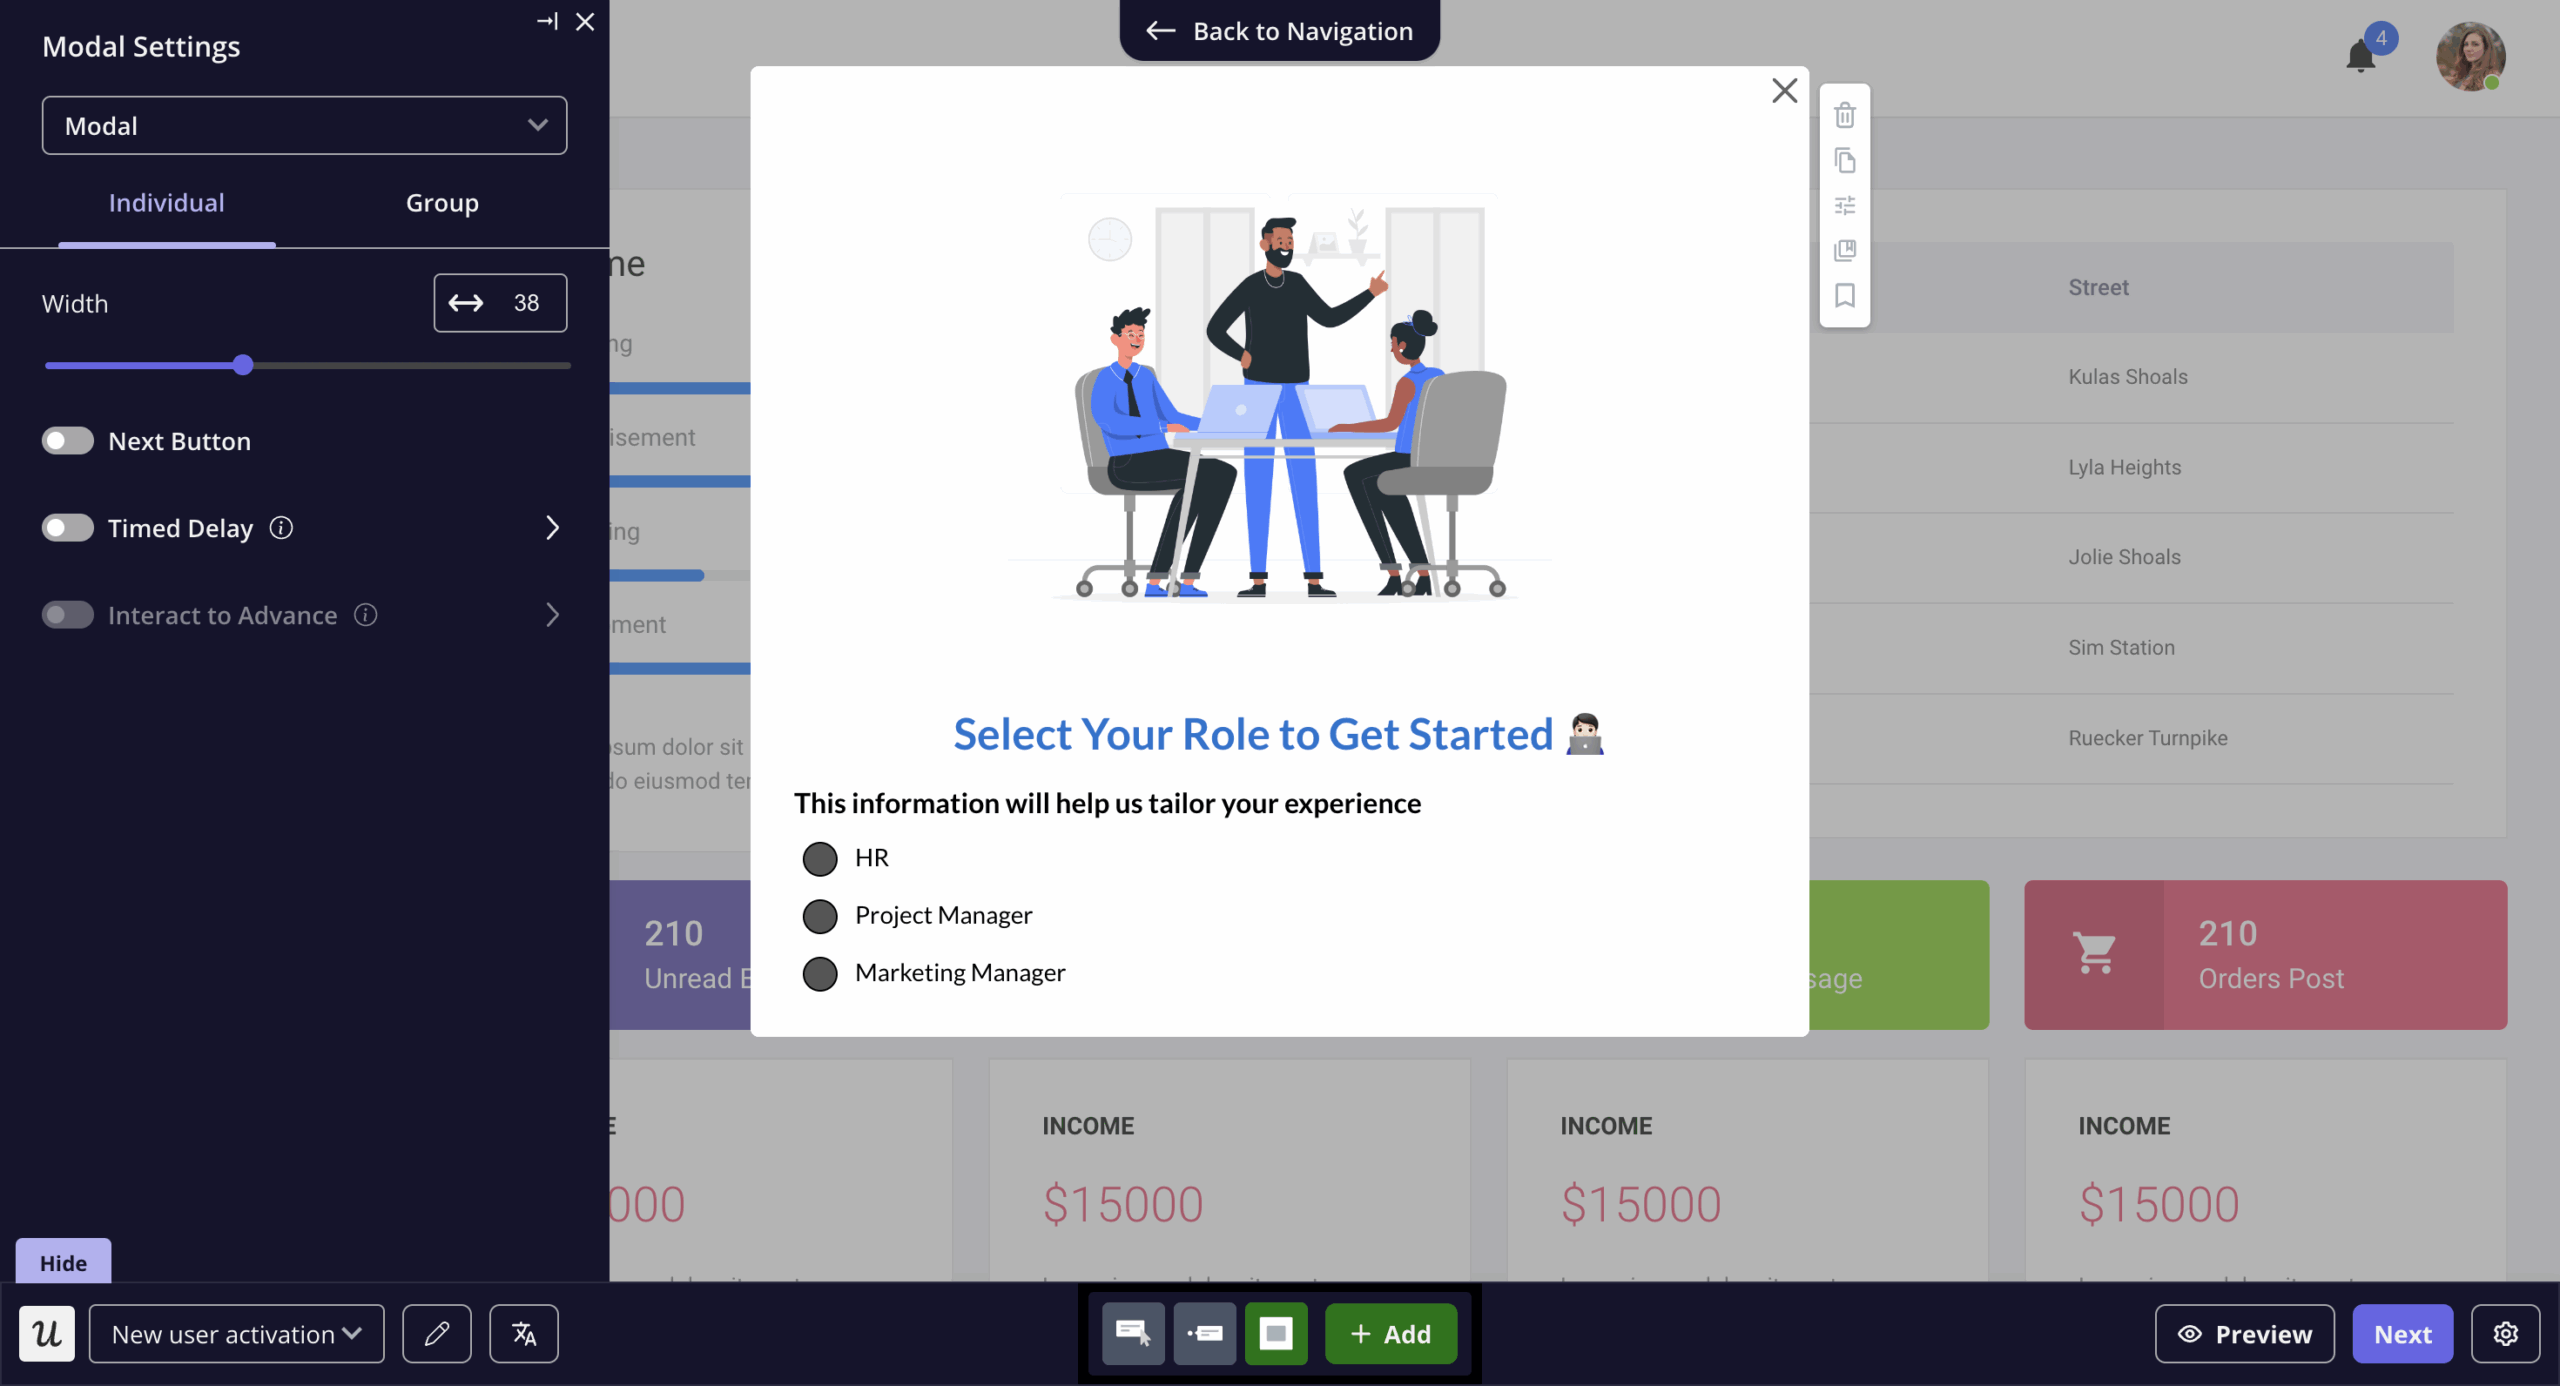
Ask users one or two questions that directly influence the onboarding path, such as:
- “What are you hoping to accomplish first?”
- “Which best describes your role?”
- “How experienced are you with this type of software?”
You can then use their answers as audience conditions for the relevant Flow.
Use Flow Logic within the same tour
Use Flow Logic when most of the tour is shared but certain answers or actions should change what happens next.
For example, an opening modal could ask whether the user has existing data to import. Users who select “Yes” can be directed toward the import process, while those who select “No” skip that guidance and move directly to creating something from scratch.
Userpilot lets you add conditions to individual Flow steps and route users forward based on their interactions. This prevents users from having to sit through instructions they don’t need.
For longer sequences using the same UI pattern, you can also organize steps into Progressive Groups. These let users move backward, skip a section, or continue through the rest of the Flow instead of being locked into a strictly linear sequence.
The goal is not to demonstrate every available personalization feature. It is to remove irrelevant steps while keeping the journey easy to understand.
5. Configure who sees the Flow and when it appears
Once the content is ready, open the Flow’s settings to control its delivery.
This part is as important as the prompts themselves. A well-designed tour will still feel disruptive if it appears to the wrong user, on the wrong page, or every time they log in.
Here are the main settings to configure.
Choose the trigger
Userpilot supports three main Flow trigger types:
- Page-specific: Start the Flow when an eligible user visits a selected page or URL path.
- Event occurrence: Trigger it after the user performs a tracked action.
- Only manually: Launch it from another Userpilot experience, a permalink, or a JavaScript function.

Choose the trigger based on the context users need before the guidance becomes relevant.
For example, don’t show a reporting walkthrough immediately after signup if users first need to connect a data source. Trigger it after they complete the connection or visit the reports page instead.
You can also launch a Flow from a checklist task or Resource Center. This is useful when users should control when they start the walkthrough.
Select the environment, domain, and page
Specify where the Flow is allowed to appear.
You can restrict it to your production or staging environment, select particular domains, and target a specific page or group of URL paths. Userpilot supports operators such as “starts with,” “contains,” “equals,” and regular-expression matching for dynamic URLs.
This prevents an element-specific tour from accidentally triggering on a page where the required interface elements aren’t available.
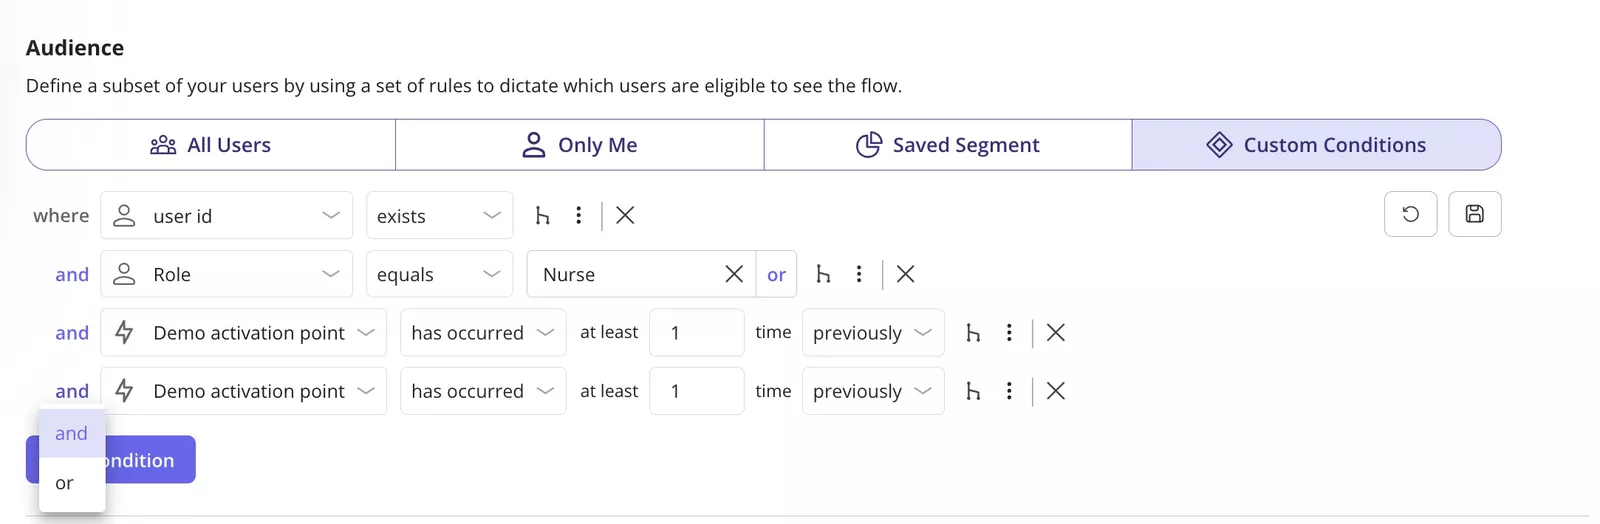
Define the audience
You can show the Flow to:
- All identified users.
- Only yourself and internal testers.
- A saved segment.
- A custom audience defined for that Flow.
Custom conditions can combine user data, company data, events, product actions, and survey responses.
For example, you could target users who:
- Signed up within the past seven days.
- Selected “marketing” as their use case.
- Haven’t yet created a campaign.
- Are on a free-trial plan.
The result is a much more precise audience than a broad segment called “new users.”
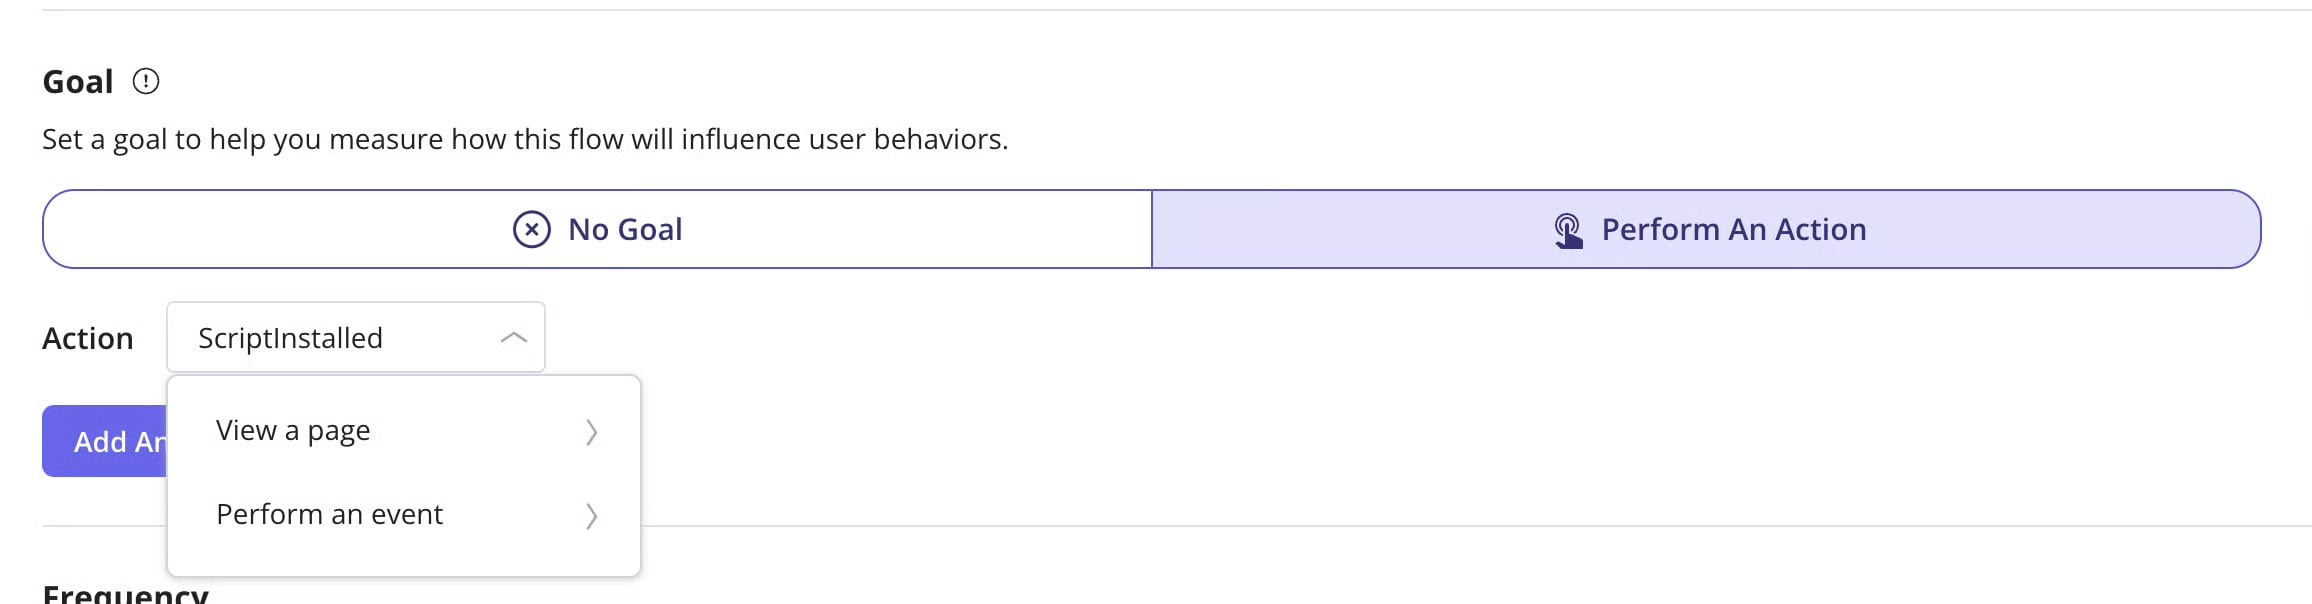
Assign the Flow goal
Select the activation action you defined before building the tour.
This creates a direct connection between the guidance users see and the product behavior you want to influence. Instead of evaluating the tour only by how many users clicked through it, you can track how many went on to complete the assigned goal.
Set an appropriate frequency
Finally, decide how often eligible users should see the Flow.
You can configure it to:
- Appear only once.
- Trigger whenever all conditions are met.
- Repeat after a selected number of days, months, or sessions.
- Continue appearing at set intervals until the user completes the Flow goal.
For most first-time welcome experiences, showing the Flow once is enough. For task-based onboarding, repeating it until the activation goal is met can make sense, provided users still have a clear way to dismiss it.
When you have several onboarding experiences running at once, use content ordering and throttling to prioritize them and prevent users from receiving too many prompts in the same session.
6. Preview and test the tour before publishing it
Use both Preview Mode and Test Mode before releasing the tour to customers. They check different parts of the experience.
Use Preview Mode to review the content and interaction
Preview Mode runs inside the Userpilot builder. Use it to:
- Check the appearance and positioning of each pattern.
- Review the copy and step order.
- Test buttons, redirects, and form fields.
- Confirm that tooltips attach to the correct elements.
- Walk through the Flow as a user would.
However, Preview Mode doesn’t apply the Flow’s audience or event-triggering rules. It can show you whether the experience works as designed, but not whether it will reach the correct users in real conditions.
Use Test Mode to validate the live experience
Test Mode lets you experience the published Flow inside your application.
Use it to confirm that:
- The intended audience qualifies for the Flow.
- The trigger starts it at the correct moment.
- The frequency settings behave as expected.
- The Flow works alongside your other live in-app experiences.
- Page changes and real product interactions don’t break the sequence.
You can test safely by restricting the Flow to a staging domain, setting the audience to “Only me,” targeting internal accounts, or setting it to trigger manually through a permalink.
Once the tour works correctly, update the environment and audience settings and publish it to your intended users.

7. Measure whether the tour drives activation
After publishing the tour, don’t judge it by completion rate alone.
A user can complete every tooltip and still fail to reach value. Start with the Flow goal you assigned and ask whether exposed users are completing that action.
Userpilot’s Flow analytics give you four initial performance metrics:
- Total shown: The number of unique users who saw the Flow.
- Completed: The number of users who completed it.
- Dismissed: The number of users who actively exited it.
- Average time to complete: How long users took to finish all the steps.
You can then use the step breakdown to see where users were shown a step, completed it, or dropped out.
Interpret the data in relation to the Flow’s purpose:
- High dismissal on the first step: The Flow may be appearing too early, targeting the wrong audience, or asking for too much attention.
- A sharp drop-off on one tooltip: The instruction may be unclear, or the selected element may not be easy to find or use.
- High completion but low goal achievement: The Flow is easy to finish but isn’t moving users toward the intended outcome.
- Strong goal completion within one segment: The tour may be especially relevant to that audience and worth adapting for similar users.
You can also inspect individual user and company activity to see who viewed, completed, or dismissed the Flow and when they completed its goal.
Customer story · Impala
That user-level view is exactly how Impala evaluated its fundraising Flow. Users who completed it added a funder to their prospect list 46% of the time, versus 23% for users who never saw the guide — a 100% lift in activation, and a far more useful signal than how many people finished the final tooltip.
When the performance data tells you where users struggle but not why, combine it with session replay or a short in-app survey. Session recordings can reveal usability problems around a particular step, while qualitative feedback can explain what users found confusing.
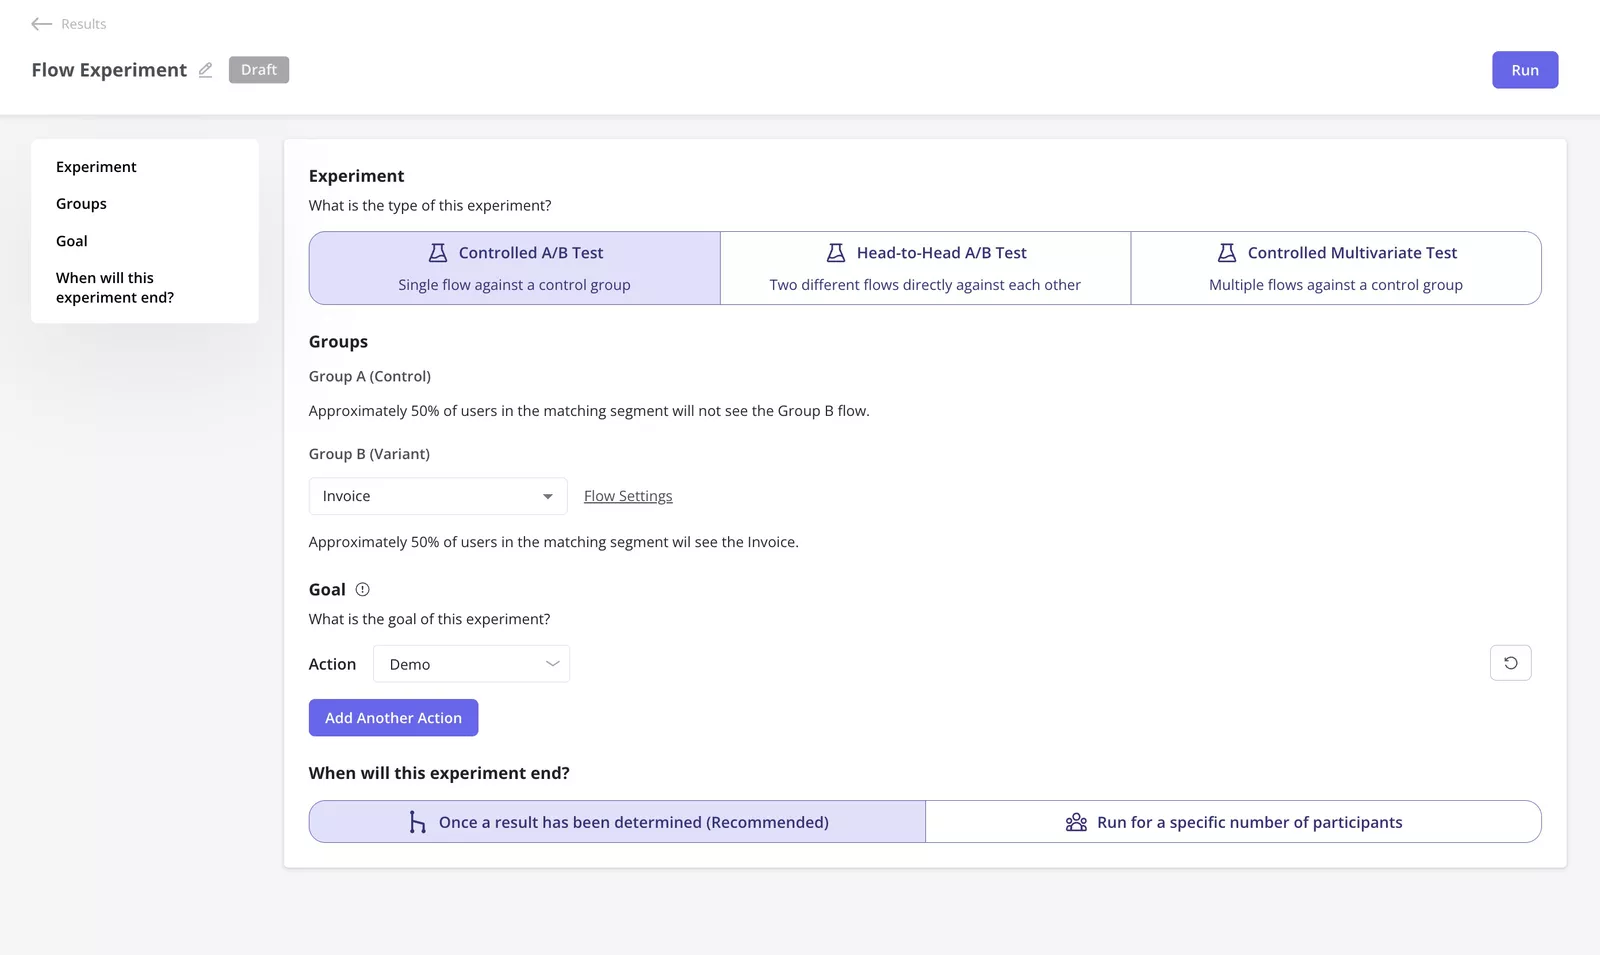
Once you have enough traffic, you can also use Userpilot Experiments to compare:
- A Flow against a control group that receives no Flow.
- Two different versions of the tour.
- Two versions against a control group through a multivariate experiment.
Change one meaningful variable at a time, such as the opening message, number of steps, UI pattern, or trigger. Then compare the versions against the same activation goal.
How to extend your tour into a complete onboarding journey
The Flow is the onboarding tour itself. Once it reliably guides users toward the first activation outcome, you can add other Userpilot experiences around it.
Add a checklist for onboarding tasks users complete over time
A tour works best for a focused task that users can complete in one sequence. A checklist is more appropriate when activation requires several tasks completed across different pages or sessions.
For example, a checklist could include:
- Create your first project.
- Connect an integration.
- Invite a teammate.
- Publish your first report.
Each checklist task can take users to a page, run a script, or trigger the relevant Userpilot Flow. This gives users a visible roadmap while keeping the individual walkthroughs short and contextual.
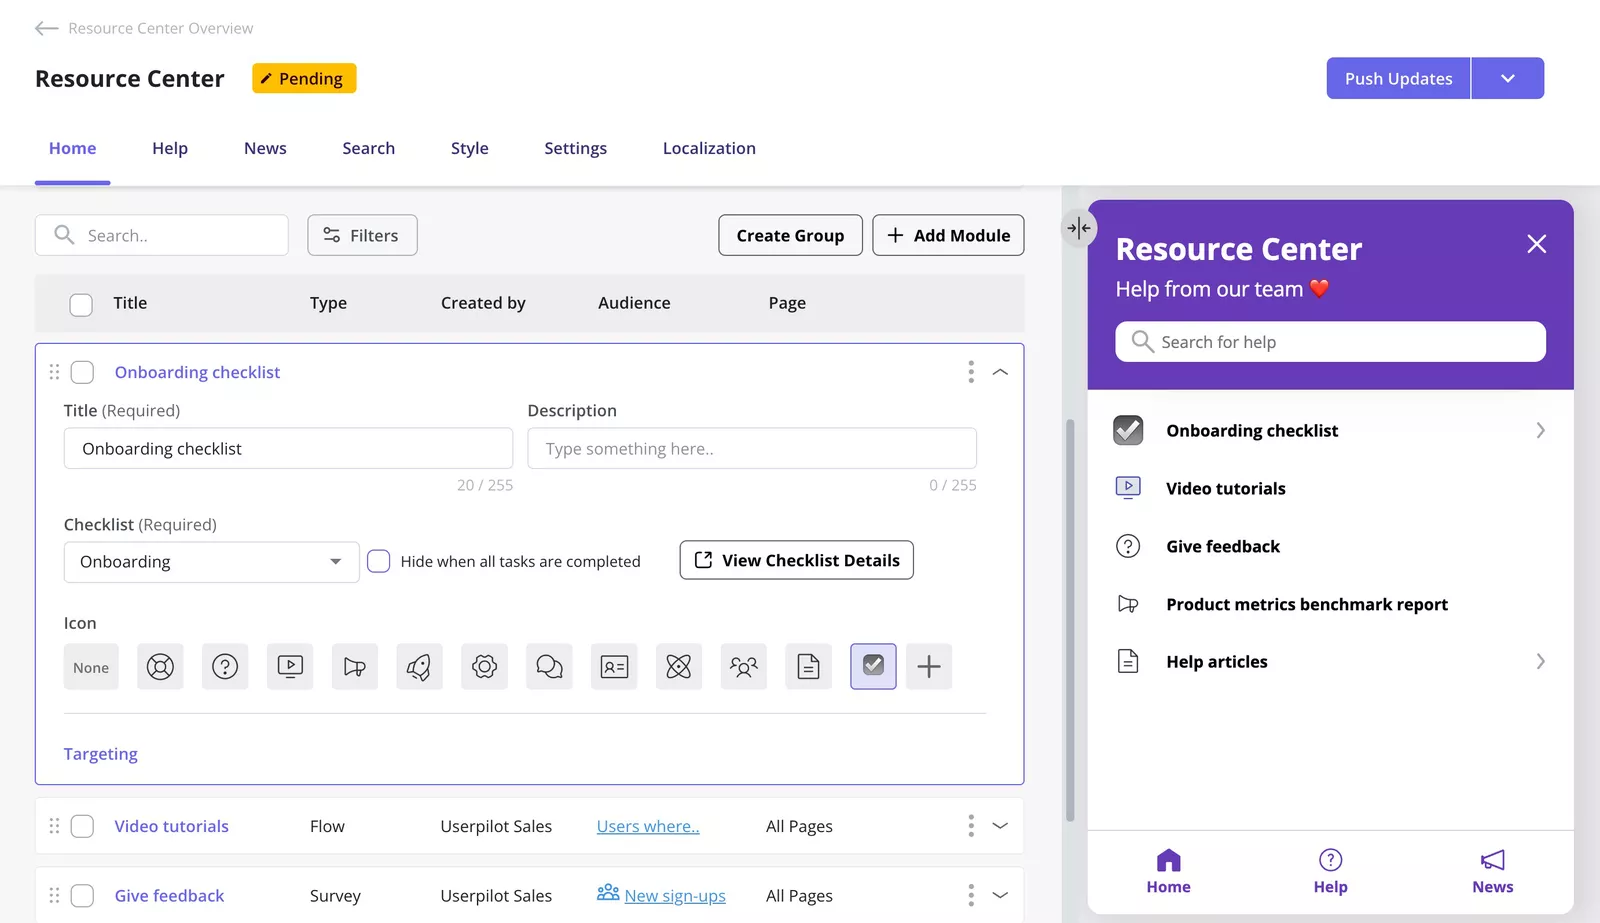
Let users replay tours from a Resource Center
Users may dismiss a tour before they finish it, need the instructions again later, or prefer to explore independently before asking for guidance.
A Resource Center gives them an on-demand place to reopen Flows and access other self-service content without leaving your product.
Userpilot Resource Centers can include:
- Flows.
- Checklists.
- Surveys.
- Knowledge base links.
- Video tutorials.
- Custom JavaScript actions.
This complements the proactive onboarding tour with guidance users can access at their own pace.
Use Workflows to coordinate a longer journey
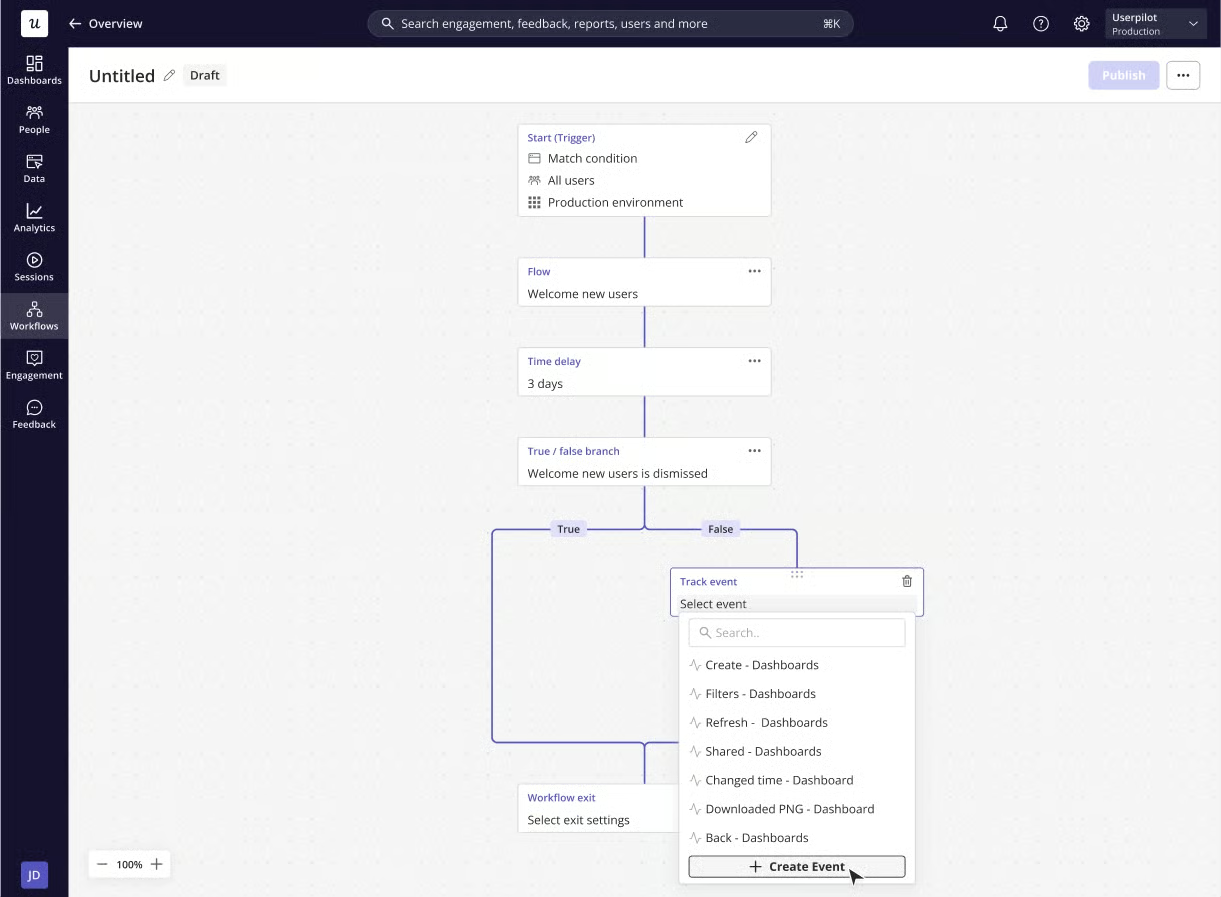
Use Userpilot Workflows when onboarding needs to continue beyond one Flow.
A Workflow can connect Flows, checklists, surveys, emails, and other in-app content. You can also add delays and true-or-false branches based on user properties, behavior, or engagement with earlier steps.
For example, you could:
- Start with a welcome survey.
- Show a relevant onboarding Flow based on the user’s answer.
- Wait to see whether they complete the activation event.
- Send a follow-up email if they don’t.
- Trigger a checklist or additional guidance when they return.
The important distinction is that Workflows orchestrate the wider onboarding journey, while each Flow should still guide users through one clear in-product experience.
Build and improve onboarding tours from one platform!
An effective onboarding tour should guide the right users toward one meaningful outcome, then give you enough data to understand where the experience is working and where it needs improvement.
Userpilot brings that process into one platform. You can build interactive Flows without code, personalize them using user data and product behavior, control when and where they appear, and measure how users progress through each step. You can then use Flow analytics, session replay, surveys, and experiments to investigate drop-offs and improve the experience over time.
Book a Userpilot demo to see how you can build, target, and optimize onboarding tours from one place.
FAQ
What is an onboarding tour?
An onboarding tour is a guided in-app experience that helps new users understand what to do and complete the actions that lead to their first meaningful outcome.
A tour can combine welcome modals, tooltips, slideouts, and interactive steps. Its purpose is not to introduce every feature, but to move users from signing up to experiencing value.
How long should an onboarding tour be?
An onboarding tour should be only as long as the task requires. For a simple activation action, three to five focused steps are often enough.
When you have more features to introduce, create additional contextual Flows and trigger them later instead of adding everything to the initial tour.
What is the difference between an onboarding tour and an interactive walkthrough?
An onboarding tour describes the broader guided experience users receive when getting started. An interactive walkthrough is an action-based form of guidance that asks users to complete each step inside the product.
In practice, an effective onboarding tour can contain an interactive walkthrough, along with patterns such as a welcome modal or final confirmation message.
Can you create an onboarding tour in Userpilot without code?
Userpilot requires an initial SDK installation so it can identify users, track product events, and display content inside your application.
After that setup, product, growth, and customer success teams can create and update onboarding Flows through Userpilot’s visual builder without coding each experience.
Can you personalize Userpilot onboarding tours?
Yes. You can target Flows using user properties, company properties, product events, tracked behavior, saved segments, and survey responses.
You can also use Flow Logic to change which steps a user sees based on their actions within the tour.
About the author