Comparing Different Pendo Alternatives by Use Cases, Pricing & Feature Comparison


Pendo is a product experience platform that helps teams understand and improve how users interact with their software.
But I’ve seen that it doesn’t fit every team equally well. Between pricing, setup complexity, and how its features are structured across modules, many teams reach a point where they start asking whether there’s a better Pendo alternative for their needs.
This guide aims to answer that question.
I went through product reviews, Reddit threads, and real user feedback to understand where Pendo falls short and which tools teams switch to. I also drew on our experience working with companies that switched from Pendo.
What you’ll find below is a breakdown of 12 Pendo alternatives, each mapped to a specific use case, from lightweight onboarding tools to enterprise digital adoption platforms and analytics-first solutions.
What are the key limitations of Pendo?
In addition to its steep, unpredictable pricing, Pendo has several functional limitations that make it less appealing to product managers and broader product teams. Here are some of the most common drawbacks teams report:
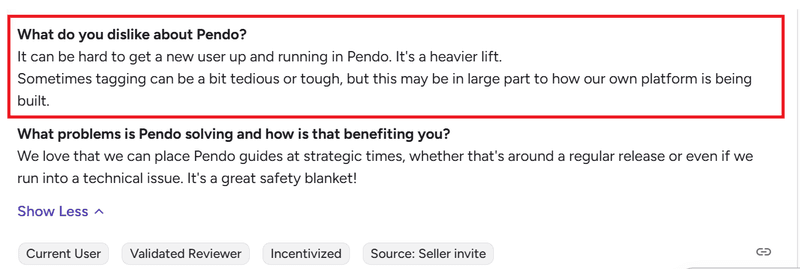
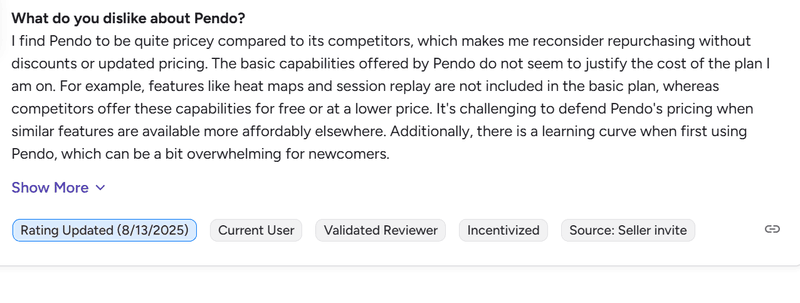
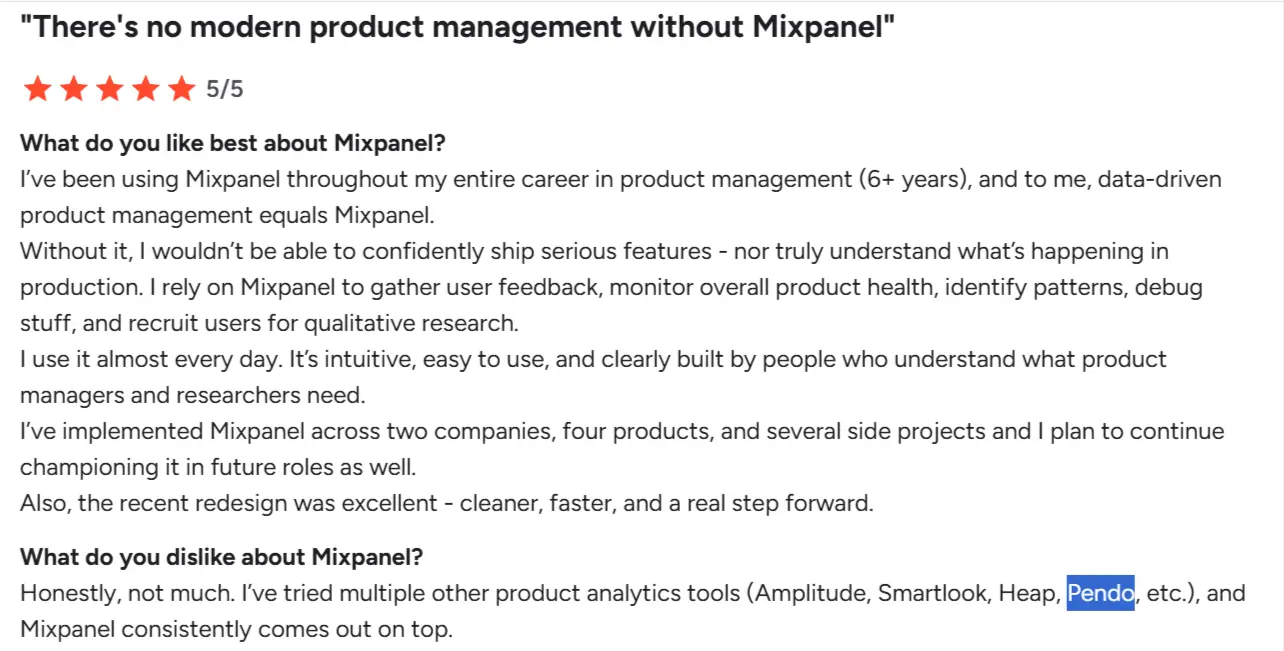
- High complexity and steep learning curve: On paper, Pendo is marketed as a no-code solution. In reality, setting it up can feel more like configuring a CRM than a plug-and-play platform. Here’s what one G2 reviewer says:
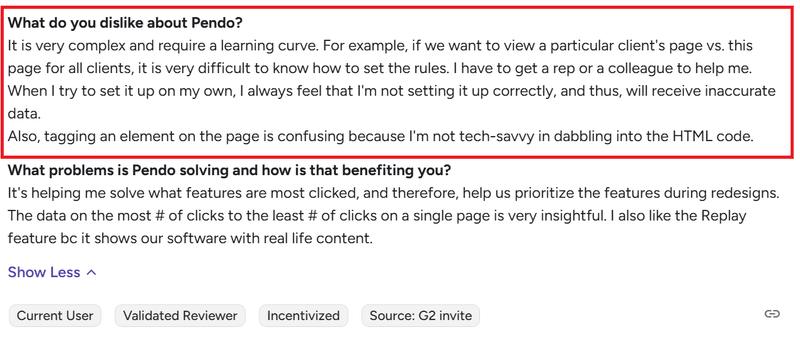
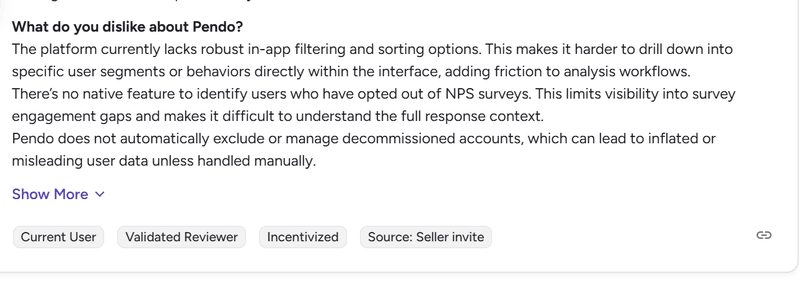
- High technical overhead: Even after you get past the learning curve, Pendo often requires engineering support for basic tasks like customizing in-app experiences to your brand or segmenting user behavior data. This G2 reviewer puts it this way:
- Modular licensing: Pendo’s modular packaging is one of its biggest frustrations. Core features that product teams rely on, like NPS surveys, advanced branching logic, AI insights, or even the resource center, aren’t always included in the base plan.
- Disjointed reporting experience: Quantitative analytics is supposed to be one of Pendo’s key strengths, but the way data is spread across the platform undermines the experience. Reports live in different places, creating data silos across Data Explorer, Guides, Listen, and Dashboards.
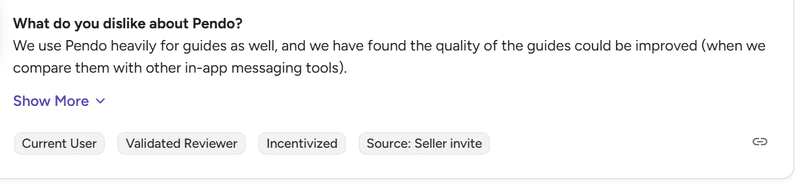
- Rigid user onboarding patterns: Pendo offers tooltips, banners, and modals, but flexibility ends there unless you’re on a higher-tier plan. Features such as embedded guides, standalone checklists, and advanced branching or automations are either missing or locked behind upgrades. Here’s how this G2 reviewer puts it:
- Dependency on integrations and add-ons: Unlike most alternatives on this list, Pendo features like session replays, advanced survey analytics, and expanded translation often require integrations or paid add-ons.

12 Pendo competitors and alternatives for digital adoption
Given these limitations, many teams start evaluating alternatives to Pendo. I’ve researched and summarized the top competitors so you can quickly see the value they offer:
- Userpilot: The closest Pendo alternative with more value for money.
- Appcues: Cross-platform onboarding with limited analytics depth.
- UserGuiding: Fastest way to provide in-app support for free, with onboarding features available on paid plans.
- Chameleon: Advanced customization for teams that want full control over in-app experiences.
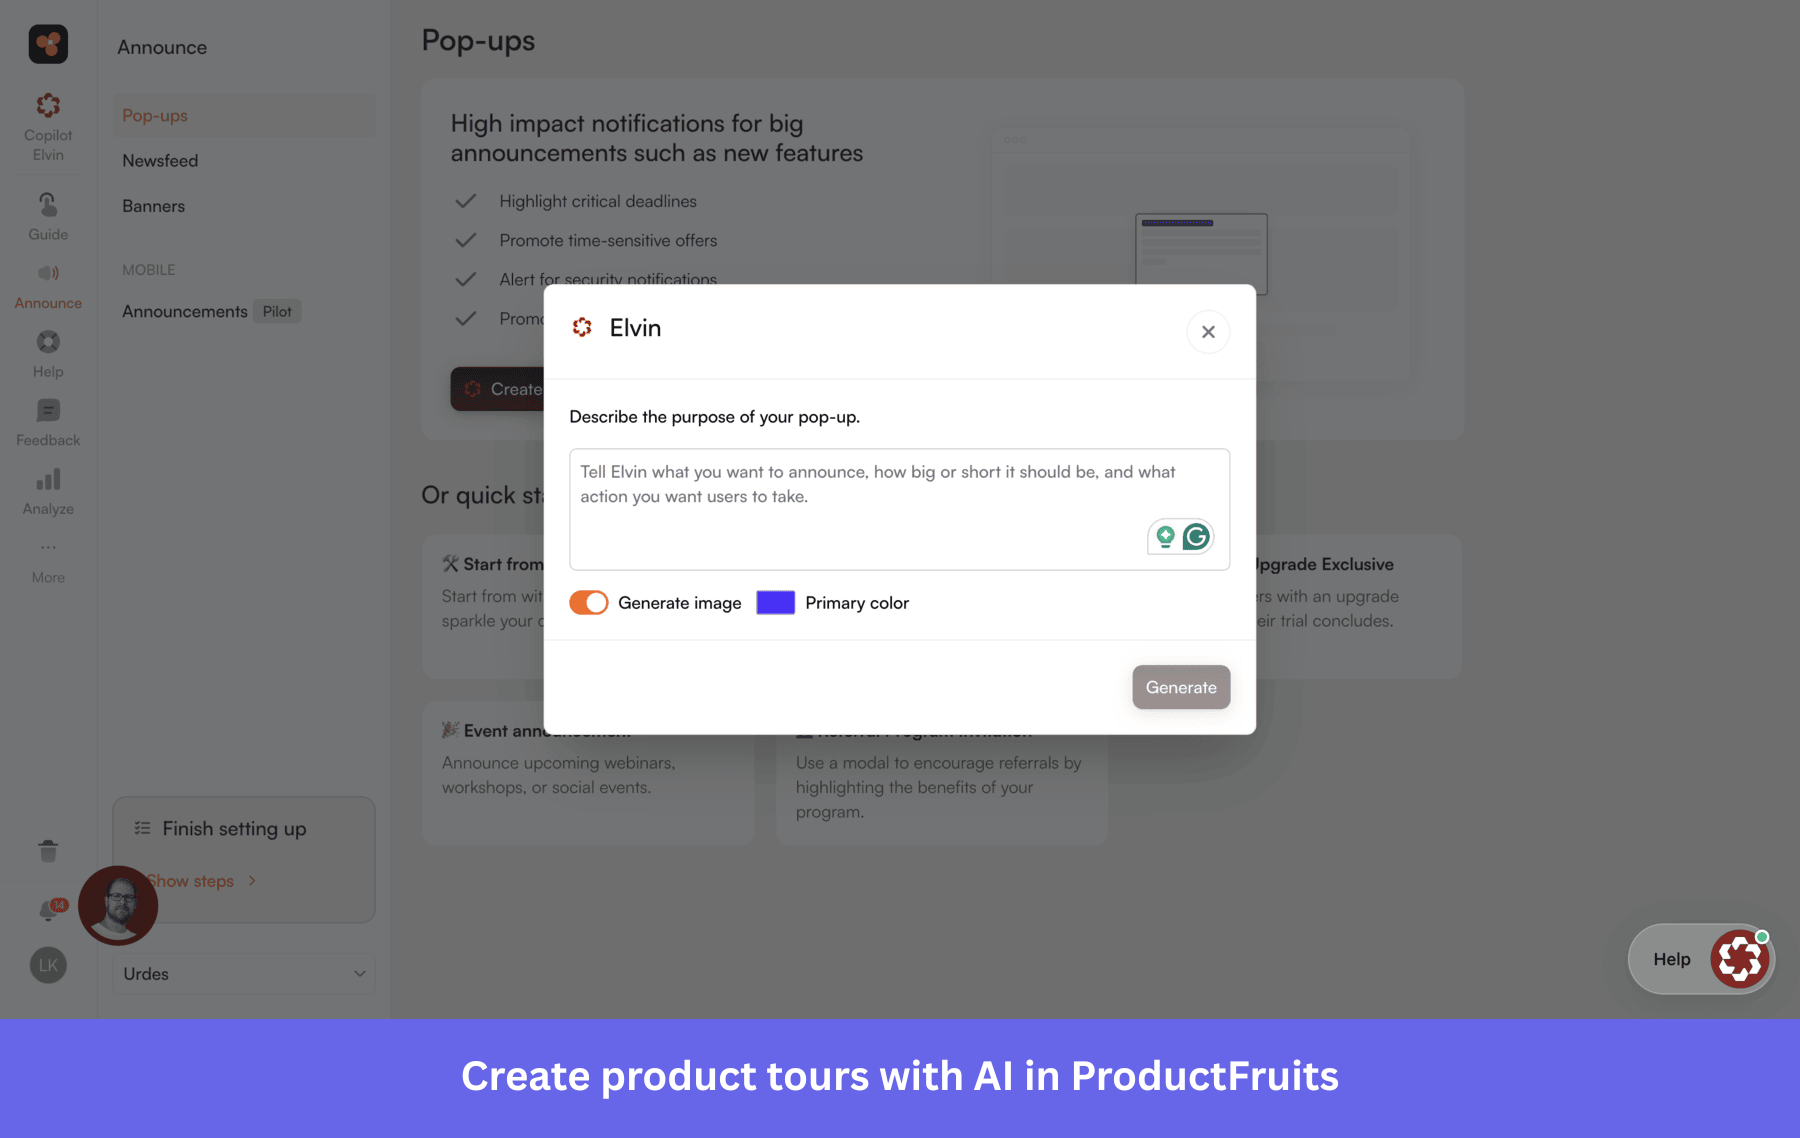
- ProductFruits: Most affordable onboarding tool with built-in help center, feedback, and AI assistance.
- WalkMe: Enterprise digital adoption for large-scale transformation and automation.
- Whatfix: Structured user and employee training with strong LMS-style capabilities.
- Userlane: Employee onboarding and change management solution with real-time, step-by-step guidance.
- Apty: AI-powered employee onboarding and process compliance platform.
- FullStory: Behavioral analytics for diagnosing user friction.
- Heap: Automatic data capture without manual tracking setup.
- Mixpanel: Comprehensive web and product analytics solution for deep event-based analysis.
My personal advice when picking a Pendo alternative is to match your software directly to your explicit quarterly goals rather than buying the platform with the longest feature list. For example
- Fix a lack of strict data by buying a dedicated product analytics tool like Mixpanel or Heap.
- Train 10,000 corporate employees by investing in an internal DAP like WalkMe.
- Execute a true product-led growth playbook by combining actionable analytics with code-free user engagement via Userpilot.
Comparing Pendo alternatives
To help you evaluate which tools align with those goals, below is a quick snapshot comparing pricing, strengths, and limitations across these platforms.
| Tool | Starting Price/Year | Best For | Key Strength | Biggest Limitation | G2 Score |
|---|---|---|---|---|---|
| Userpilot | $3,588 ($299/mo, billed annually) | 🎯 Teams looking for the closest Pendo alternative with more value for money | Transparent pricing, clear autocapture, multiple UI patterns, and advanced customer satisfaction and sentiment surveys | Some advanced features are limited to higher-tiered plans | ⭐ 4.6 |
| Appcues | The lowest price point is from $6,462 | 📱 Cross-platform onboarding across web and mobile | Smooth onboarding flows across web and mobile | Weak analytics compared to peers | ⭐ 4.6 |
| UserGuiding | Free tier available
Paid plan starts at $2,088 ($174/mo, billed annually) |
🧩 Teams that want to start with in-app support for free | Easy, no-code onboarding flows for startups | Limited analytics depth | ⭐ 4.7 |
| Chameleon | $3,348 ($279/mo) | 🛠️ Advanced customization and control | Highly flexible, pixel-perfect UI control | Requires engineering support for advanced use | ⭐ 4.4 |
| ProductFruits | $1332
($111/mo, billed annually) |
🪶 Cost-effective onboarding with built-in help centers | Product tours, onboarding checklists, and built-in help center in a simple no-code setup | Limited analytics and user segmentation compared to more advanced platforms | ⭐ 4.7 |
| WalkMe | ~$14,000 | 🌍 Digital transformation and workflow automation | Enterprise-grade compliance and workflow coverage | Long and complex setup process | ⭐ 4.5 |
| Whatfix | ~$25,000 | 🏢 Enterprise employee and user onboarding | Deep integration with LMS and internal systems | Very high cost for most SaaS teams | ⭐ 4.6 |
| Userlane | ~$17,500 | ⚡ Employee onboarding and change management | Quick time-to-value with intuitive walkthroughs | Lacks robust product analytics | ⭐ 4.7 |
| Apty | From ~$9,500 | 📋 AI-powered employee onboarding and process compliance | Tracks task completion and enforces step-by-step workflows across enterprise applications | Smaller ecosystem and fewer integrations than larger platforms | ⭐ 4.7 |
| FullStory | $10,000 (free tier available) | 🔎 UX diagnostics and session replay | Session replay combined with behavioral analytics | Its onboarding and in-app guidance features are less mature than dedicated adoption platforms | ⭐ 4.5 |
| Heap | From $3,600 (free tier available) | 📊 Automatic data capture across web and mobile | Powerful autocapture and retroactive data analysis | Limited in-app guidance features | ⭐ 4.4 |
| Mixpanel | From $1,200 (free tier available) | 🔍 Comprehensive web and product analytics | Granular funnel and retention insights in real time, plus A/b testing capabilities | Primarily analytics with no onboarding features | ⭐ 4.6 |
4 Categories of Pendo alternatives
Pendo’s current product positioning is a “product experience + analytics” suite that combines product analytics, in-app guides, and session replay, plus sentiment surveys (NPS/PMF/CSAT), feedback centralization (Listen), and cross-channel messaging automation (Orchestrate).
For competitive analysis, I like to treat “Pendo competitors” as four main categories (with onboarding tools further split into two subgroups based on use case):
- Enterprise digital adoption platforms (DAPs) that focus on employee enablement and change management across many internal apps (e.g., WalkMe, Whatfix, Userlane, and Apty).
- Onboarding with built-in analytics solution for product-led teams (e.g., Userpilot and Appcues). These are the closest replacements for Pendo.
- SaaS onboarding/product engagement tools that prioritize in-app messaging, onboarding patterns, and lightweight analytics (e.g., Chameleon, UserGuiding, and ProductFruits).
- Analytics + session replay platforms that compete with Pendo on “understand behavior and find friction,” but usually don’t provide robust in-app guidance (e.g., FullStory, Heap, and Mixpanel).
This split matters because “best alternative” depends on which Pendo pillar you’re replacing: in-app guidance, analytics/replay, voice-of-customer, or orchestrated messaging.
Therefore, here’s my fast rule of thumb:
- Choose enterprise DAPs (WalkMe/Whatfix/Userlane/Apty) when the primary job is employee adoption across many systems with heavier governance and IT ownership.
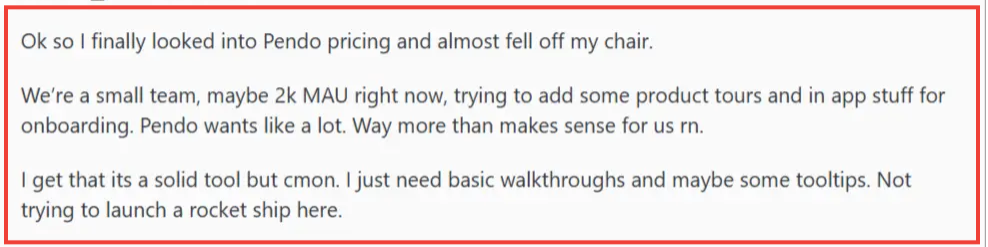
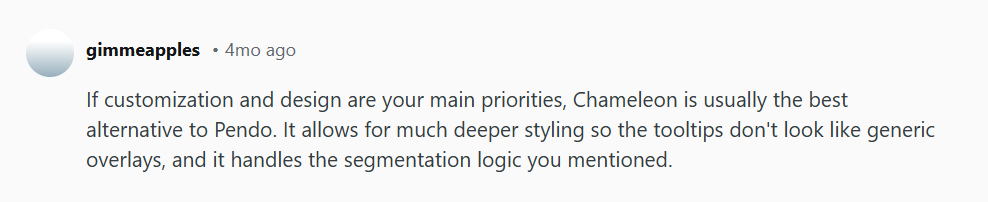
- Choose SaaS onboarding tools (ProductFruits/Chameleon/etc) when you need rapid, no/low-code in-app experiences, and you can pair with a dedicated analytics stack if needed, especially when your budget is limited like this Redditor:
- Choose product growth tools like Userpilot or Appcues if you need the closest replacements for Pendo that are easier to use and more cost-effective.
- Choose session replay and analytics specialists (FullStory/Heap) when diagnosing user friction is core, and you don’t need a native user guidance layer.
Now let’s get into each Pendo alternative in more detail.
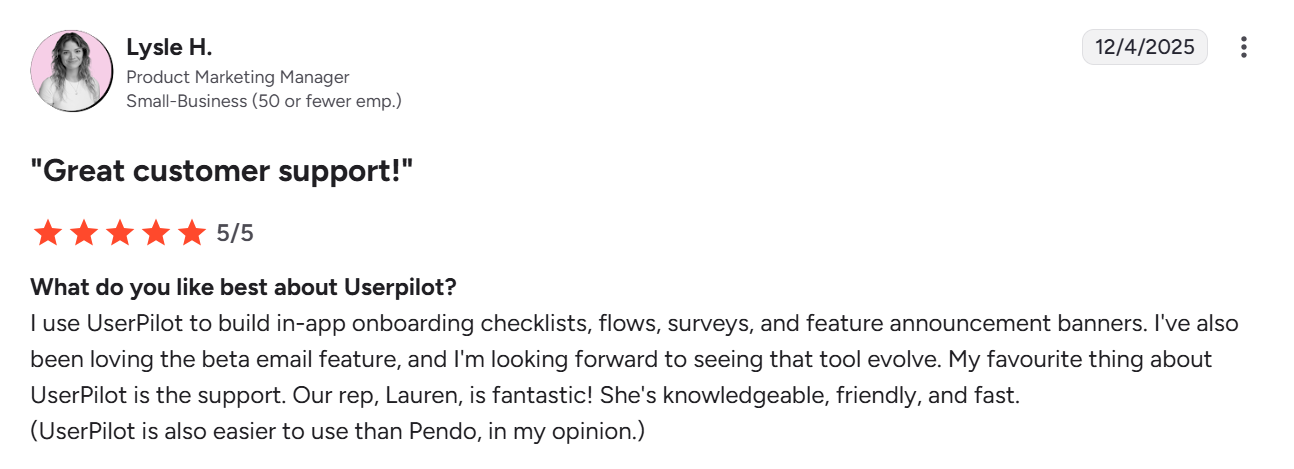
Userpilot: Best for teams looking for the closest Pendo alternative with more value for money
Userpilot doesn’t come first on this list because it’s the best Pendo alternative, since that depends on your specific needs. However, it’s the closest in terms of feature coverage for SaaS use cases.
As an all-in-one digital adoption platform, it offers product analytics, in-app guidance, and user feedback in a single code-free platform.
Many teams switching from Pendo choose Userpilot because it’s easier to use, more transparent in pricing, and better suited to nuanced use cases that directly support user success. For example, we have a customer who switched because our localization supports right-to-left languages, while Pendo doesn’t.
G2 Rating: 4.6/5 ⭐

Key features
- Truly no-code: From creating onboarding flows to segmenting users and adjusting UI patterns, Userpilot equips product teams to build and launch in-app experiences without relying on engineering teams. Compared to Pendo’s heavier setup and navigation, this leads to faster iteration and less back-and-forth with technical teams.
- Real-time, actionable analytics: Userpilot makes it easy to analyze product usage, conduct A/B tests, and act on insights immediately. By comparison, Pendo’s data processing introduces delays, with analytics typically not available in real time due to its data pipeline. According to Pendo’s own documentation, data visibility can take up to an hour depending on processing stages. In addition, Pendo relies more heavily on custom report setup, with fewer ready-to-use dashboard templates, which slows down time to insight.
- Flexible feedback collection at a better price point: Userpilot allows teams to collect user feedback through NPS, CSAT, CES, and fully customizable in-app surveys without gating access behind enterprise tiers. While Pendo has expanded its survey capabilities beyond basic polls, these features are only available in its Ultimate plan. Pricing for this tier isn’t publicly disclosed, but Vendr data shows Pendo contracts averaging around $48,500 annually, with larger contracts reaching up to $146,000 per year. In contrast, Userpilot includes robust survey functionality at a significantly lower entry point, making it easier for teams to collect user sentiment and act on it without committing to enterprise-level pricing.
- Built for continuous optimization, not just setup: Userpilot is evolving toward a more proactive model with its upcoming AI-powered growth agent. Instead of manually identifying drop-offs or opportunities, the agent can surface insights, suggest improvements, and trigger actions that drive adoption.
Pricing
Userpilot’s pricing plan starts at $299 per month, billed annually.
When to choose Pendo vs. Userpilot?
Go with Pendo if you’re a large enterprise, don’t mind the cost, and have dedicated teams to manage analytics, onboarding, and feedback across separate modules.
Choose Userpilot if your goal is to move faster with fewer dependencies. It’s a better fit if pricing predictability matters or if you need more flexible user engagement features and a wider range of in-app surveys.
Don’t take my word for it. Here’s what Matthew says after Shelterluv migrated to Userpilot:
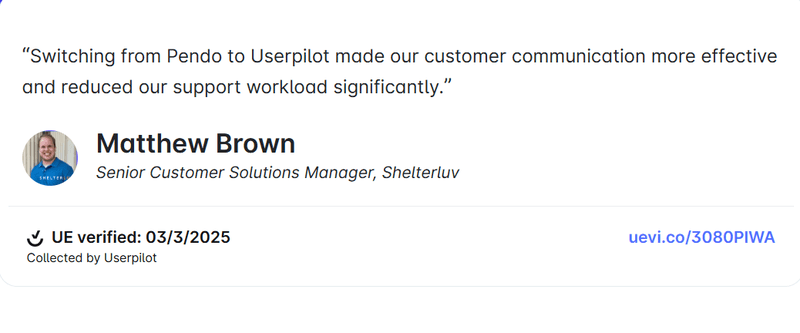
👉 See more examples of companies that migrated from Pendo to Userpilot and why.
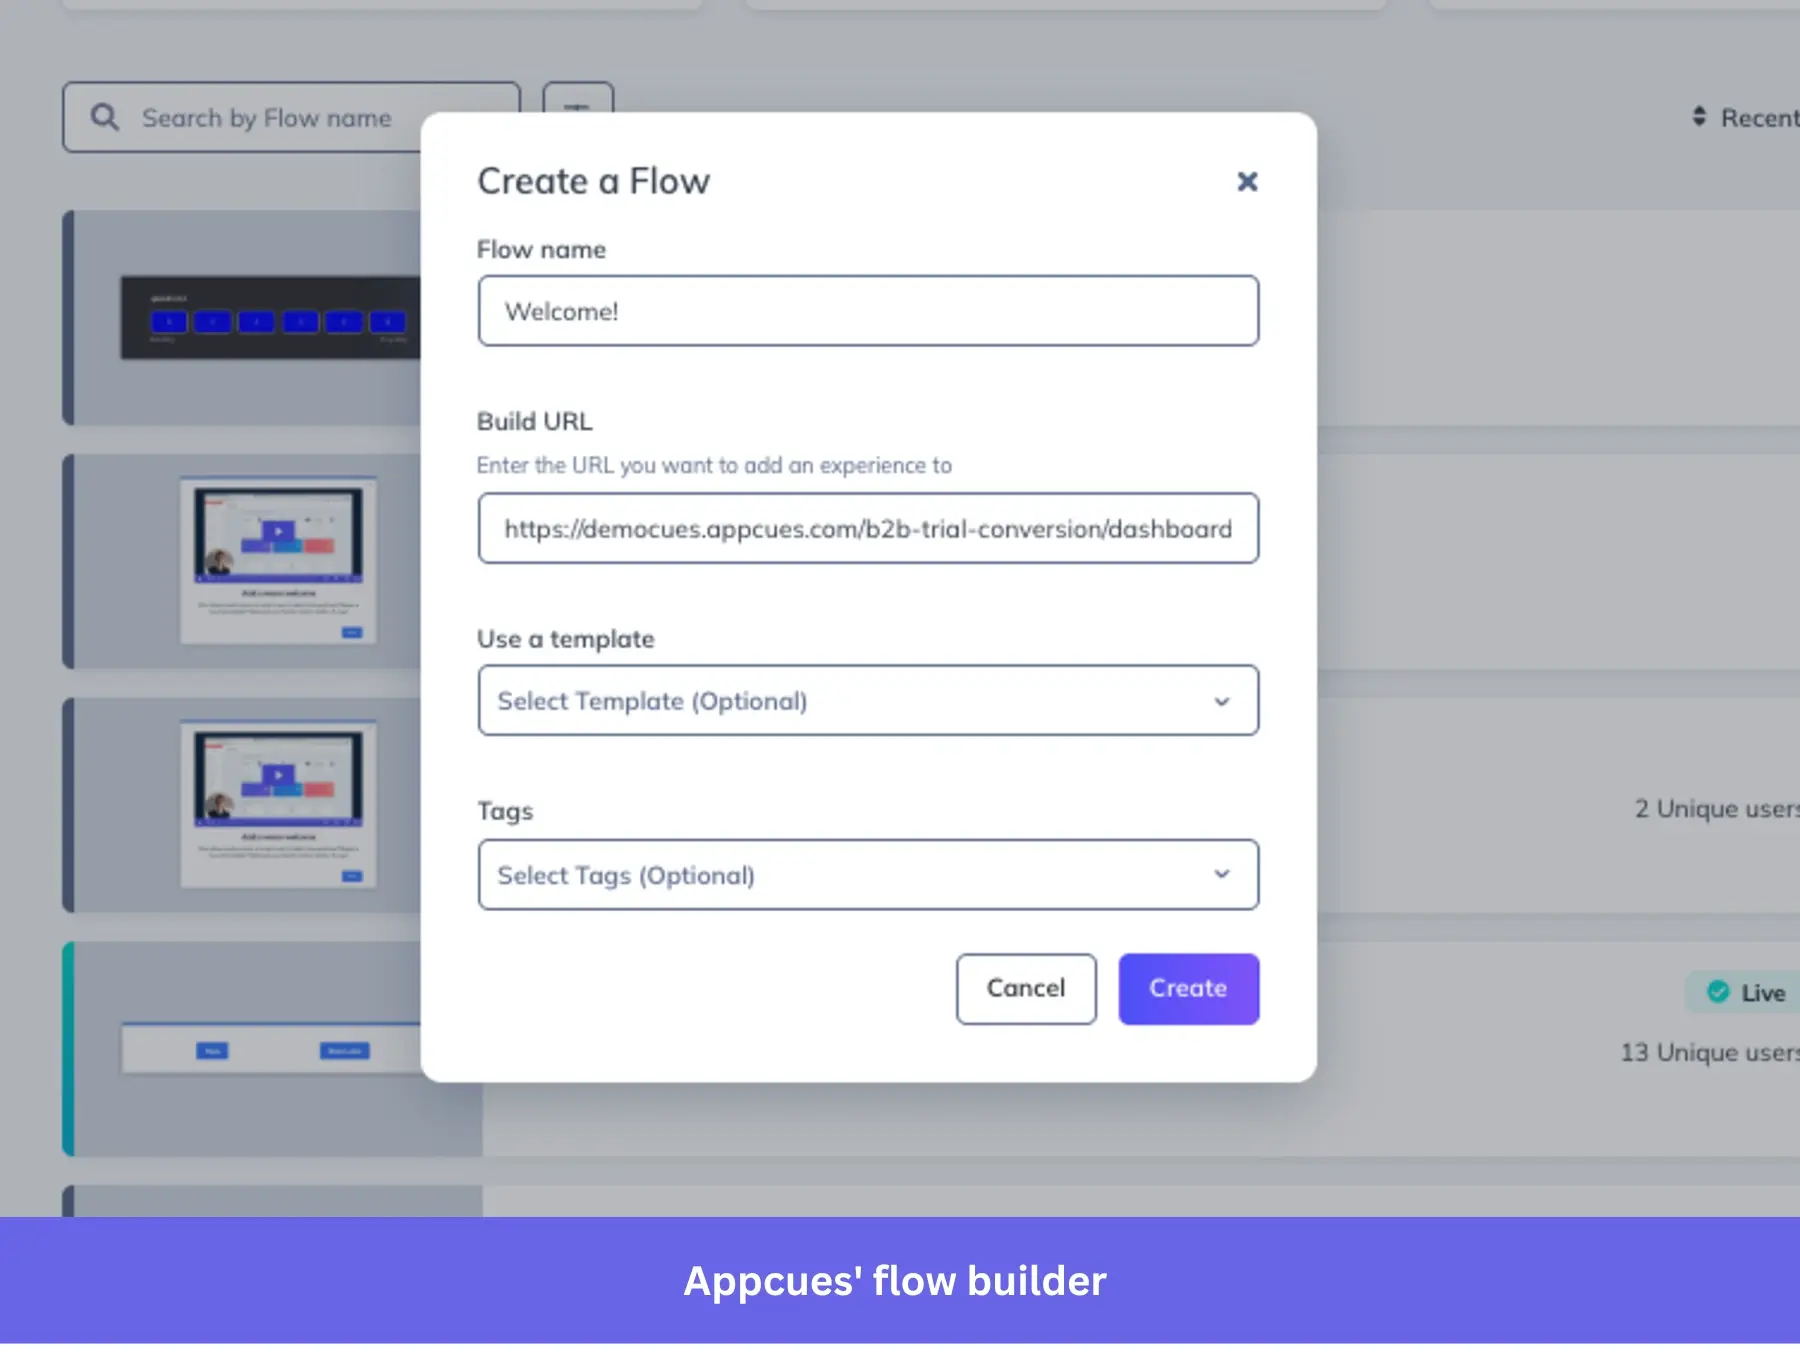
Appcues: Best for cross-platform onboarding across web and mobile
Appcues is one of the closest alternatives to Pendo in terms of feature coverage for onboarding and in-app engagement. Like Userpilot, it lets you build product tours, tooltips, announcements, and UI-driven flows without engineering support.
The main trade-off is on the analytics side. While Pendo combines onboarding with deeper product analytics, Appcues focuses more on helping teams ship experiences quickly rather than analyze behavior at scale.
G2 Rating: 4.6/5 ⭐
Key features
- Cross-platform onboarding with a unified workflow builder: Appcues allows you to manage onboarding across web and mobile from a single interface. Using its Workflows feature, you can link these experiences so a user moves from a web action to a mobile step within the same logic. While you still design the UI for each surface, you orchestrate them as one continuous journey rather than disconnected items. In contrast, Pendo’s mobile guides are configured independently from web guides, which increases setup time and makes it harder to maintain a seamless cross-platform flow.
- Event-based triggering without heavy setup: Appcues lets you define and use custom events directly within the platform, and you can apply them to targeting and triggering logic as soon as you create them. This means your onboarding flows can respond quickly to user behavior without requiring extensive instrumentation or waiting for data processing. Pendo, by comparison, uses a combination of feature tagging and Track Events, which typically require prior setup, and, as I mentioned earlier, event data can take time to process before it becomes available for segmentation or guide targeting. This difference makes Appcues more flexible when you need to adjust onboarding logic quickly based on evolving user behavior.
- Faster iteration on in-app experiences: Appcues is optimized for speed when building and updating flows. You can create, preview, and publish experiences quickly, then adjust targeting or content without navigating multiple modules. Pendo separates features across areas like Guides, Data Explorer, and Listen, which can add friction when iterating on onboarding tied to analytics.
Pricing
Appcues’ pricing now starts at $750/month for 1,000 MAUs. This is a notable shift from its earlier entry point of $250 monthly.
They offer tailored options for early-stage startups and smaller teams, but these are typically available through sales conversations rather than self-serve plans.
When to choose Pendo vs. Appcues?
Choose Pendo if you’re a data-heavy team. Compared to Appcues, Pendo is the tool you open when you’re trying to understand what’s happening across your product before deciding what to build or change.
Appcues works better when you already know what needs improvement and just want to quickly ship onboarding flows, in-app announcements, or UI nudges.
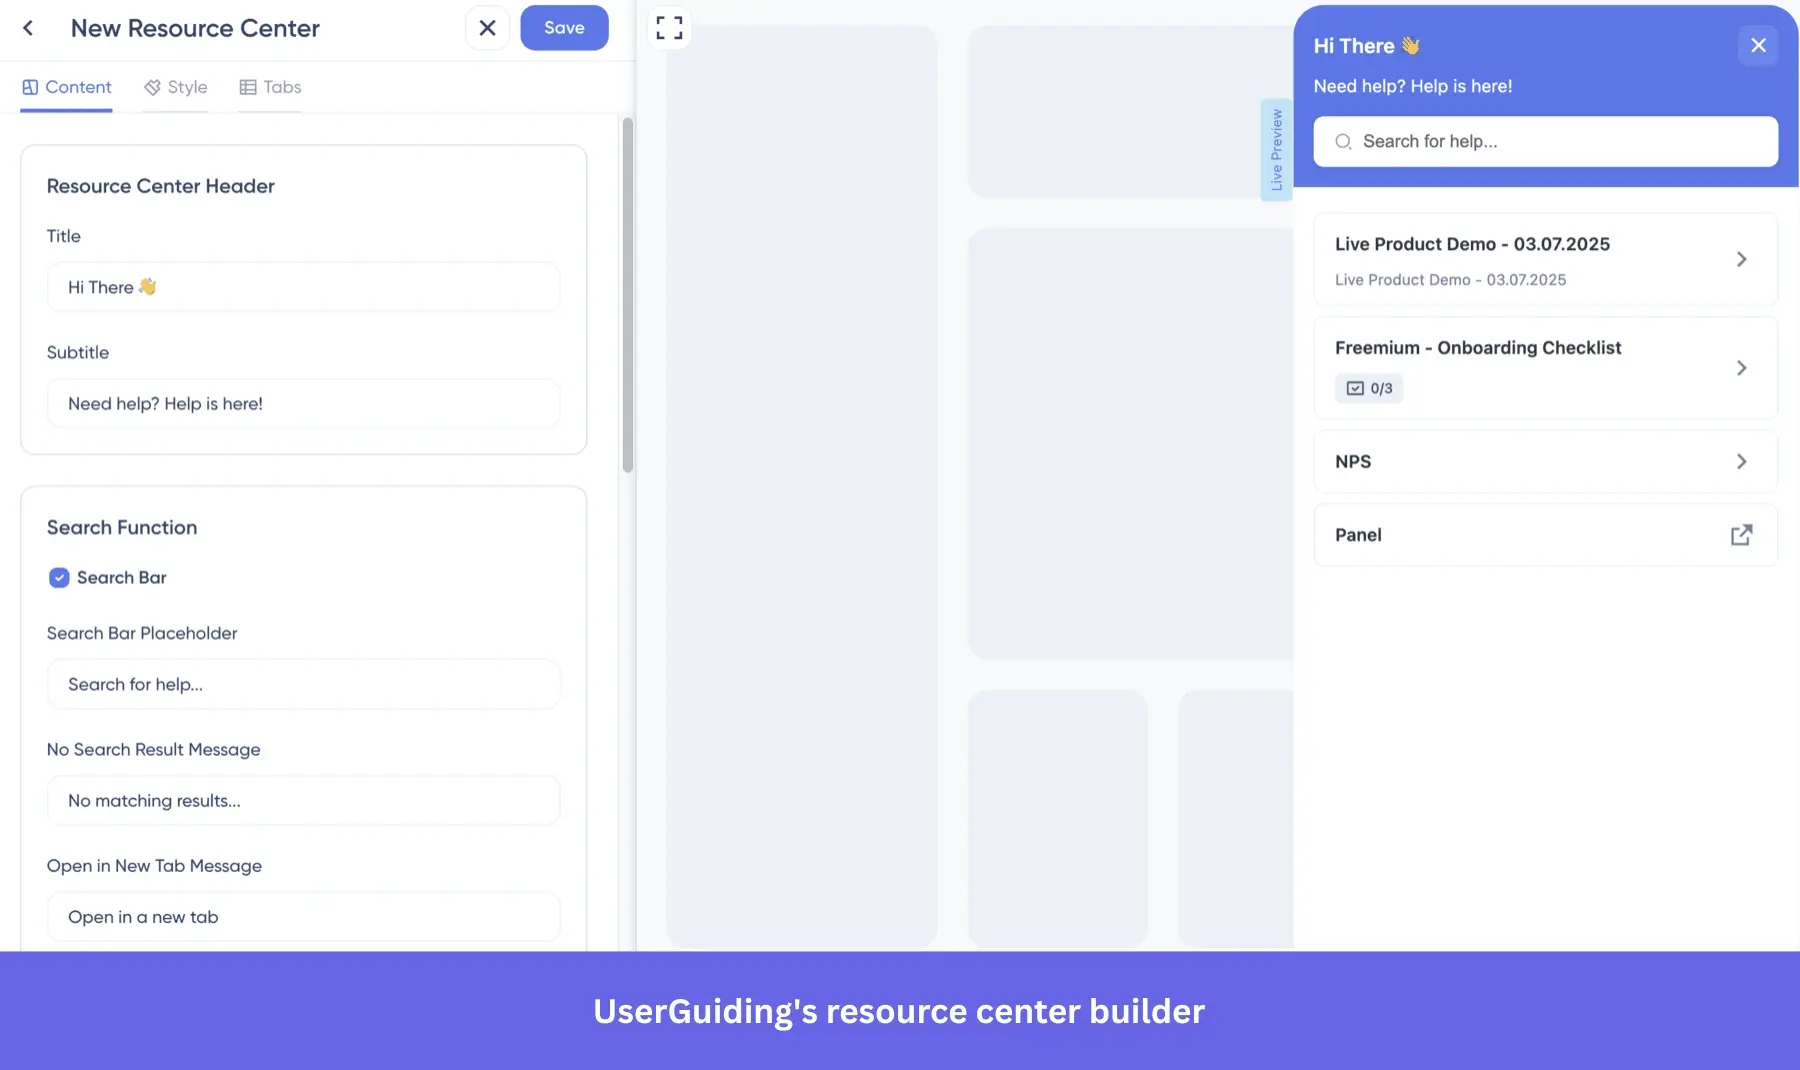
UserGuiding: Best for teams that want to start with in-app support for free
UserGuiding is a practical alternative to Pendo if you want to validate your onboarding and support needs before investing in a more complex platform.
Its free plan focuses on essentials like a resource center, knowledge base, and AI assistant, which lets you deliver help content inside your product without upfront cost.
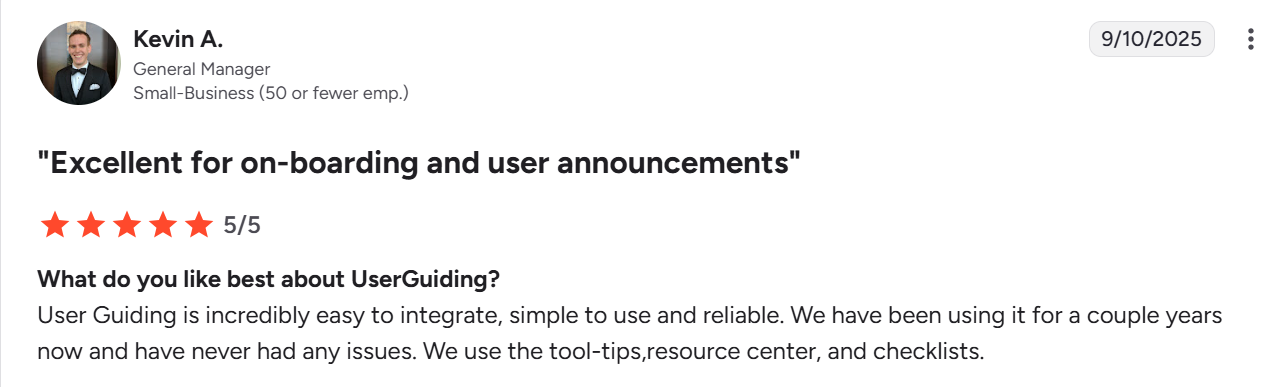
G2 Rating: 4.7/5 ⭐
Key features
- Layered onboarding without heavy setup: UserGuiding lets you build product tours, checklists, and onboarding flows without code, but its real advantage is how quickly you can deploy these without prior data setup. You can create experiences and target users based on simple attributes or page rules immediately. In contrast, Pendo often requires feature tagging and event configuration before guides can be meaningfully targeted, which slows down initial rollout.
- Built-in microsurveys: UserGuiding supports NPS, CSAT, and CES, and custom surveys out of the box. Pendo, on the other hand, provides these functionalities as add-ons, unless you’re on its highest tier.
- Native resource center as a starting point: UserGuiding’s resource center is available early in its pricing structure and is designed to act as a central hub for guides, FAQs, and announcements inside the product. In Pendo, similar functionality through the resource center is typically tied to higher plans, which means teams often need to invest more before offering a comparable in-app support experience.
Pricing
UserGuiding’s pricing starts at $174/month for 2000 monthly active users.
When to choose Pendo vs. UserGuiding?
As I mentioned, UserGuiding is the better option if your goal is to build quick onboarding flows without overcommitting to a heavier tool. You won’t get advanced customer segmentation or detailed behavioral analytics, but for early-stage teams, the basic features are often enough.
Go with Pendo if your team needs deeper visibility into user behavior and wants to tie onboarding decisions to product analytics at a more granular level.
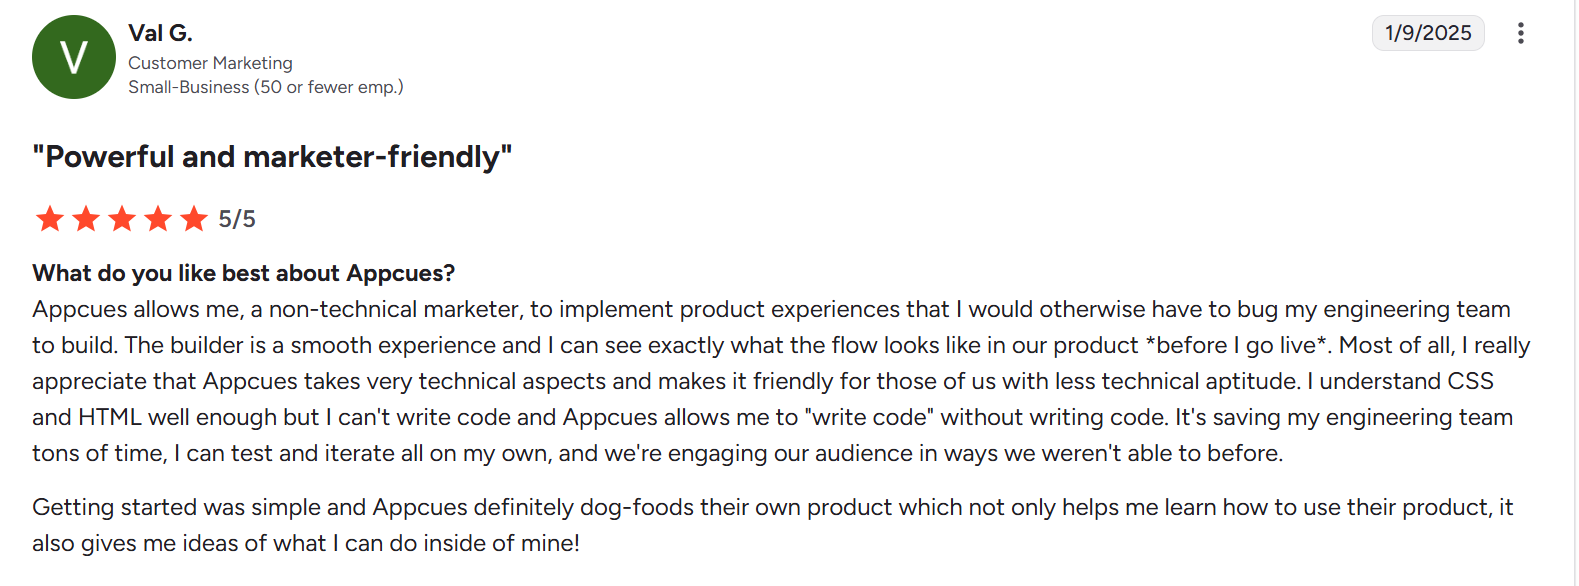
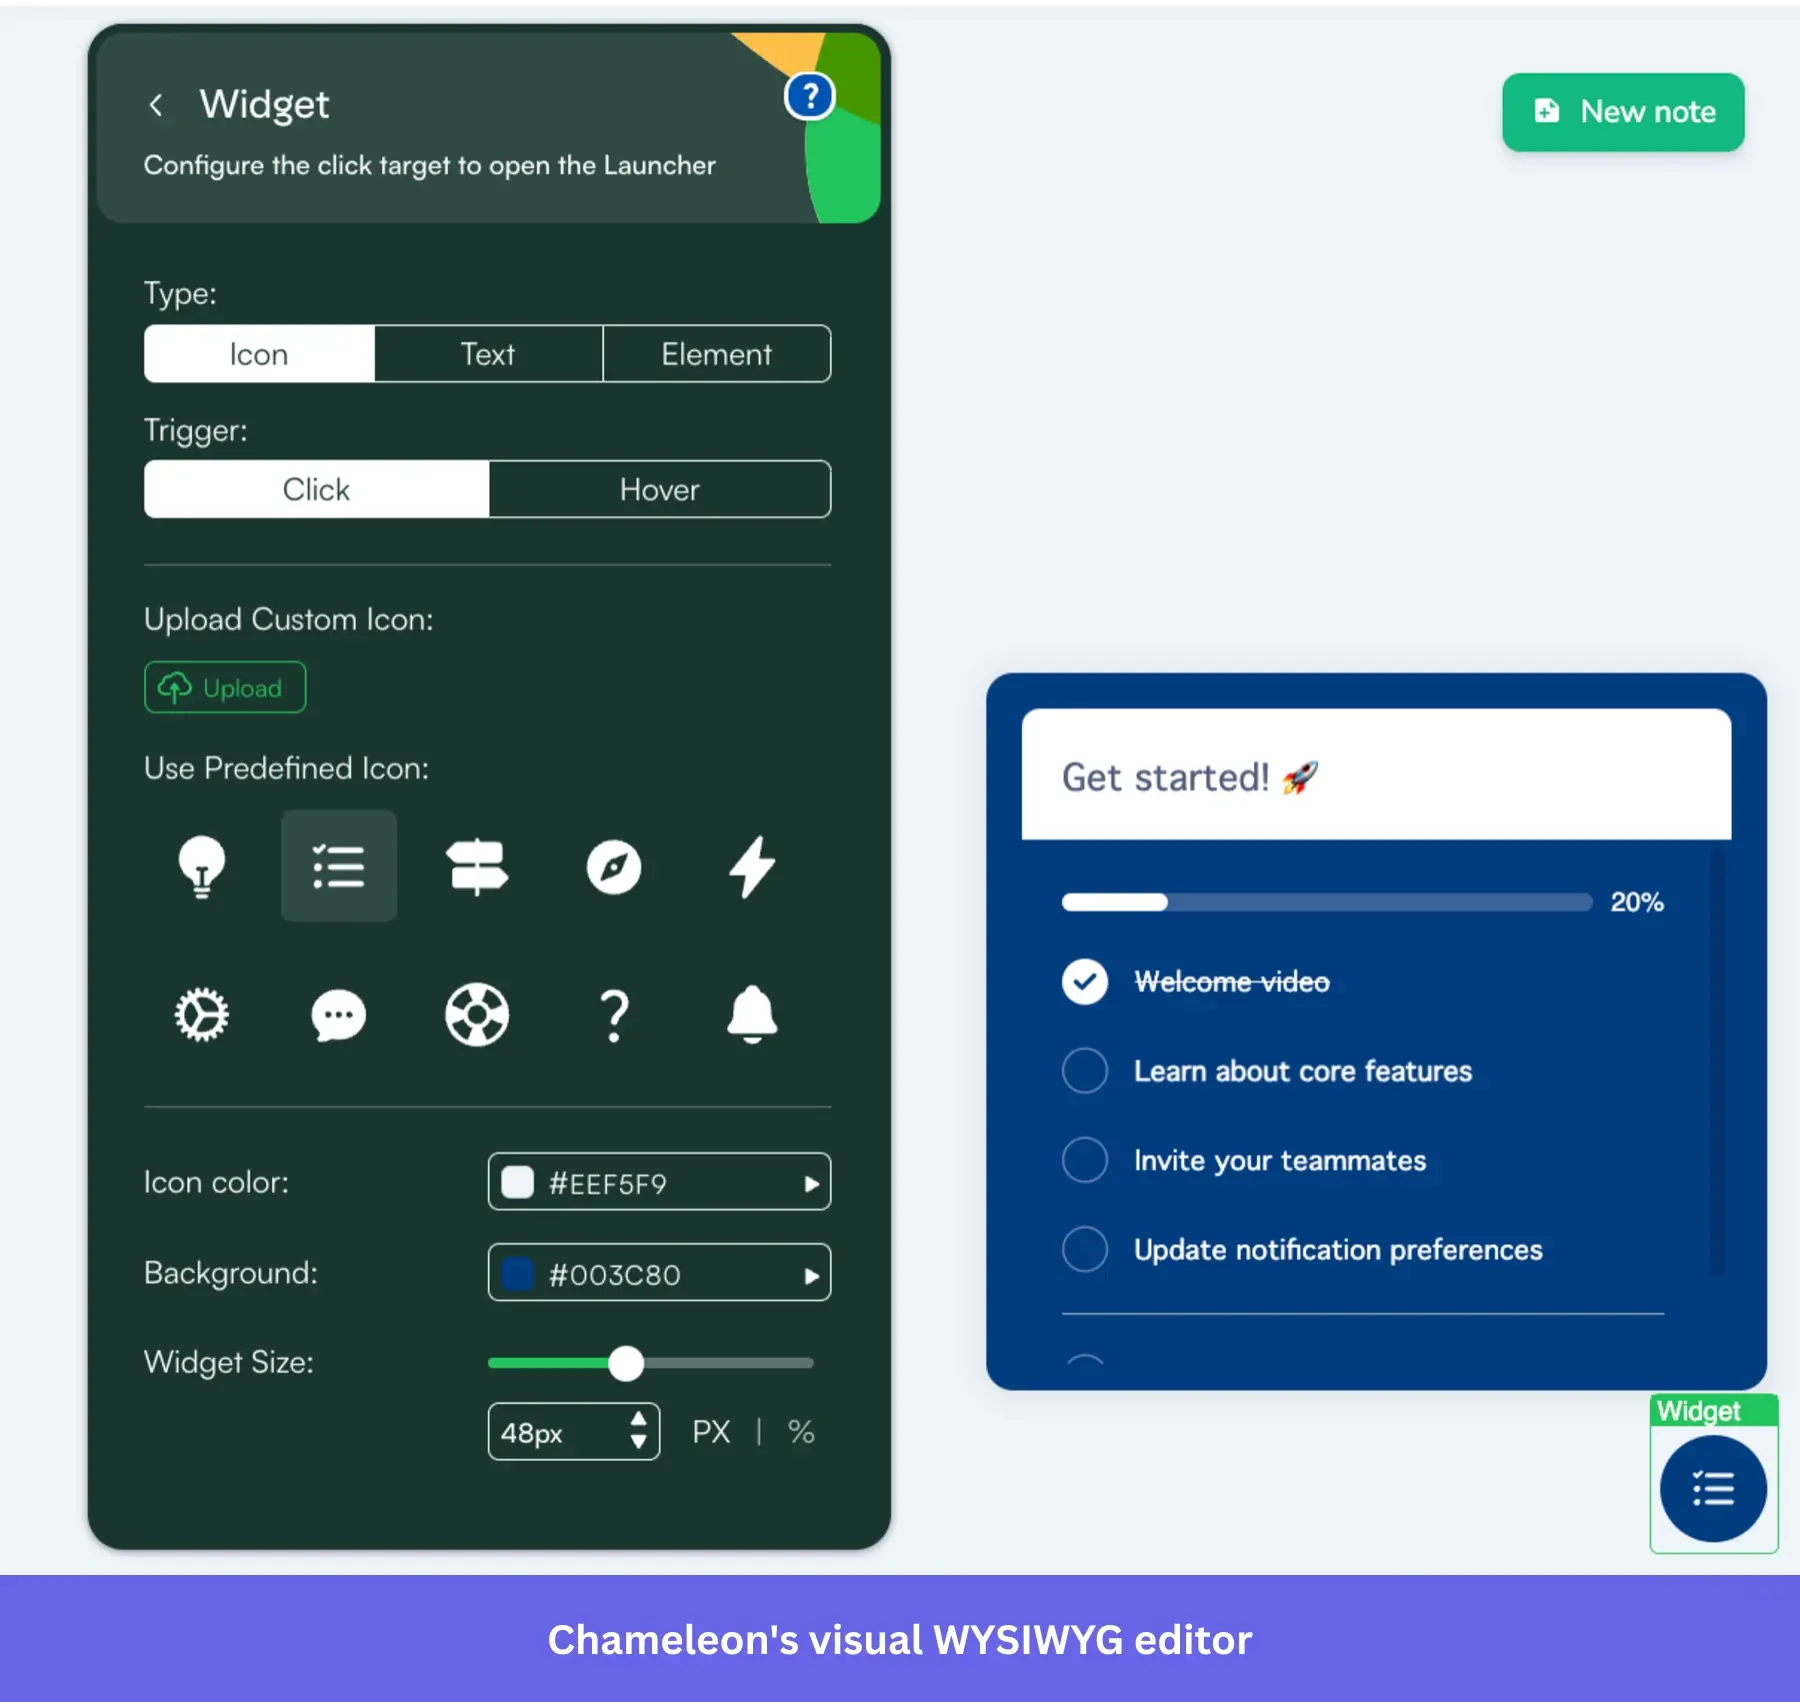
Chameleon: Best for advanced customization and full control
Chameleon is built for teams that want deep control over in-app experiences.
Instead of relying on predefined UI patterns alone, it allows technical teams to embed and customize experiences so they feel native to the product.
G2 Rating: 4.4/5 ⭐
Key features
- Governance and version control for complex deployments: Chameleon provides structured control over in-product experiences through flow versioning, workspace-level permissions, and a built-in history log that records changes over time. It also supports performance monitoring at the experience level, with integrations that send alerts through tools like Slack or email when engagement drops or issues arise. Pendo offers Guide display alerts when a step fails to load as intended, but it lacks automated notifications tied directly to performance metrics, making it harder for teams to proactively optimize flows before engagement drops.
- More flexible UI patterns with deeper customization: Like every other onboarding tool, Chameleon supports modals, banners, tooltips, hotspots, and embedded cards, but the key difference is how much control you have over them. You can customize styling, positioning, and behavior to match your product’s UI more closely than most tools allow. In Pendo, Guides are built within a more structured system with predefined layouts and limited styling unless you move to higher tiers or use custom code. Here’s how a Reddit user puts it:
- SDK and developer workflow control: Chameleon includes an SDK and API layer that enables teams to trigger experiences programmatically, pass custom properties, and control when and how flows appear based on application state rather than predefined rules alone. Pendo also provides an SDK that enables guide delivery and user tracking, but its Guide triggering model is more closely tied to tagged elements and predefined segmentation rules within the platform. As a result, while Pendo works well for standard onboarding and messaging scenarios, it offers less direct programmatic control for developers who need to orchestrate experiences dynamically or integrate tightly with custom application workflows.
Pricing
Chameleon’s pricing starts at around $3,348 per year for 1000 monthly tracked users.
When to choose Pendo vs. Chameleon?
Choose Pendo if you like its analytics features and don’t mind a more standardized approach to building user experiences.
Chameleon is the no-brainer if you care about how user experiences look and behave. It gives you far more control over styling, targeting, and flow design.
ProductFruits: Best for AI-generated onboarding implementation
ProductFruits deserves credit for being one of the earlier tools in the category to lean into AI-assisted onboarding.
Pricing is also one of its clearest selling points. Starting at $96/month billed annually, it’s among the most affordable options in the space, and it includes unlimited team seats across all plans, which matters as your internal team grows.
That said, it’s a focused tool. If you’re primarily looking to get basic onboarding up and running quickly without a big budget, it does that well.
G2 Rating: 4.7/5⭐
Key features
- All-in-one onboarding and support without modular friction: ProductFruits unifies onboarding flows, checklists, and in-app guidance with a natively built-in help center and knowledge base. This allows users to complete tasks and access documentation within a single, cohesive interface without the need for external integrations. Pendo provides a similar experience through its resource center, but it often functions as a container for external help docs rather than a native repository.
- Feedback collection with built-in visual context: ProductFruits allows users to submit feedback directly from the app with screenshots and screen recordings attached to their message. This enables teams to see exactly what the user experienced without tedious back-and-forth. While Pendo supports feedback collection through its Listen module, it lacks a native way for users to manually attach visual proof like recordings to their requests.
- AI-Powered automation and one-click localization: ProductFruits provides an AI Copilot that can automatically generate tours from your existing documentation and provide real-time, multilingual support by answering user questions directly from your knowledge base. It also features one-click AI translations, allowing you to localize onboarding content into dozens of languages instantly without leaving the platform. Pendo provides robust localization settings, but the translation process typically requires manual content synchronization or third-party integrations.
Pricing
ProductFruits’ pricing starts at $111/month (billed annually) for 1,500 MAUs.
When to choose Pendo vs. ProductFruits?
ProductFruits works well when your priority is user onboarding and in-app help, without the overhead of a more complex platform.
Choose Pendo if onboarding is just one part of a broader strategy that also requires product analytics, advanced segmentation, and tighter connections between user behavior, feedback, and in-app experiences.
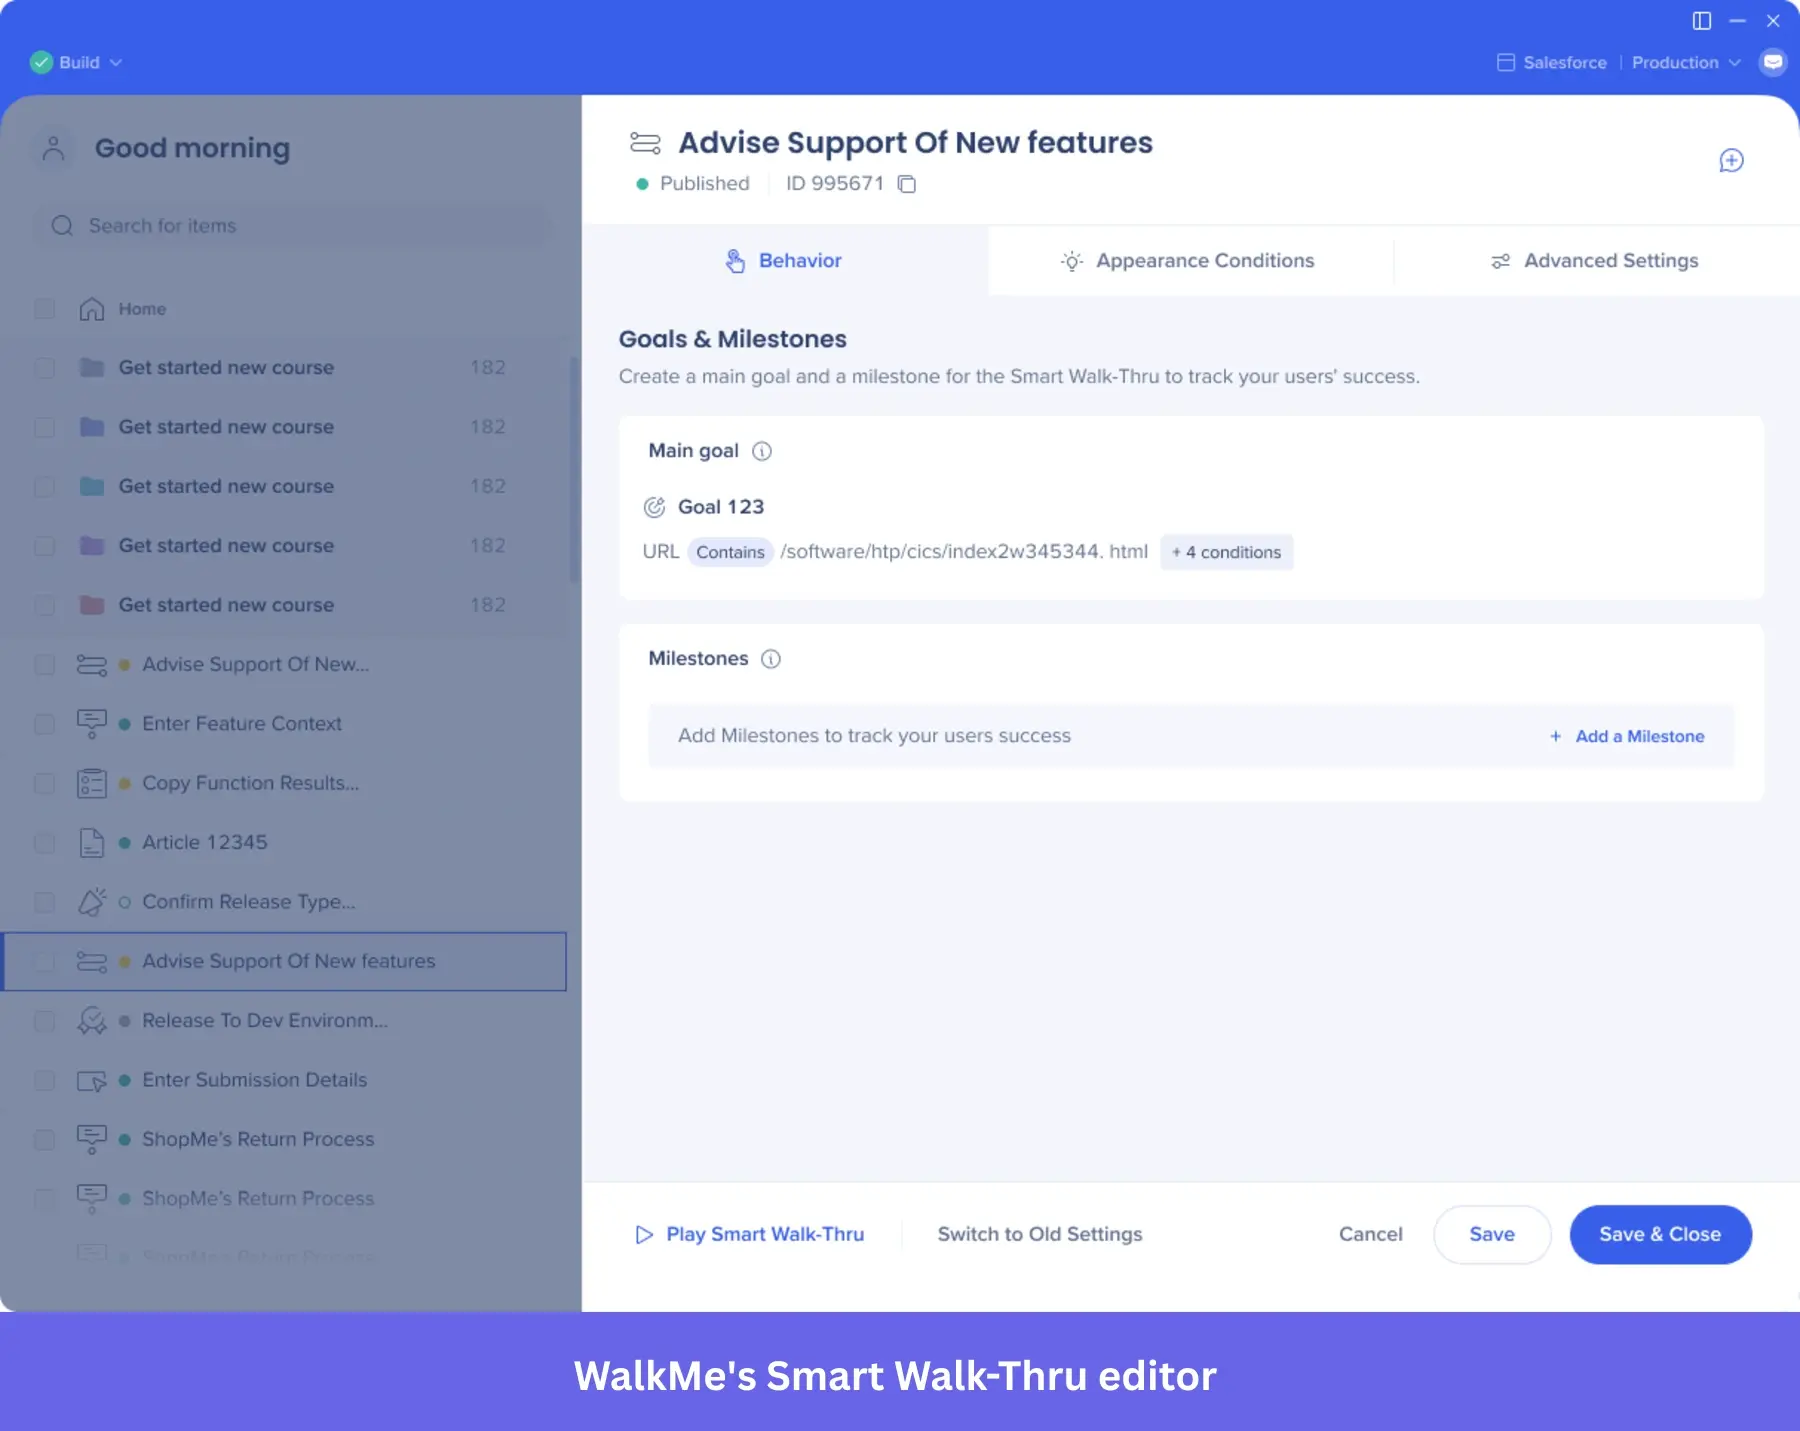
WalkMe: Best for enterprise digital transformation and workflow automation
WalkMe is a leading digital adoption platform designed for organizations that need to manage how work gets done across multiple enterprise systems. It provides extensive features to guide users through complex processes and reduce friction in day-to-day operations across tools like CRMs, ERPs, and internal platforms.
G2 Rating: 4.5/5 ⭐
Key features
- Process-level guidance across multiple systems: WalkMe’s Smart Walk-Thrus, SmartTips, and ShoutOuts are designed to guide users through entire workflows, not just isolated UI interactions. For example, you can guide an employee through completing a task that spans multiple steps inside a CRM or ERP system, ensuring each step is followed correctly. In Pendo, guides are typically tied to individual features or pages within a single product, which makes them less effective for cross-system processes or multi-step operational tasks.
- Workflow automation, not just guidance: WalkMe can automate actions inside applications, such as auto-filling fields, triggering clicks, or advancing users through repetitive steps. This means users don’t just get instructions; the platform can actively assist in completing the task. Pendo, by comparison, focuses on guiding users through tooltips and flows but doesn’t execute actions on their behalf. This distinction is critical in enterprise environments where reducing manual effort and enforcing consistency are priorities.
- System-wide visibility and license optimization: WalkMe’s Discovery module tracks how employees use different applications across the organization, helping teams identify unused licenses and underutilized tools. This goes beyond product analytics by providing visibility across the entire tech stack, not just a single application. Pendo’s analytics are primarily product-centric, which makes them useful for understanding user behavior within your product, but less effective for optimizing software usage across multiple internal systems.
Pricing
Walkme is also not public about its pricing, so again, I checked with Vendr and other sources. Publicly available data suggests a starting price of $14,000 per annum.
When to choose Pendo vs. WalkMe?
Pendo is the more natural fit if your focus is on understanding how users interact with your product and improving adoption through insights and guidance.
WalkMe is built for a different scale of problem. It’s best used when you’re rolling out complex systems across large teams and need to reduce user friction at the process level, not just the feature level.
Whatfix: Best for enterprise employee and user onboarding
Like WalkMe, Whatfix is an enterprise-grade adoption platform. The difference is that Whatfix also actively supports training for external users, not just employees.
Also, Whatfix leans more toward structured training, documentation, and guided learning, making it easier to roll out across teams without the same level of customization or setup overhead.
G2 Rating: 4.6/5 ⭐

Key features
- Structured training embedded within applications: Whatfix goes beyond simple tooltips to provide a comprehensive training layer directly inside enterprise tools. It enables teams to deliver structured, repeatable learning modules that employees can revisit on demand to ensure process compliance. While Pendo provides effective in-app guides, its framework is primarily built for feature adoption and product-led messaging. It lacks the deep L&D-focused infrastructure, such as hands-on sandboxes and native training wikis, that make Whatfix a dedicated solution for enterprise-level employee enablement.

- Deep integrations with enterprise learning and content systems: Whatfix integrates with learning management systems, knowledge bases, and enterprise tools, allowing teams to connect in-app guidance with formal training programs and documentation. This means you can tie onboarding to existing learning workflows rather than managing it separately. In Pendo, similar experiences often rely on its resource center or external integrations, which are less tightly coupled with formal training systems and require additional setup to achieve the same level of alignment.
- Cross-application guidance with centralized management: Whatfix allows you to deploy and manage guidance across multiple applications from a single platform, which is useful in environments where employees work across several systems. For instance, you can standardize onboarding across a CRM, HR system, and internal tools while tracking progress centrally. Pendo’s analytics and guides are typically scoped to a single product environment, which limits its ability to support onboarding and training across a broader enterprise tech stack.
Pricing
Whatfix offers custom enterprise plans. Data from Vendr suggests a starting price of $25,000 per annum.
When to choose Pendo vs. Whatfix?
Choose Whatfix if you need to deliver structured onboarding and training across teams or user groups, especially when consistency matters. Its integration with learning management systems and built-in guidance make it easier to standardize how people learn and use complex tools.
Pendo is the better option when your focus is on understanding user behavior and using those insights to drive feature adoption and product decisions.
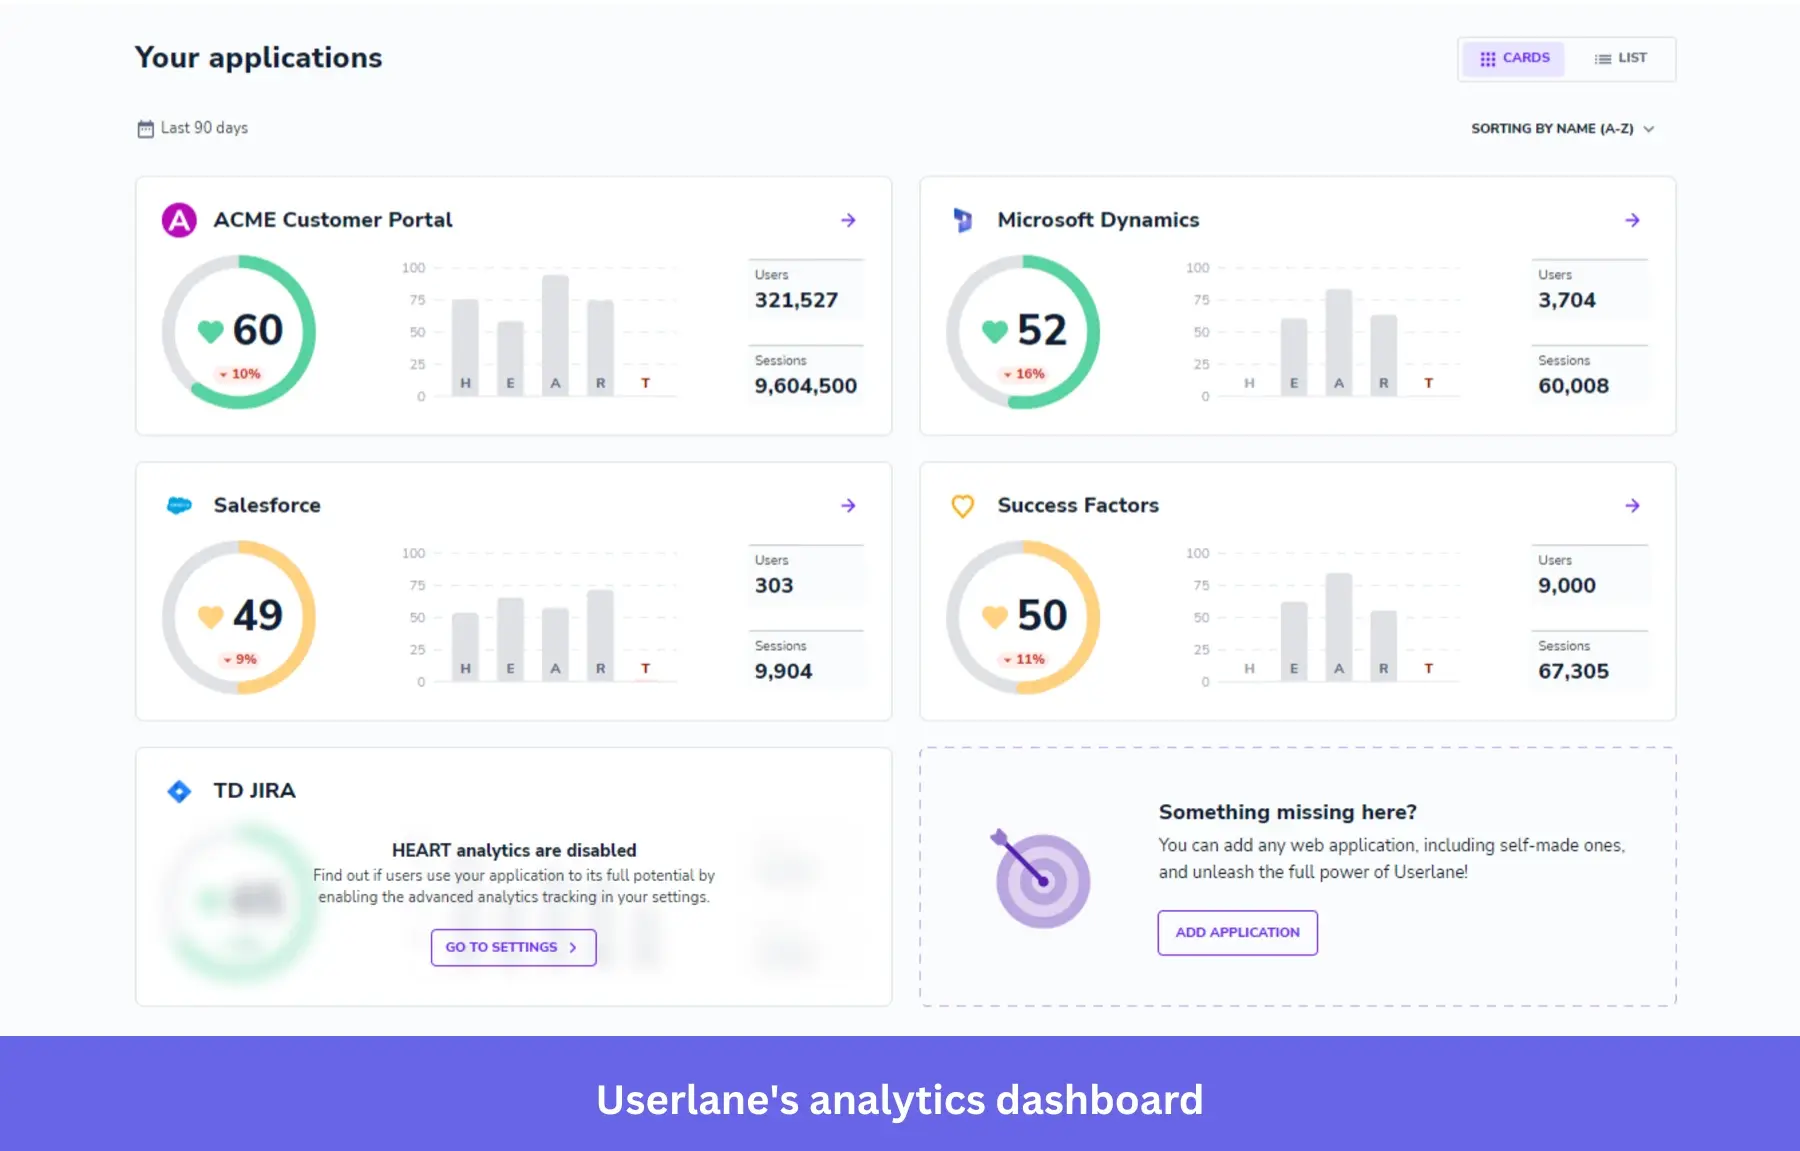
Userlane: Best for employee onboarding and change management
Userlane is built around guided, step-by-step user guides rather than flexible in-app experiences. It helps users complete tasks in real time through interactive walkthroughs and provides visibility into how users engage with workflows across different tools.
G2 Rating: 4.7/5 ⭐
Key features
- Process-driven walkthroughs for end-to-end task completion: Userlane provides interactive walkthroughs that guide users through entire business processes. While Pendo’s guides are excellent for feature discovery and broad communication, they’re primarily anchored to specific tooltips and modals. This makes them ideal for announcing product updates, but less effective than Userlane at ensuring users successfully navigate high-stakes workflows from start to finish.
- On-demand guidance embedded across workflows: Userlane allows users to access walkthroughs at any time while working, rather than relying only on triggered onboarding flows. This means employees can pull up guidance when they get stuck mid-task and continue from where they are. Pendo supports triggered guides, but it’s less focused on persistent, on-demand execution support within complex workflows, which limits its usefulness when users need continuous assistance.
- Cross-application analytics based on task completion: Userlane uses its own adaptation of the Google HEART framework (Happiness, Engagement, Adoption, Retention, Task Success) to provide a structured, multi-dimensional view of how users engage with enterprise applications. Pendo’s analytics are primarily product-centric, delivering deep, granular data on feature usage within specific applications. This makes Userlane better suited for executives who need to track process adoption and ROI across a broad enterprise ecosystem rather than just individual feature performance.
Pricing
Userlane’s pricing plans are quote-based, but customers report an average contract value of around $17,500.
When to choose Pendo vs. Userlane?
This choice usually comes down to whether you’re trying to analyze behavior or enforce it.
Pendo is the tool you rely on when decisions depend on funnels, feature usage, and segmentation. Userlane works better if you plan to guide users through complex processes and prevent avoidable mistakes.
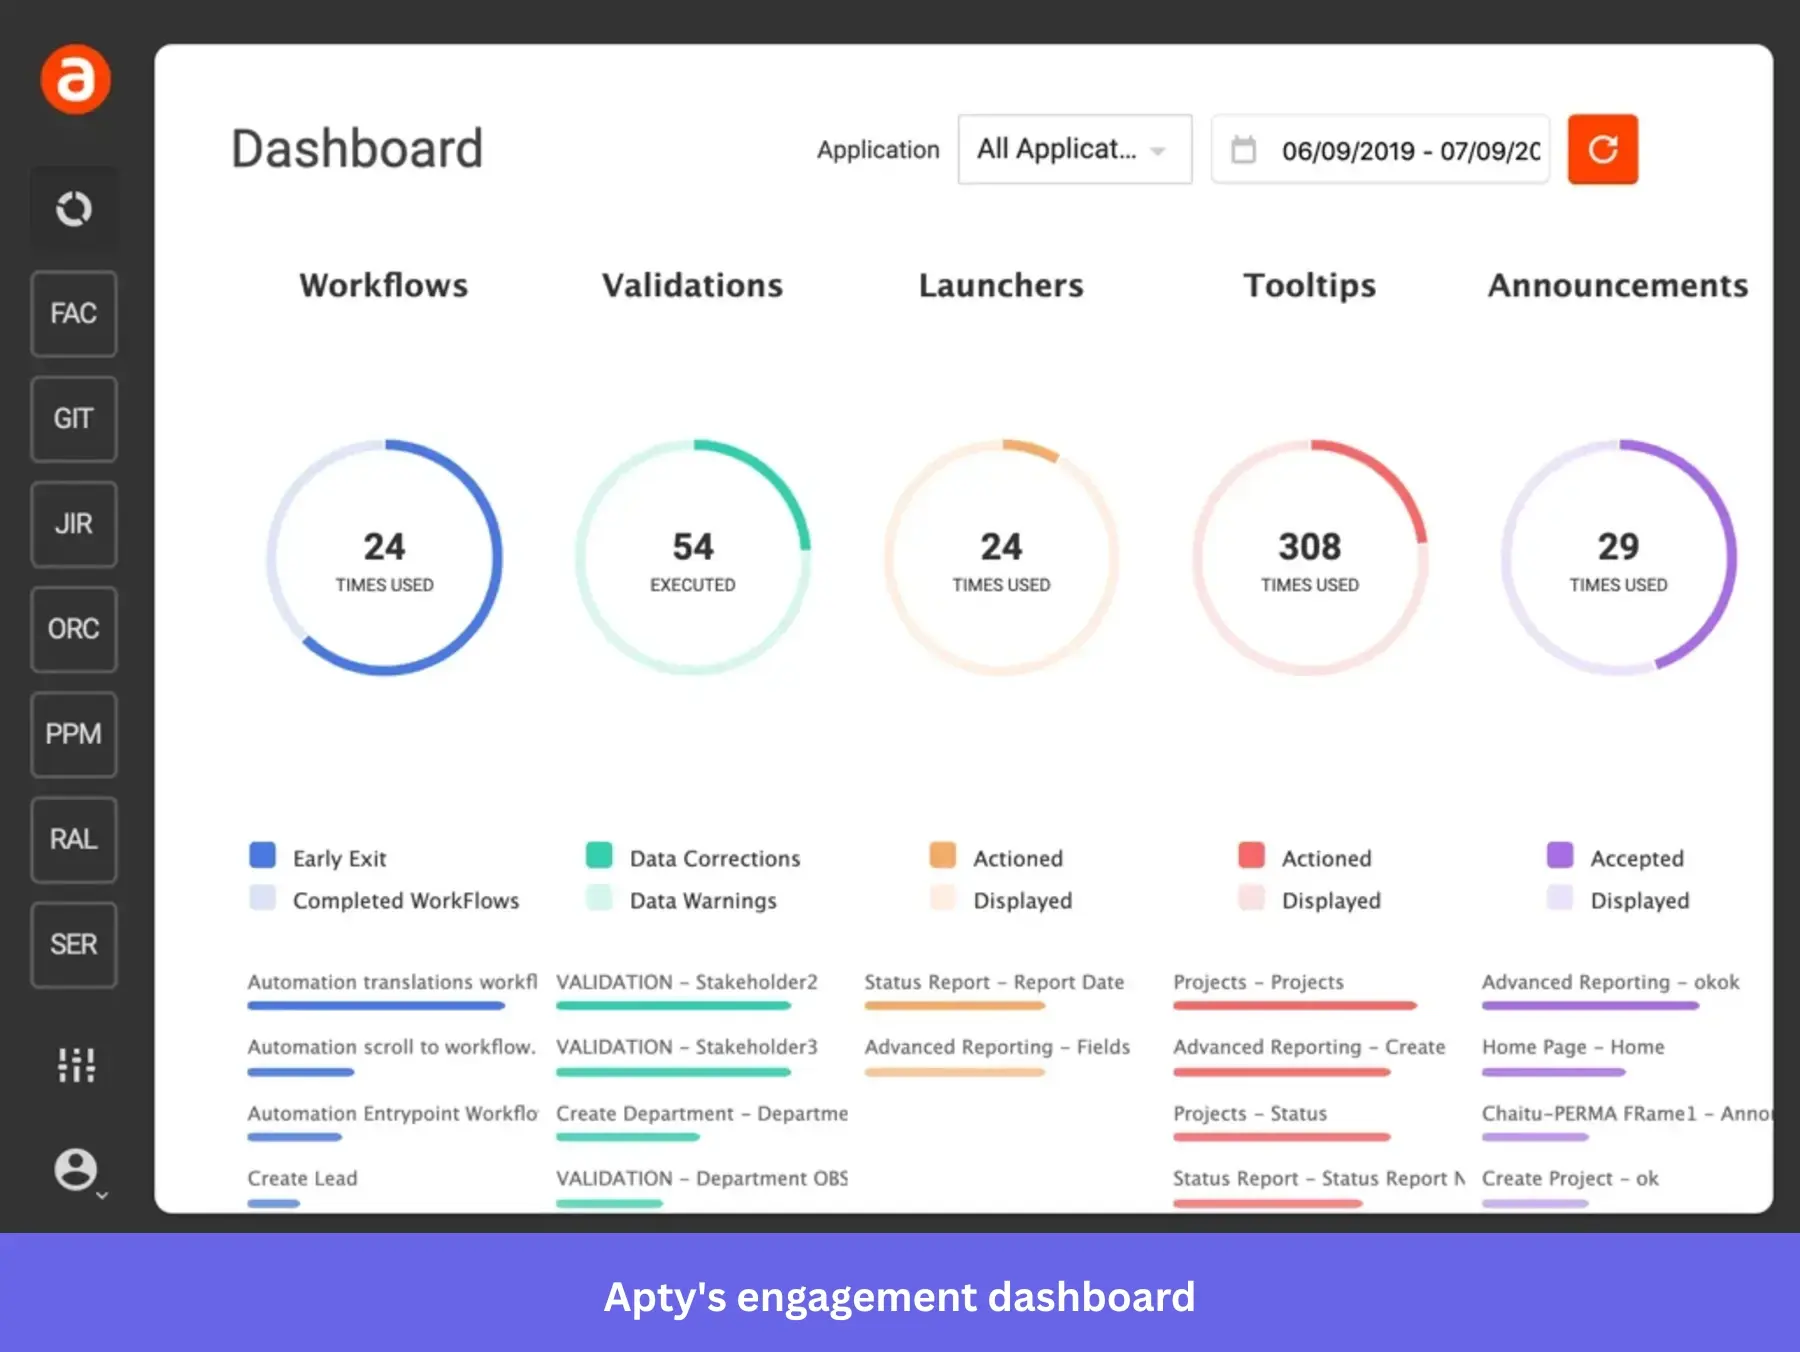
Apty: Best for AI-powered employee onboarding and process compliance
Similar to Userlane, Apty provides in-app guidance that walks employees through workflows inside systems like Salesforce or SAP.
The difference is in how each platform handles execution and control: Userlane focuses on guiding users through tasks, while Apty adds a stronger layer of automation, data validation, and process enforcement.
G2 Rating: 4.7/5⭐
Key features
- Process enforcement with real-time validation: Unlike standard guides that merely offer suggestions, Apty can validate field inputs in real-time and block form submissions if data is missing or incorrectly formatted. While Pendo excels at using tooltips to nudge users toward the right action and can even let you build a form validation guide, it lacks the native enforcement layer required to prevent incorrect entries at the point of entry.
- Workflow automation tied to business rules: Apty streamlines complex processes by automating repetitive tasks based on predefined business logic. Like WalkMe, it can auto-fill fields or dynamically skip steps when specific criteria are met, reducing manual effort and the risk of user error. While Pendo provides guides to help users navigate, it functions primarily as a visual aid and doesn’t enforce the underlying workflow logic.
- Process-level analytics across systems: Apty tracks how users complete workflows across tools, giving you visibility into where processes break down, how long tasks take, and where errors occur. Pendo’s product analytics provides feature usage, funnels, and user behavior insights, but the data isn’t granular enough to show you whether users are completing critical business processes correctly. For example, Pendo can tell you how many users clicked a “Create Opportunity” button, but it won’t show whether the opportunity was filled out correctly, submitted with complete data, or followed the required workflow steps.
Pricing
Apty’s pricing starts at $9,500 per app per year. Final costs vary depending on employee count, compliance requirements, and implementation complexity.
When to choose Pendo vs. Apty?
Pendo is better suited for understanding user behavior and improving product adoption.
Apty, on the other hand, is built for environments where following the right process is critical, whether that’s maintaining data accuracy, meeting compliance requirements, or standardizing how work gets done across teams.
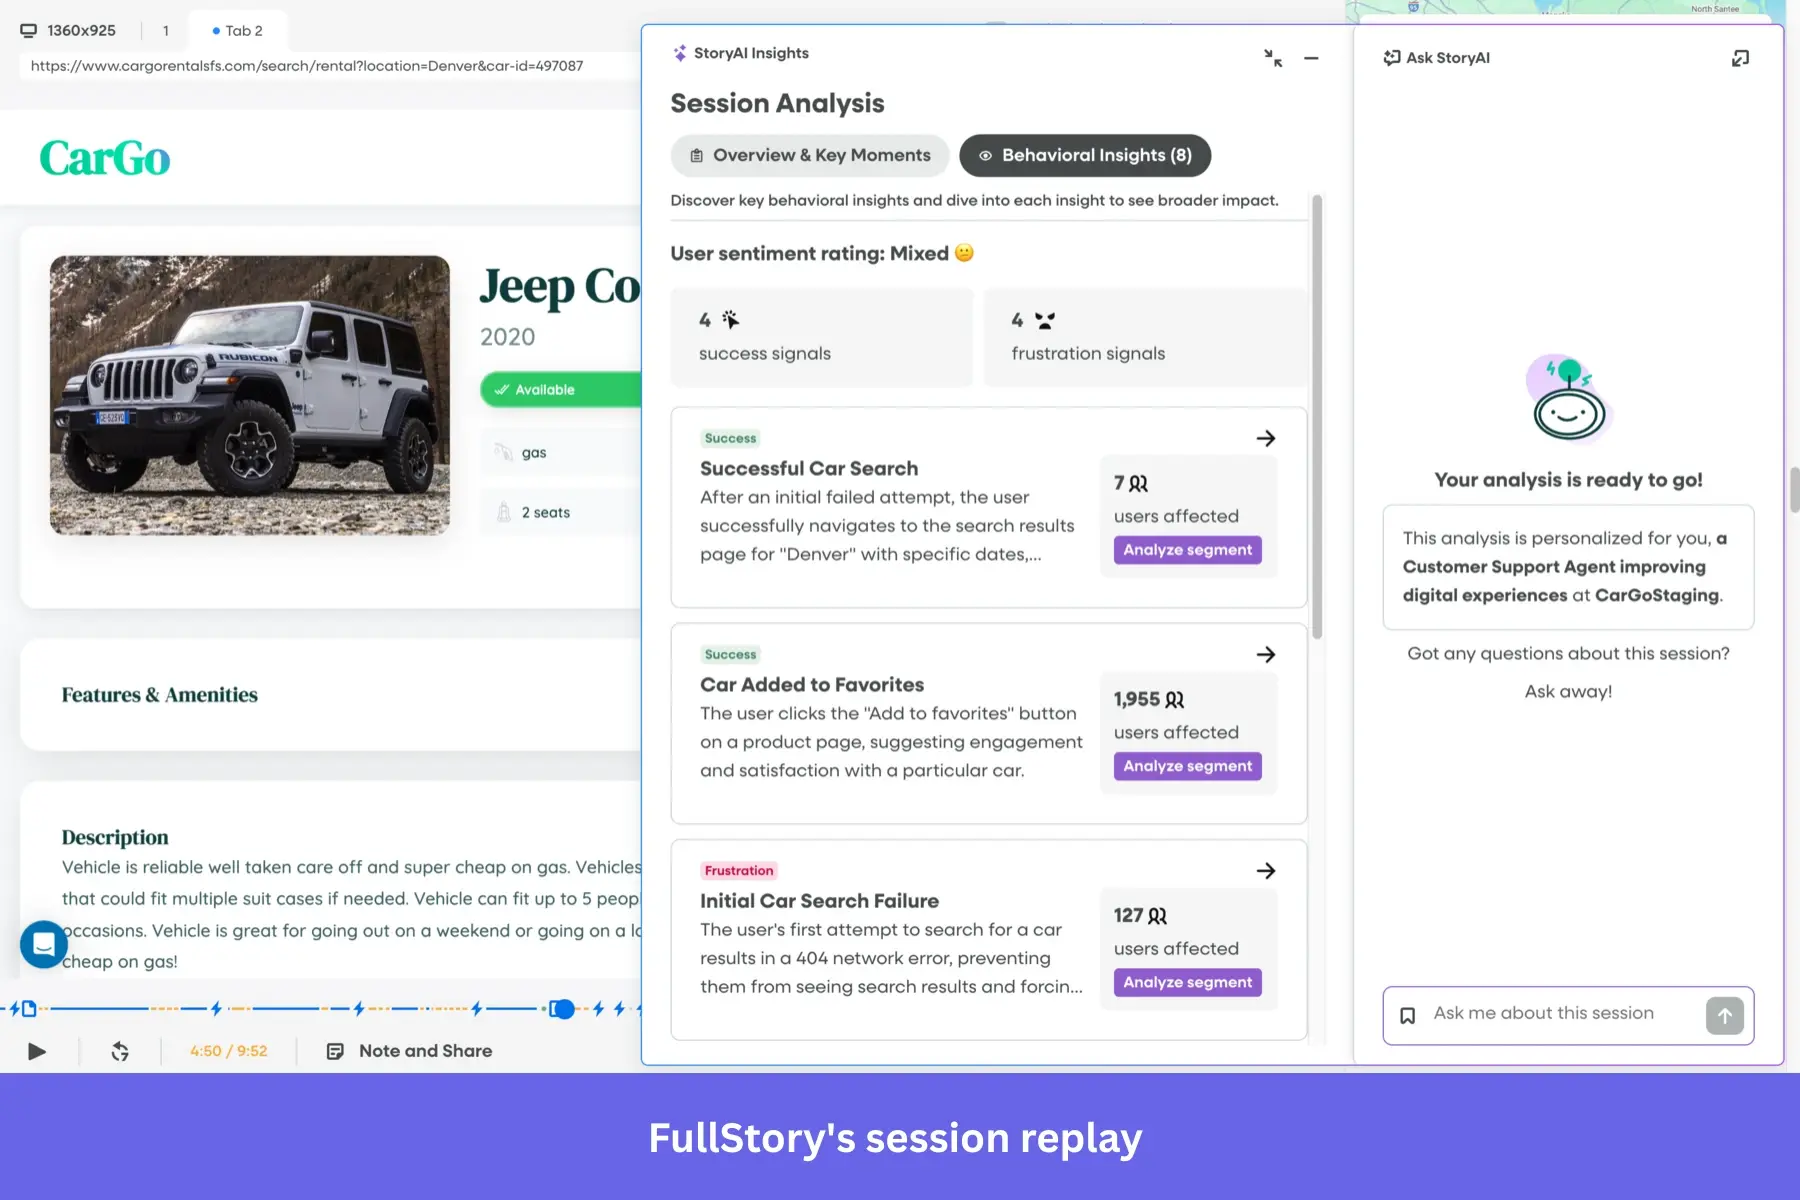
FullStory: Best for UX diagnostics and session replay analysis
FullStory helps teams understand user behavior through session replay and behavioral analytics. Its proprietary Fullcapture technology automatically records every user interaction without requiring manual event setup.
G2 Rating: 4.5/5⭐
Key features
- Advanced friction detection and technical diagnostics: FullStory uses auto-capture technology to automatically surface behavioral signals such as rage clicks, dead clicks, and browser console errors without manual tagging. This allows teams to instantly jump from a funnel drop-off to a session replay that includes the exact technical logs behind a failure. While Pendo has added frustration metrics to its platform, its insights are often more closely tied to predefined, tagged features. Compared to Pendo, FullStory remains the superior choice for deep root cause analysis.
- Searchable session replay across all user behavior: FullStory lets you run truly exploratory searches across all past user sessions. You can instantly filter for complex behavioral sequences and move from hypothesis to insight in seconds. Pendo has a session replay feature, but its analytics model remains primarily tag-dependent. Investigating unexpected issues in Pendo often requires you to have already defined the specific features or segments you’re interested in, making it a more structured tool for tracking known goals rather than an open-ended platform for uncovering unknown friction.
- Feedback and light user guidance: FullStory recently introduced Guides and Surveys to help teams act on insights. You can trigger simple in-app messages or collect feedback, but you won’t find the same depth of UI patterns, targeting logic, or flow-building capabilities available in tools like Pendo, Userpilot, or Chameleon.
Pricing
FullStory uses custom pricing, but Vendr data shows pricing typically starts at around $10,000 per year. The platform also offers a free plan with up to 30,000 sessions per month.
When to choose Pendo vs. Fullstory?
FullStory is the tool you reach for when something feels off in your product, and you need to see exactly why.
Pendo is better suited for acting on those insights. The fact that it combines analytics with user guidance, surveys, and in-app messaging means you can respond to issues without stitching together multiple tools. The downside is its modular pricing. If budget is a concern, a more practical approach is to pair FullStory with a lighter onboarding tool from this list.
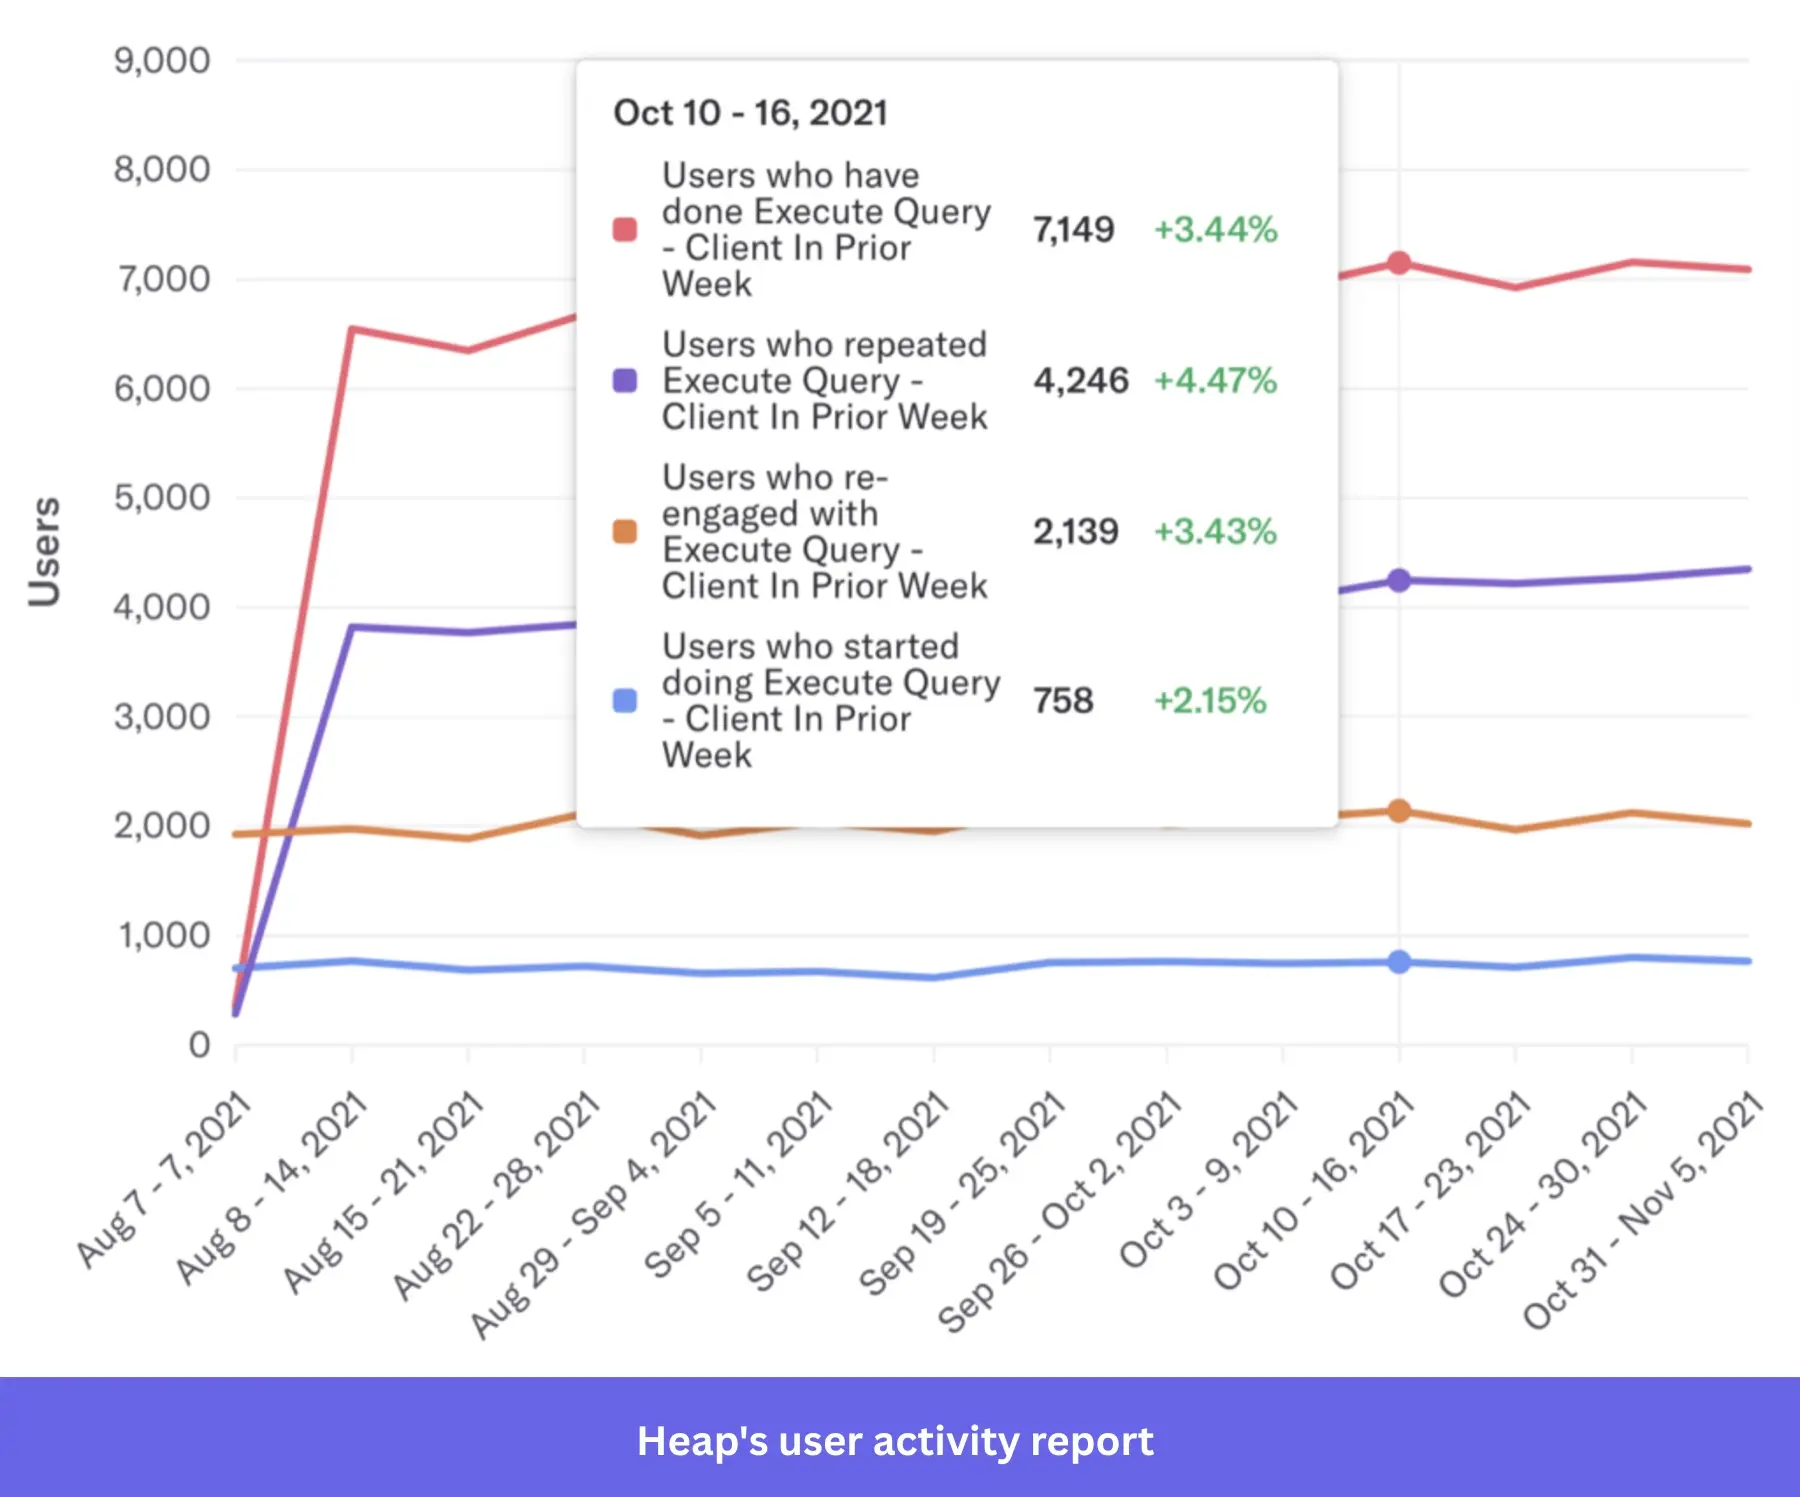
Heap: Best for automatic data capture across web and mobile
Heap is a digital insights platform best known for its automatic data capture and data science layer. The platform records user clicks, swipes, and page views out of the box, so you can go back and analyze behavior retroactively without worrying about missed data.
G2 Rating: 4.4/5 ⭐
Key features
- Comprehensive autocapture with native retroactivity: Heap automatically records every user interaction from the moment of installation. This ensures a complete behavioral dataset that you can analyze retroactively. For example, if you define a “new” event today, Heap can instantly surface its historical data from weeks ago. While Pendo offers retroactive analysis for its no-code feature tags, its data collection is often limited to standard page and click events. You need prior developer instrumentation for more complex events, and any missed setup results in permanent data gaps that you can’t recover later.
- Funnel and journey analysis without prior instrumentation: Heap allows you to build funnels and user journeys on the fly using any captured interaction. You can map how users move through a flow, identify drop-offs, and refine your analysis without waiting for engineering input or pre-configured events. Pendo also supports funnels and paths, but they rely more heavily on predefined features and tagged events, which makes exploratory analysis less flexible.
- Data warehouse integrations and downstream analysis: Heap offers seamless integrations with Google Analytics, Snowflake, BigQuery, and Redshift via Heap Connect. Because it captures every interaction, the platform provides a structured, modeling-ready dataset that teams can easily join with revenue, CRM, or product usage data for advanced business intelligence. While Pendo offers data exports and syncs, its output is primarily scoped to tagged features. This makes it an excellent tool for in-platform reporting, but it offers less flexibility for data teams who need a complete, unfiltered behavioral history to build complex downstream models in a centralized environment
Pricing
Heap has a free plan for small teams, but its paid tiers are quote-based. G2 reports a starting price of $3,600 per year.
When to choose Pendo vs. Heap?
Both tools offer strong analytics capabilities. The difference is in how data is captured and used.
Pendo is a great fit when you want analytics tied directly to in-app guidance. Heap is the better choice if you don’t want to worry about setting up tracking. Since it automatically captures user activity, it gives teams the flexibility to explore data later without missing key events.
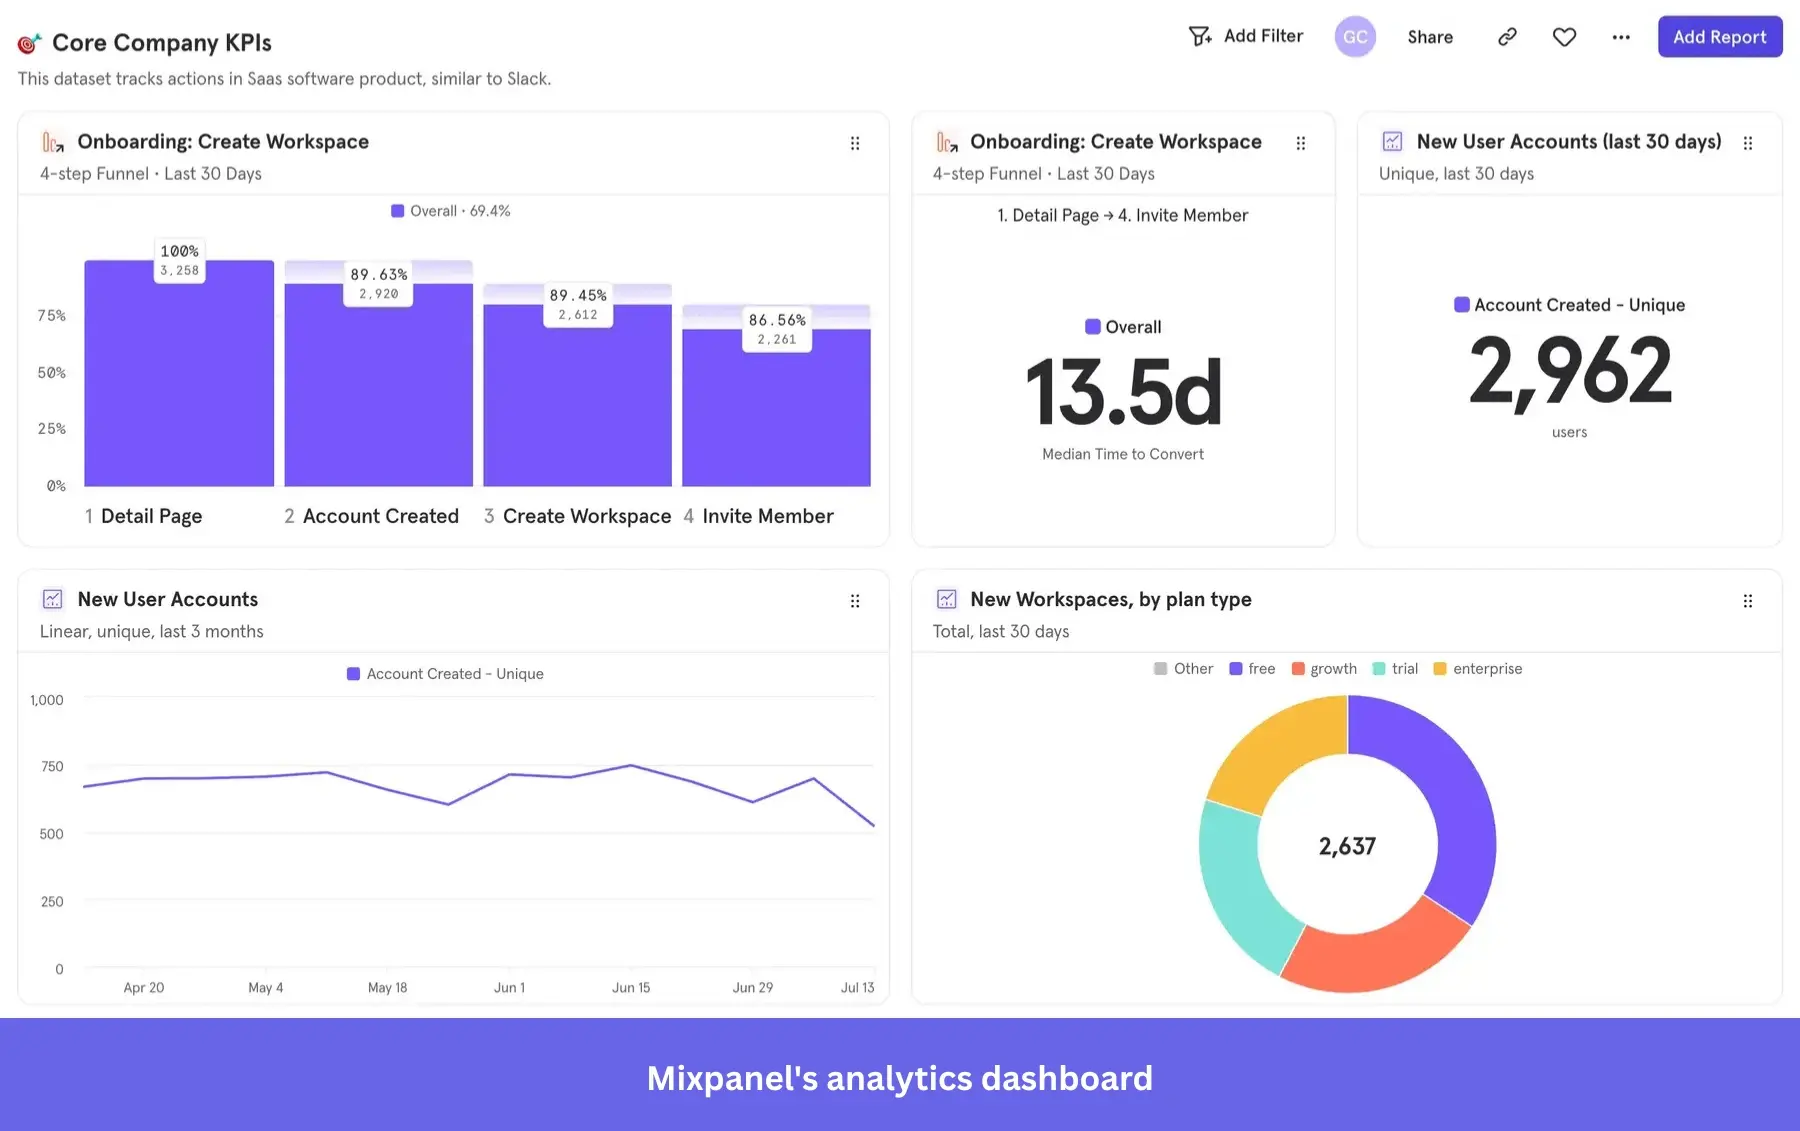
Mixpanel: Best for comprehensive web and product analytics
Mixpanel is another analytics tool worth considering if your goal is to replace Pendo’s analytics layer. The platform offers transparent pricing, helps teams understand user interactions across web and mobile applications, stores historical data, and draws qualitative insights from random user actions.
G2 Rating: 4.6/5 ⭐
Key features
- Precision event-based analytics and data modeling: Mixpanel is built for teams that require absolute control over their data schema. By using a developer-led event model, it allows for high-resolution tracking where you can enrich every user activity with custom properties for deeper slicing and dicing. Pendo’s no-code feature tagging is optimized for speed and ease of use, but it’s UI-dependent and less flexible for modeling complex, multi-dimensional user behaviors.
- Cohort analysis and retention tracking at scale: Mixpanel allows you to create dynamic cohorts based on user behavior and track how those cohorts evolve over time. You can answer questions like “how many users who adopted Feature A in week one are still active after 30 days?” or “which onboarding path leads to the highest retention?” While Pendo offers retention and segmentation, Mixpanel’s cohort analysis is more flexible and better suited for teams running continuous product experiments and lifecycle analysis.
- Impact analysis tied to product changes: Mixpanel makes it easy to measure how specific features or releases affect user behavior by linking events to outcomes like engagement, conversion, or retention. For instance, you can track whether users who interacted with a new feature are more likely to convert or return. This helps teams validate product decisions with data and iterate quickly. Pendo provides similar insights, but Mixpanel’s strength lies in how easily you can customize and slice this analysis across different user segments and timeframes.
Pricing
Mixpanel pricing starts with a generous free plan (up to 1M monthly events). Paid plans begin at $1,200 per year, but mid-market SaaS teams often spend tens of thousands, depending on event volumes.
When to choose Pendo vs. Mixpanel?
Mixpanel makes more sense when your team is deeply focused on product analytics and needs flexibility in data capture and analysis. Because pricing scales with event volume, it works well if you want to start small, experiment freely, and only pay more as your usage grows. It’s also a better fit if real-time insights and detailed event tracking are critical to how you ship and evaluate features.
Pendo, on the other hand, is better suited if you want analytics bundled with in-app guides and customer feedback in a single platform. It trades some analytics depth for a more integrated product experience layer, which can be useful if your team prefers not to stitch together multiple tools.
How to choose the right Pendo competitor for your business needs: Decision-making framework
The best choice depends less on the tools themselves and more on your business realities. Here are the main factors to weigh:
- Budget: If you’re an early-stage startup or cost-conscious team, prioritize tools with transparent pricing and no hidden fees (e.g., ProductFruits, UserGuiding, or Userpilot). Larger enterprises with a budget for consulting and long rollouts may lean toward WalkMe or Whatfix.
- Team size and expertise: Small teams without dedicated developers will benefit from no-code platforms like Userpilot or Appcues. Enterprises with IT/admin resources can unlock more customization from tools like Chameleon or WalkMe.
- Implementation speed: Need to get started in weeks, not months? Look at Userpilot, Appcues, or UserGuiding. If you’re an enterprise platform and can afford longer onboarding, consider WalkMe or Whatfix.
Decision snapshot
| Tool | Best choice when… |
|---|---|
| Userpilot | You need a Pendo alternative with better usability, faster setup, and more transparent pricing. |
| Appcues | Your priority is building onboarding flows across web and mobile apps with minimal engineering effort. |
| UserGuiding | You want to start with in-app support for free and add onboarding features as your needs grow. |
| Chameleon | You need deep customization and control over in-app experiences, with developer support available. |
| ProductFruits | You want a cost-effective way to combine onboarding and in-app support in a single tool. |
| WalkMe / Whatfix | You’re rolling out structured onboarding or training across large teams and multiple enterprise systems. |
| Userlane | You need step-by-step guidance to ensure employees follow workflows correctly across internal tools. |
| Apty | You need to enforce business processes, validate inputs, and ensure compliance across systems. |
| FullStory | You want to diagnose workflow friction through session replay and behavioral signals. |
| Mixpanel / Heap | You need granular insights from funnels, user journey, and retention analysis across web and mobile applications, with flexibility in data capture and exploration. |
Ready to Switch?
Over the years, we’ve seen more and more SaaS teams move away from Pendo to platforms that better fit their needs. If you’re considering a switch, Userpilot makes the transition smooth, with full support (including contract buyouts for qualified accounts).
Book a demo to get started.
DISCLAIMER: Userpilot strives to provide accurate information to help businesses determine the best solution for their particular needs. Due to the dynamic nature of the industry, the features offered by Userpilot and others often change over time. The statements made in this article are accurate to the best of Userpilot’s knowledge as of its publication/most recent update on April 6, 2026.
About the author