Good product onboarding is the ultimate remedy to customer churn and business growth. It arms new users with the tools they need to succeed with your product and simplifies the job of your support team.
In this guide, we examine:
- What product onboarding is.
- Why it’s important.
- How to create a successful user onboarding process.
- Valuable product onboarding best practices.
Try Userpilot Now
See Why 1,000+ Teams Choose Userpilot
Summary of product onboarding for SaaS companies
- Product onboarding refers to everything you do to introduce trial users to your product and set them up for success.
- User onboarding focuses on applying your onboarding systems to individual use cases to improve the user experience and onboarding effectiveness.
- A good product onboarding flow improves activation, conversion, and retention. Moreover, it lowers customer activation costs and reduces customer churn.
- The onboarding funnel has three phases: the primary stage for onboarding new users, the secondary stage for driving engagement, and the tertiary stage for boosting account expansion for existing users.
- A successful product onboarding strategy begins by defining the target audience and creating user personas for the product.
- Afterward, you want to identify new user activation points, create a customer journey map, and design personalized onboarding flows for each user persona.
- Finally, you must analyze your efforts, track your results, and iterate accordingly.
Some product onboarding best practices include:
- Create positive first impressions with a friction-free signup process and a carefully curated welcome screen.
- Use interactive walkthroughs and contextual onboarding to help customers discover the features they need and drive engagement.
- Track product engagement data to identify weaknesses in your onboarding process and fix them.
- Use video tutorials, guides, and in-app resource centers to drive customer success through education.
- Collect feedback to learn about your customer’s needs and pain points and act on them.
What is product onboarding?
Product onboarding is the process of introducing your product or service to new users and customers. It involves educating users on how the product works, how to use its core features to solve their pain points, and how to navigate the product’s interface.
Product onboarding vs. user onboarding
Although product onboarding and user onboarding share certain similarities, they’re different.
Product onboarding refers to the systems that make a product more discoverable, especially during the user’s initial interaction with the product. User onboarding, however, focuses on applying those systems at the individual level to help users get the most out of the product.
Product onboarding is, thus, a discovery strategy for product features that aims to improve the product experience. Meanwhile, the user onboarding process aims to improve the user experience by helping users derive value from the product.
Why is product onboarding important?
An effective product onboarding process has many advantages for SaaS companies and their customers, including:
- The onboarding process drives user activation by helping users quickly get acquainted with your product and then experience its value.
- Onboarding improves customer retention which simultaneously lowers customer acquisition costs.
- Product onboarding improves revenue by boosting the freemium-to-premium conversion rate.
- Good user onboarding boosts user engagement by providing users with all the knowledge they need to fully utilize the product. Fully engaged customers are less likely to churn.
Ultimately, the product onboarding process ensures customers can properly navigate your product with little or no assistance, resulting in fewer support tickets, higher customer satisfaction, as well as more loyal customers.
Important elements to build your onboarding process
Product onboarding is an ongoing process that begins when a user signs up and continues through the various user journey stages.
In this section, we examine how onboarding requirements, needs, and processes may differ as a user progresses through their journey.
Primary onboarding for new users
At the primary onboarding stage, the user has just signed up for your product and needs to receive the best guidance possible. So the goal of onboarding at this stage is to help new users realize the product’s value.
Here, the ideal onboarding flow is designed to be simple and intuitive. It should address all customer’s concerns, answer their questions, and prove to them that you’re the only solution they need to solve their pain points.
Take advantage of tooltips, empty states, and checklists to create an interactive onboarding flow that will reduce your user’s time to value and successfully drive them toward the activation point.
Keeping active users engaged
An effective onboarding process is ongoing. After successfully driving adoption, the customer onboarding experience should help keep customers engaged and active.
To achieve product stickiness, your secondary onboarding efforts should guide users toward hidden features that help them do more with the product.
Use product analytics tools like Userpilot to help you identify and segment users who are yet to adopt certain features.
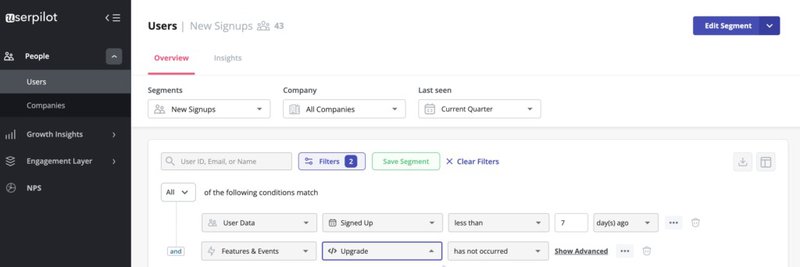
Then use tooltips, popups, and other in-app message modals to direct feature discovery and adoption.
Account expansion and new feature announcements
For the final onboarding phase, you already have happy, active users who employ the product’s features the right way. Even more, some of them may even become power users, setting the stage for your next goal in the customer onboarding process – account expansion.
Your tertiary onboarding efforts should get users to experience more value and increase the customer’s lifetime value.
One way to do this is by collecting feedback to find areas of improvement. You can request a feature from your power users, and add them to your product. If your power users need them to stay on board, your new users would appreciate your efforts too.
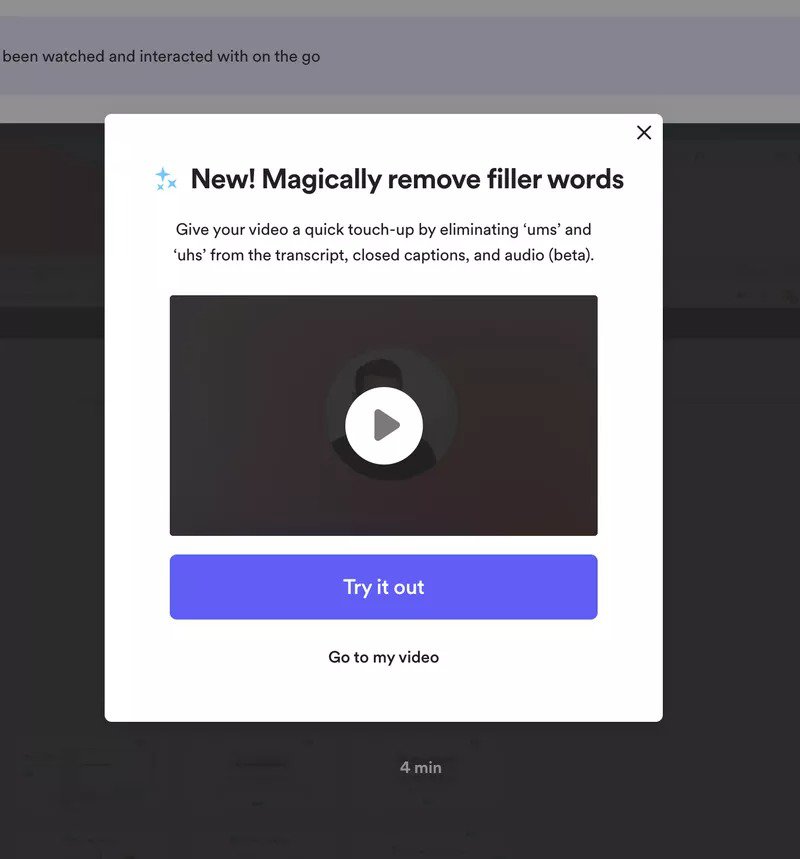
After developing new features, don’t leave your users guessing about the feature. Use new feature announcements to educate users on how to benefit from this new addition and simultaneously drive feature adoption.
Once you have power users, you can trigger upselling prompts in-app by showcasing what they will get with a higher plan.
How to create a successful product onboarding strategy
There is no one-size-fits-all product onboarding process. How you go about onboarding users will differ by business model, industry, etc. However, there are basic steps to follow when creating a successful customer onboarding strategy.
Define your target audience
The first step to creating a product onboarding strategy is identifying and understanding your target audience. Essentially, you want to answer the question: “What constitutes my ideal user?”
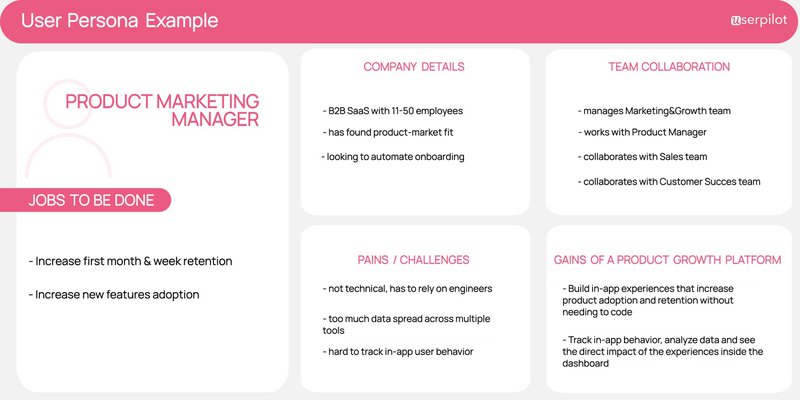
What background do they come from? What are their pain points and goals? And, what are their jobs to be done (JTBD) with the product?
Afterward, use all of this information to create different user personas for your product. Each persona should capture a different segment of your target audience with similar goals, backgrounds, and challenges.
Define new users activation points for each persona type
Each user persona you create will have a slightly different purpose for using your product. This means they’ll need to engage with the product’s core features, which may be similar or slightly different, to get value.
To become fully activated customers, each distinct persona must engage with different combinations of your product’s key features. Therefore, you need to identify these features as well as the touchpoints that help each persona complete their jobs to be done.
Map the customer journey
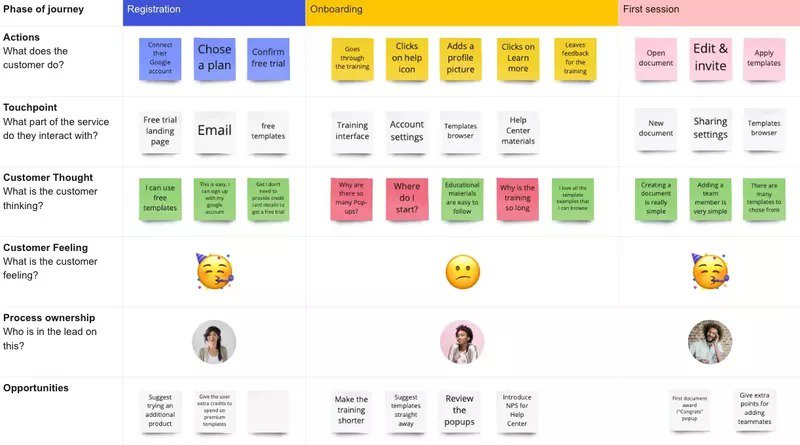
After you have identified customer touchpoints for each persona, it’s time to map the customer journey. Understanding the user journey helps you identify opportunities for improving the customer experience along the way.
To create your customer journey map, you must first figure out the key phases in the users’ experience.
Map out the activities that sit within those phases and identify the touchpoints, milestones, emotions, pain points, and solutions that help boost activation.
Build personalized product onboarding flows for each persona type
A user activation onboarding playbook defines the goals, outcomes, experiences, and touchpoints required for your new users to experience value and achieve customer success.
To be successful, the playbook must be specific to each persona and their goals. It should note what features the user must engage with to achieve success and also highlight specific UI elements that drive the user toward activation.
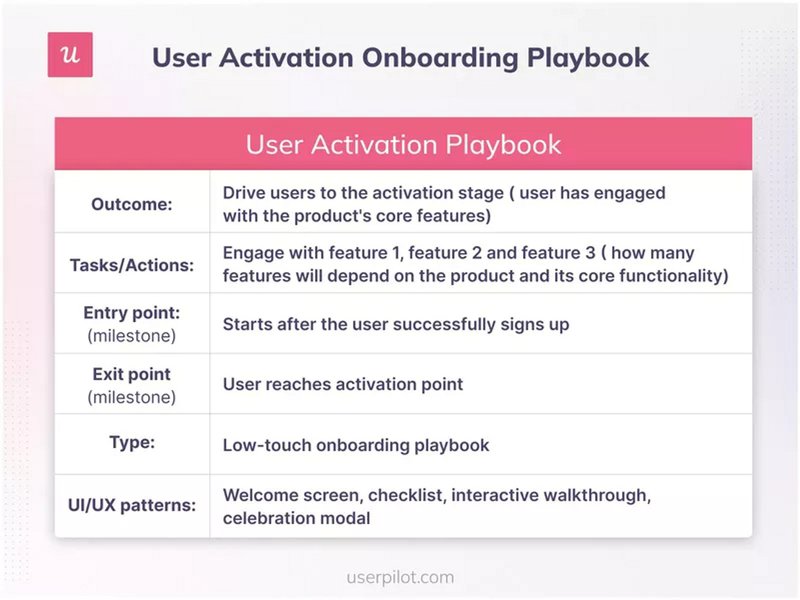
Built correctly, an onboarding playbook gives you a clear vision of how your onboarding process should look from the signup through to product adoption and advocacy. It also makes tracking success easier.
Analyze and iterate
If you want to improve your onboarding process, you need to constantly analyze your customer journeys and iterate accordingly.
Track product analytics data to see how users interact with your product and identify friction in the product onboarding process and the user journey. Then, work on fixing those friction points to maintain a seamless onboarding process and avoid churn.
You can track everything from user engagement to customer satisfaction and customer loyalty data using Userpilot’s advanced product analytics.
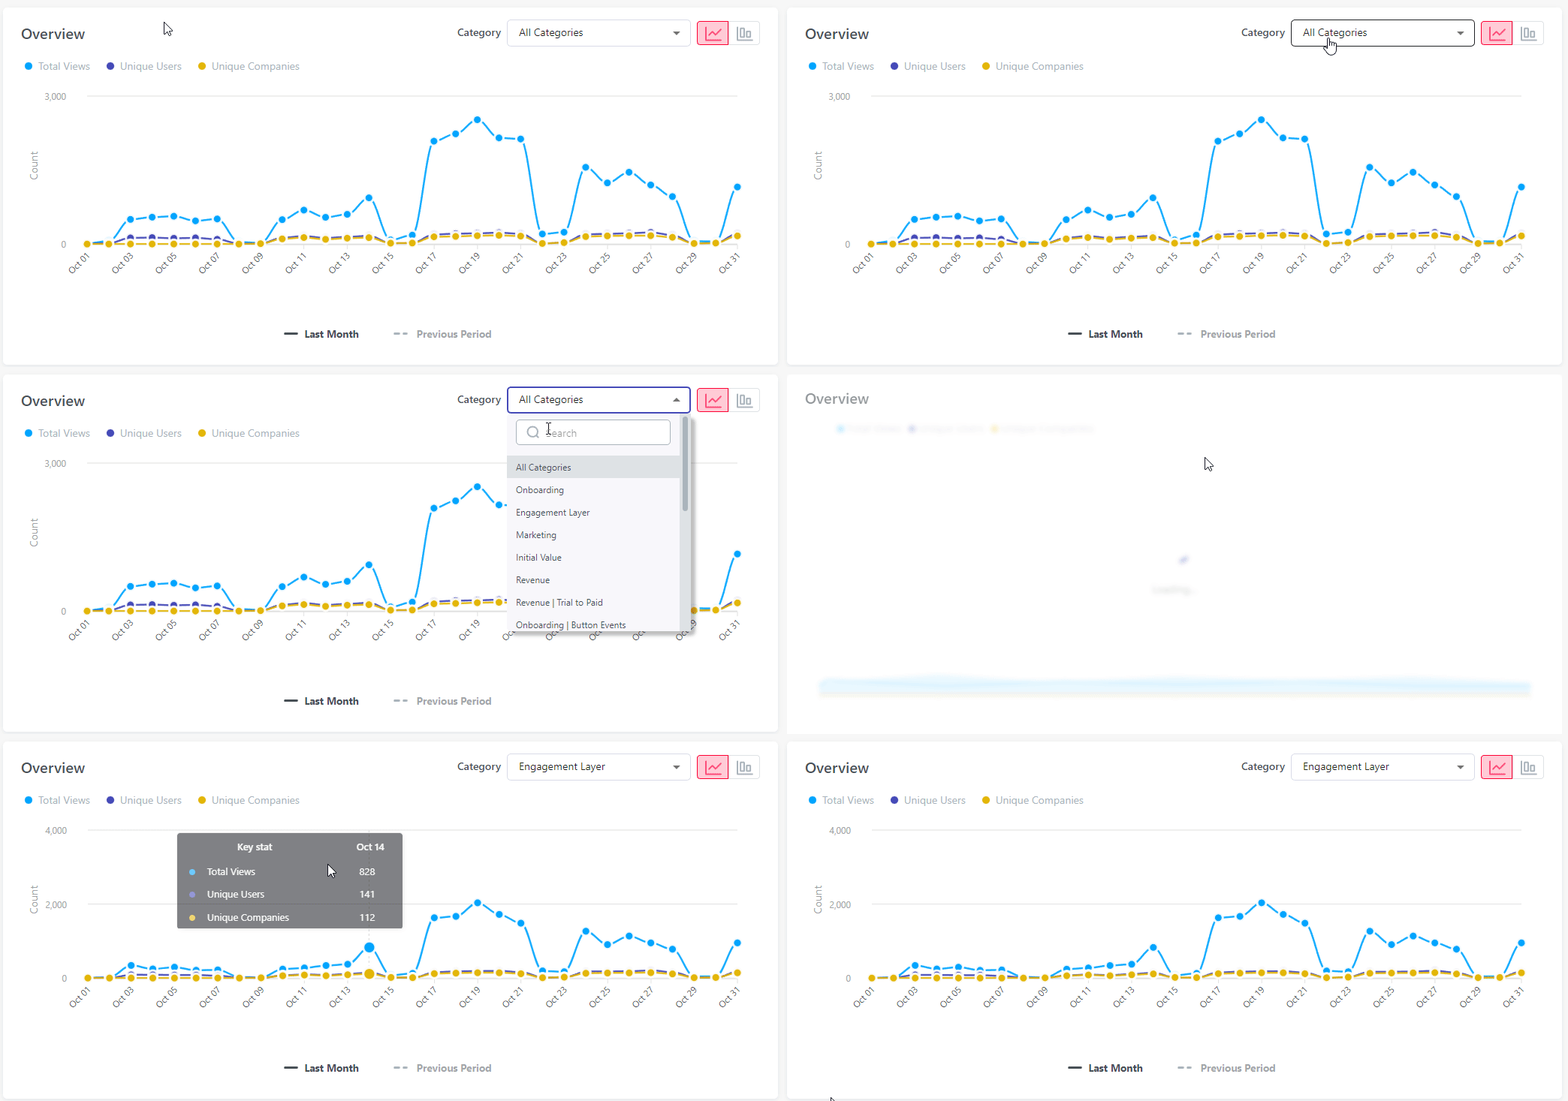
Look out for actionable insights in the data. For instance, if multiple users experience friction at the same point, that’s your cue to refine your onboarding flow to make it clearer.
Product onboarding best practices
The goal of customer onboarding is to get users acquainted with the product. Consider some best practices that help you create a successful product onboarding process.
Create a frictionless signup process
The signup page is your first chance to leave a lasting first impression on your users. So you need to keep the signup process as simple and friction-free as possible. This is not the time to send out long registration forms requesting the user’s life story.
Request only the minimum information required for signup. If possible, use Single Sign-On (SSO) to help users complete the process in no time.
The whiteboarding platform, Miro, is a leading example of how multiple SSO options help users save login time. Miro makes sure every option relevant to their users is available, even including options like Slack and Apple.
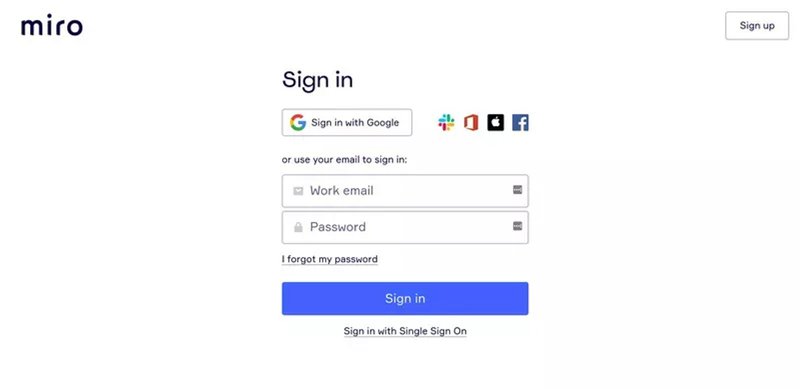
You also want to avoid derailing your customers by requiring email confirmations. Email confirmations can wait while the user gets a feel of the product and grows in appreciation of it.
Welcome new customers
Speaking of first impressions, the first impression a user gets of your product after completing the signup process will be from the welcome screen.
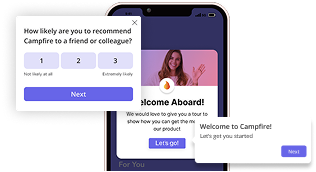
Since this is your opportunity to warmly welcome new customers to the product, trigger a welcome survey to collect invaluable user insights about your new customer’s goals and JTBDs.
Social media scheduling platform Postify does this with its welcome screen. In addition to welcoming new users, it reinforces the expected product value and presents an automated survey that helps them learn about the user’s JTBD.
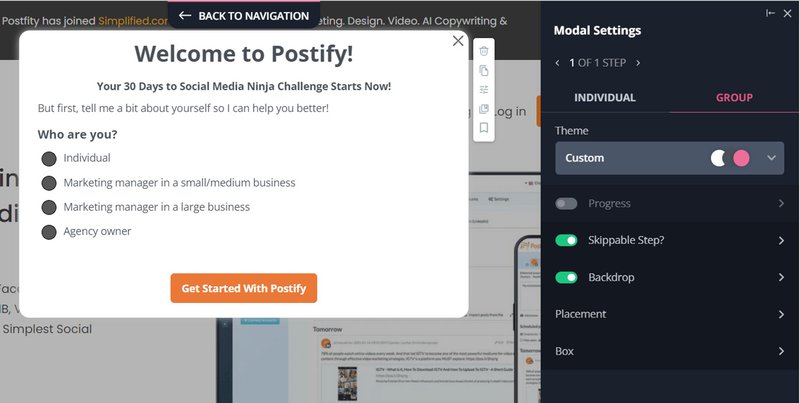
Postify then uses this information to segment new users with similar JTBDs and personalize their onboarding experience.
Create contextual product onboarding experiences
Create personalized onboarding experiences for your different user personas to help them discover the specific features they need.
Now, using the data collected on your welcome screen, segment new users according to your different personas.
Ultimately, each user segment should receive its own curated user onboarding experience to help the users solve their pain points and reach activation.
Use micro product onboarding checklists
A product onboarding checklist helps users to focus on the steps necessary for activation. Its goal is to simplify what may appear to be a complicated process by breaking it down into smaller steps. But, you must be careful.
For instance, you want to avoid creating a 10-step onboarding checklist that only succeeds in scaring the user away. Focus strictly on the few steps (say, 4/5) required for activation and leave out the unnecessary steps.
Likewise, be sure to watch your language. Your checklist copy should be clear and action-oriented. For example: “Make your first post.”
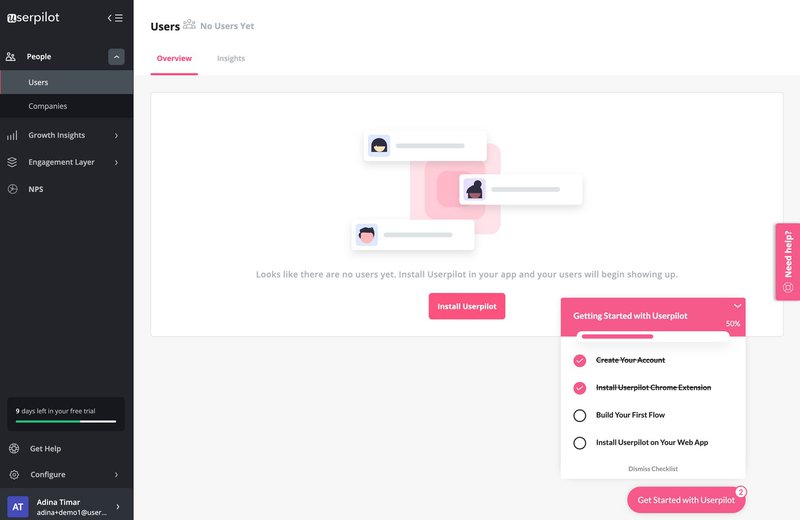
When creating different checklists, make sure to add a progress bar and completed actions to motivate users to finish the rest.
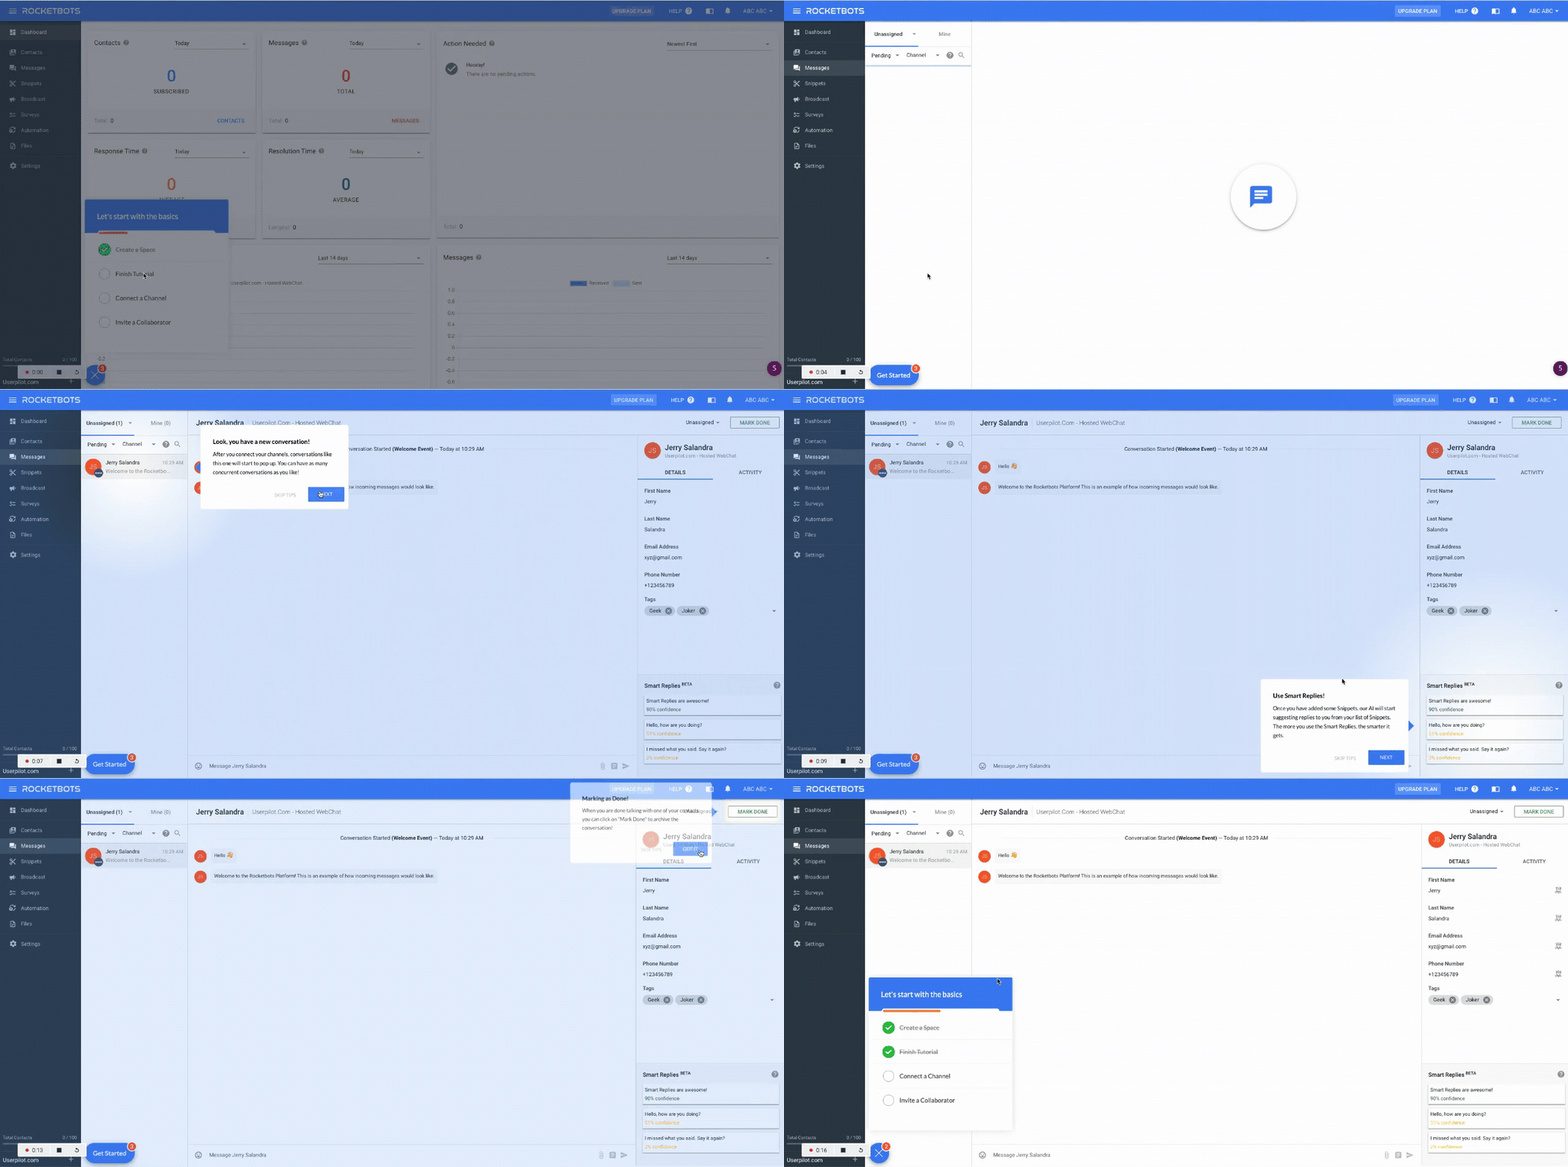
Replace product tours with interactive walkthroughs to keep users engaged
Product tours are long, boring, and impersonal. They throw a ton of information in the way of the user and prompt no action in response.
To keep the onboarding process more engaging and action-oriented, replace your product tours with an interactive walkthrough – a curated step-by-step guide that prompts users to take action after each step.
Track product engagement to identify and remove friction
Tracking your product engagement metrics is a crucial part of measuring onboarding effectiveness.
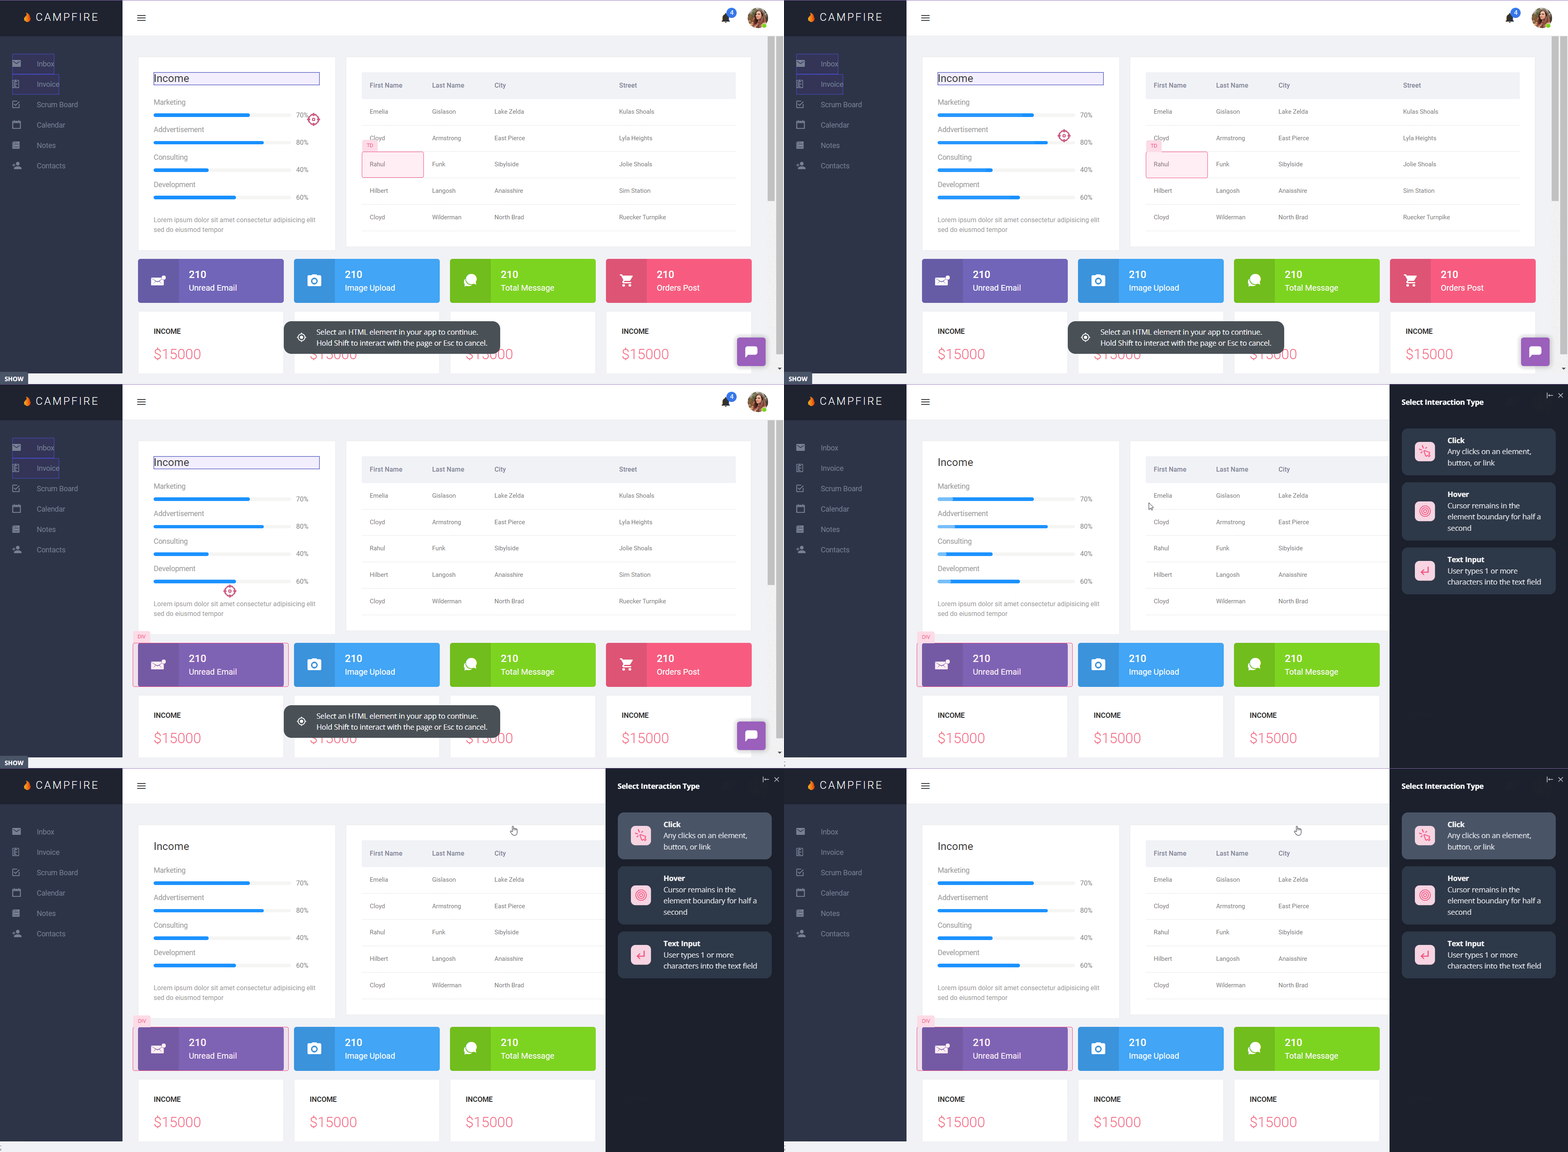
Tracking your product engagement data will help reveal friction points, such as dead click elements which should be fixed.
It will also help you see how your product adoption process works and fix where it falls short. Simply triggering an onboarding flow for an underutilized feature can be the catalyst for adoption.
With Userpilot, you can tag different UI elements and see how users interact with them.
Educate users on how to use your product to drive customer success
Effective user onboarding includes customer education. That means teaching and helping new and existing users to use your product and derive value from it.
When done correctly, customer education empowers users to get the best out of your product. Even more, it speeds up user onboarding, helps you better engage users, and improves customer retention.
A carefully created customer education strategy can include a mix of education systems. For example, you can use a short onboarding video to educate users from the beginning about how they can get the most from your product.
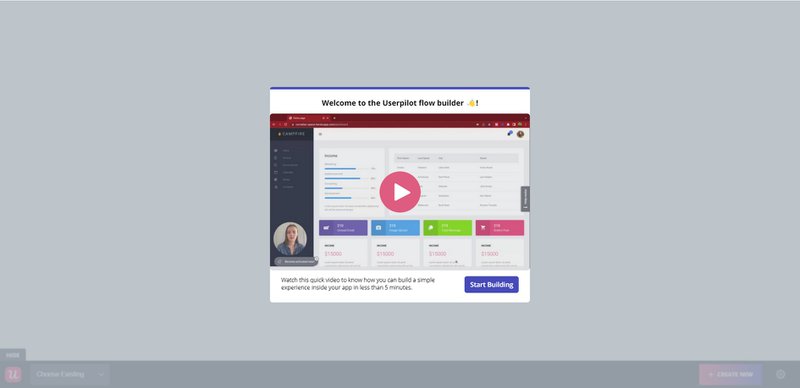
You can back this up with videos addressing a specific learning curve – such as using a feature or completing a task. You can also use in-app training materials (tooltips, modals, etc.), a knowledge base, and webinars to provide support and guidance.
Collect user feedback and act on it
The surest way to achieve customer success is to listen to your users. Customer feedback can tell you whether or not your product onboarding process has been successful.
Collect user feedback to hear users’ direct thoughts about their onboarding experience.
For example, you can trigger an in-app survey after a specific customer interaction to learn about their experience.
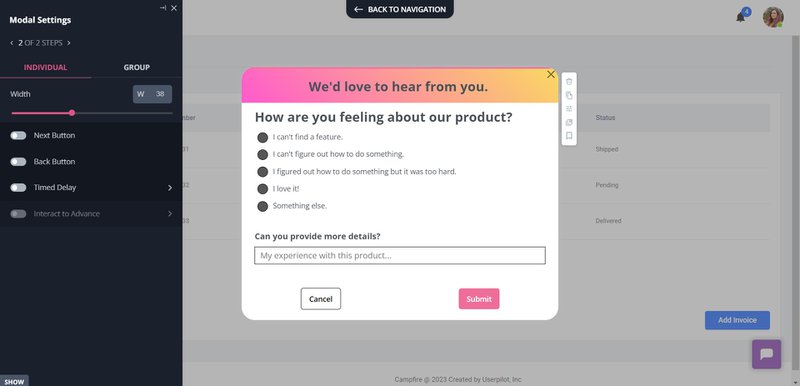
Ensure you pay attention to the results from your feedback survey. Show users that you’re listening by acting on their insights and reaching out to close the feedback loop.
The best product onboarding tools to create an effective product onboarding process
Creating your ideal customer onboarding experience doesn’t have to be a nightmare. Thanks to the following onboarding software, curating the right experience for your digital tools and collecting product onboarding data is no longer a hassle.
Userpilot – Best value for money for product onboarding
Userpilot is a powerful product adoption software, used for creating a personalized, flexible, and contextually relevant in-app and mobile onboarding experience.
Built for SaaS product and customer success teams, Userpilot helps you improve your customer onboarding experience and boost user activation without writing a line of code.
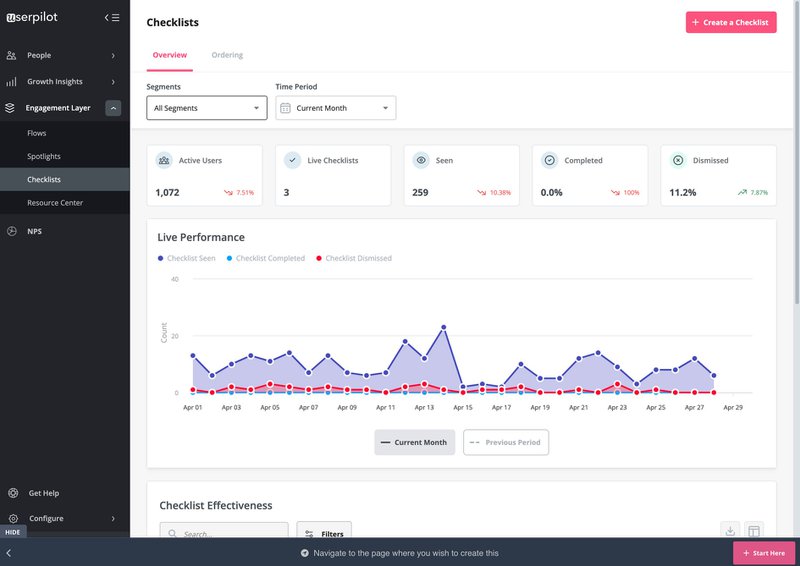
Here’s what you can expect from Userpilot:
- A no-code solution that only requires your dev to install a line of Javascript code and download a chrome extension for the visual builder.
- A large selection of UI patterns (modals, tooltips, slideouts, banners, and hotspots) and in-app onboarding experiences (checklists, microsurveys, etc.).
- Onboard and engage mobile app users by creating personalized messaging, push notifications, and surveys.
- Access to a built-in NPS survey tool for collecting and analyzing user sentiment.
- An event tracker for tracking single or combined events, like clicks, hovers, and form fills, and analyzing these user interactions.
- Advanced product analytics for tracking in-app flows and identifying where users need help.
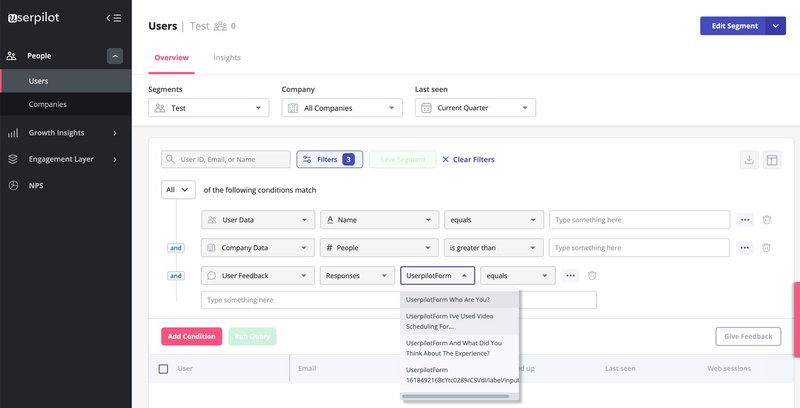
- Create a contextual onboarding experience by segmenting users based on user identification data, in-app engagement, custom events, hovers, clicks, form fills, feedback responses, NPS scores, etc.
- Create and launch in-app resource centers that host user guides and video tutorials and enable users to search the knowledge base or reach out to support.
What users think about Userpilot
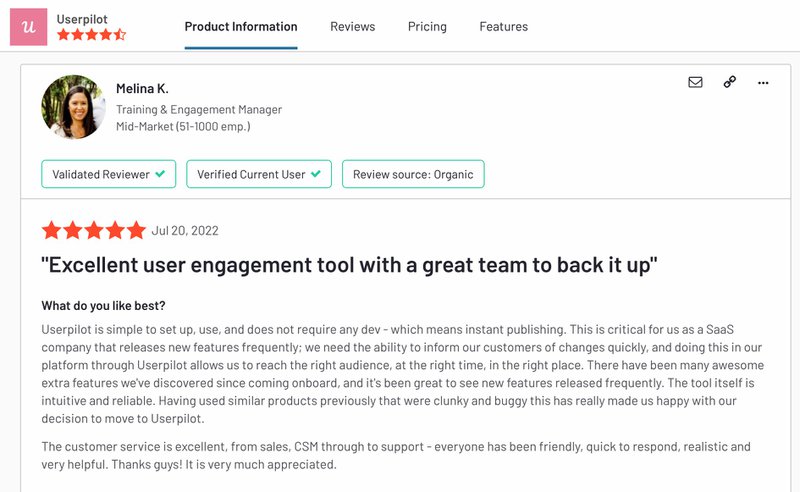
Userpilot boasts a 4.6-star review on G2, with Training and Engagement Manager Melina K. describing it as an…
“Excellent user engagement tool with a great team to back it up.”
Userpilot pricing
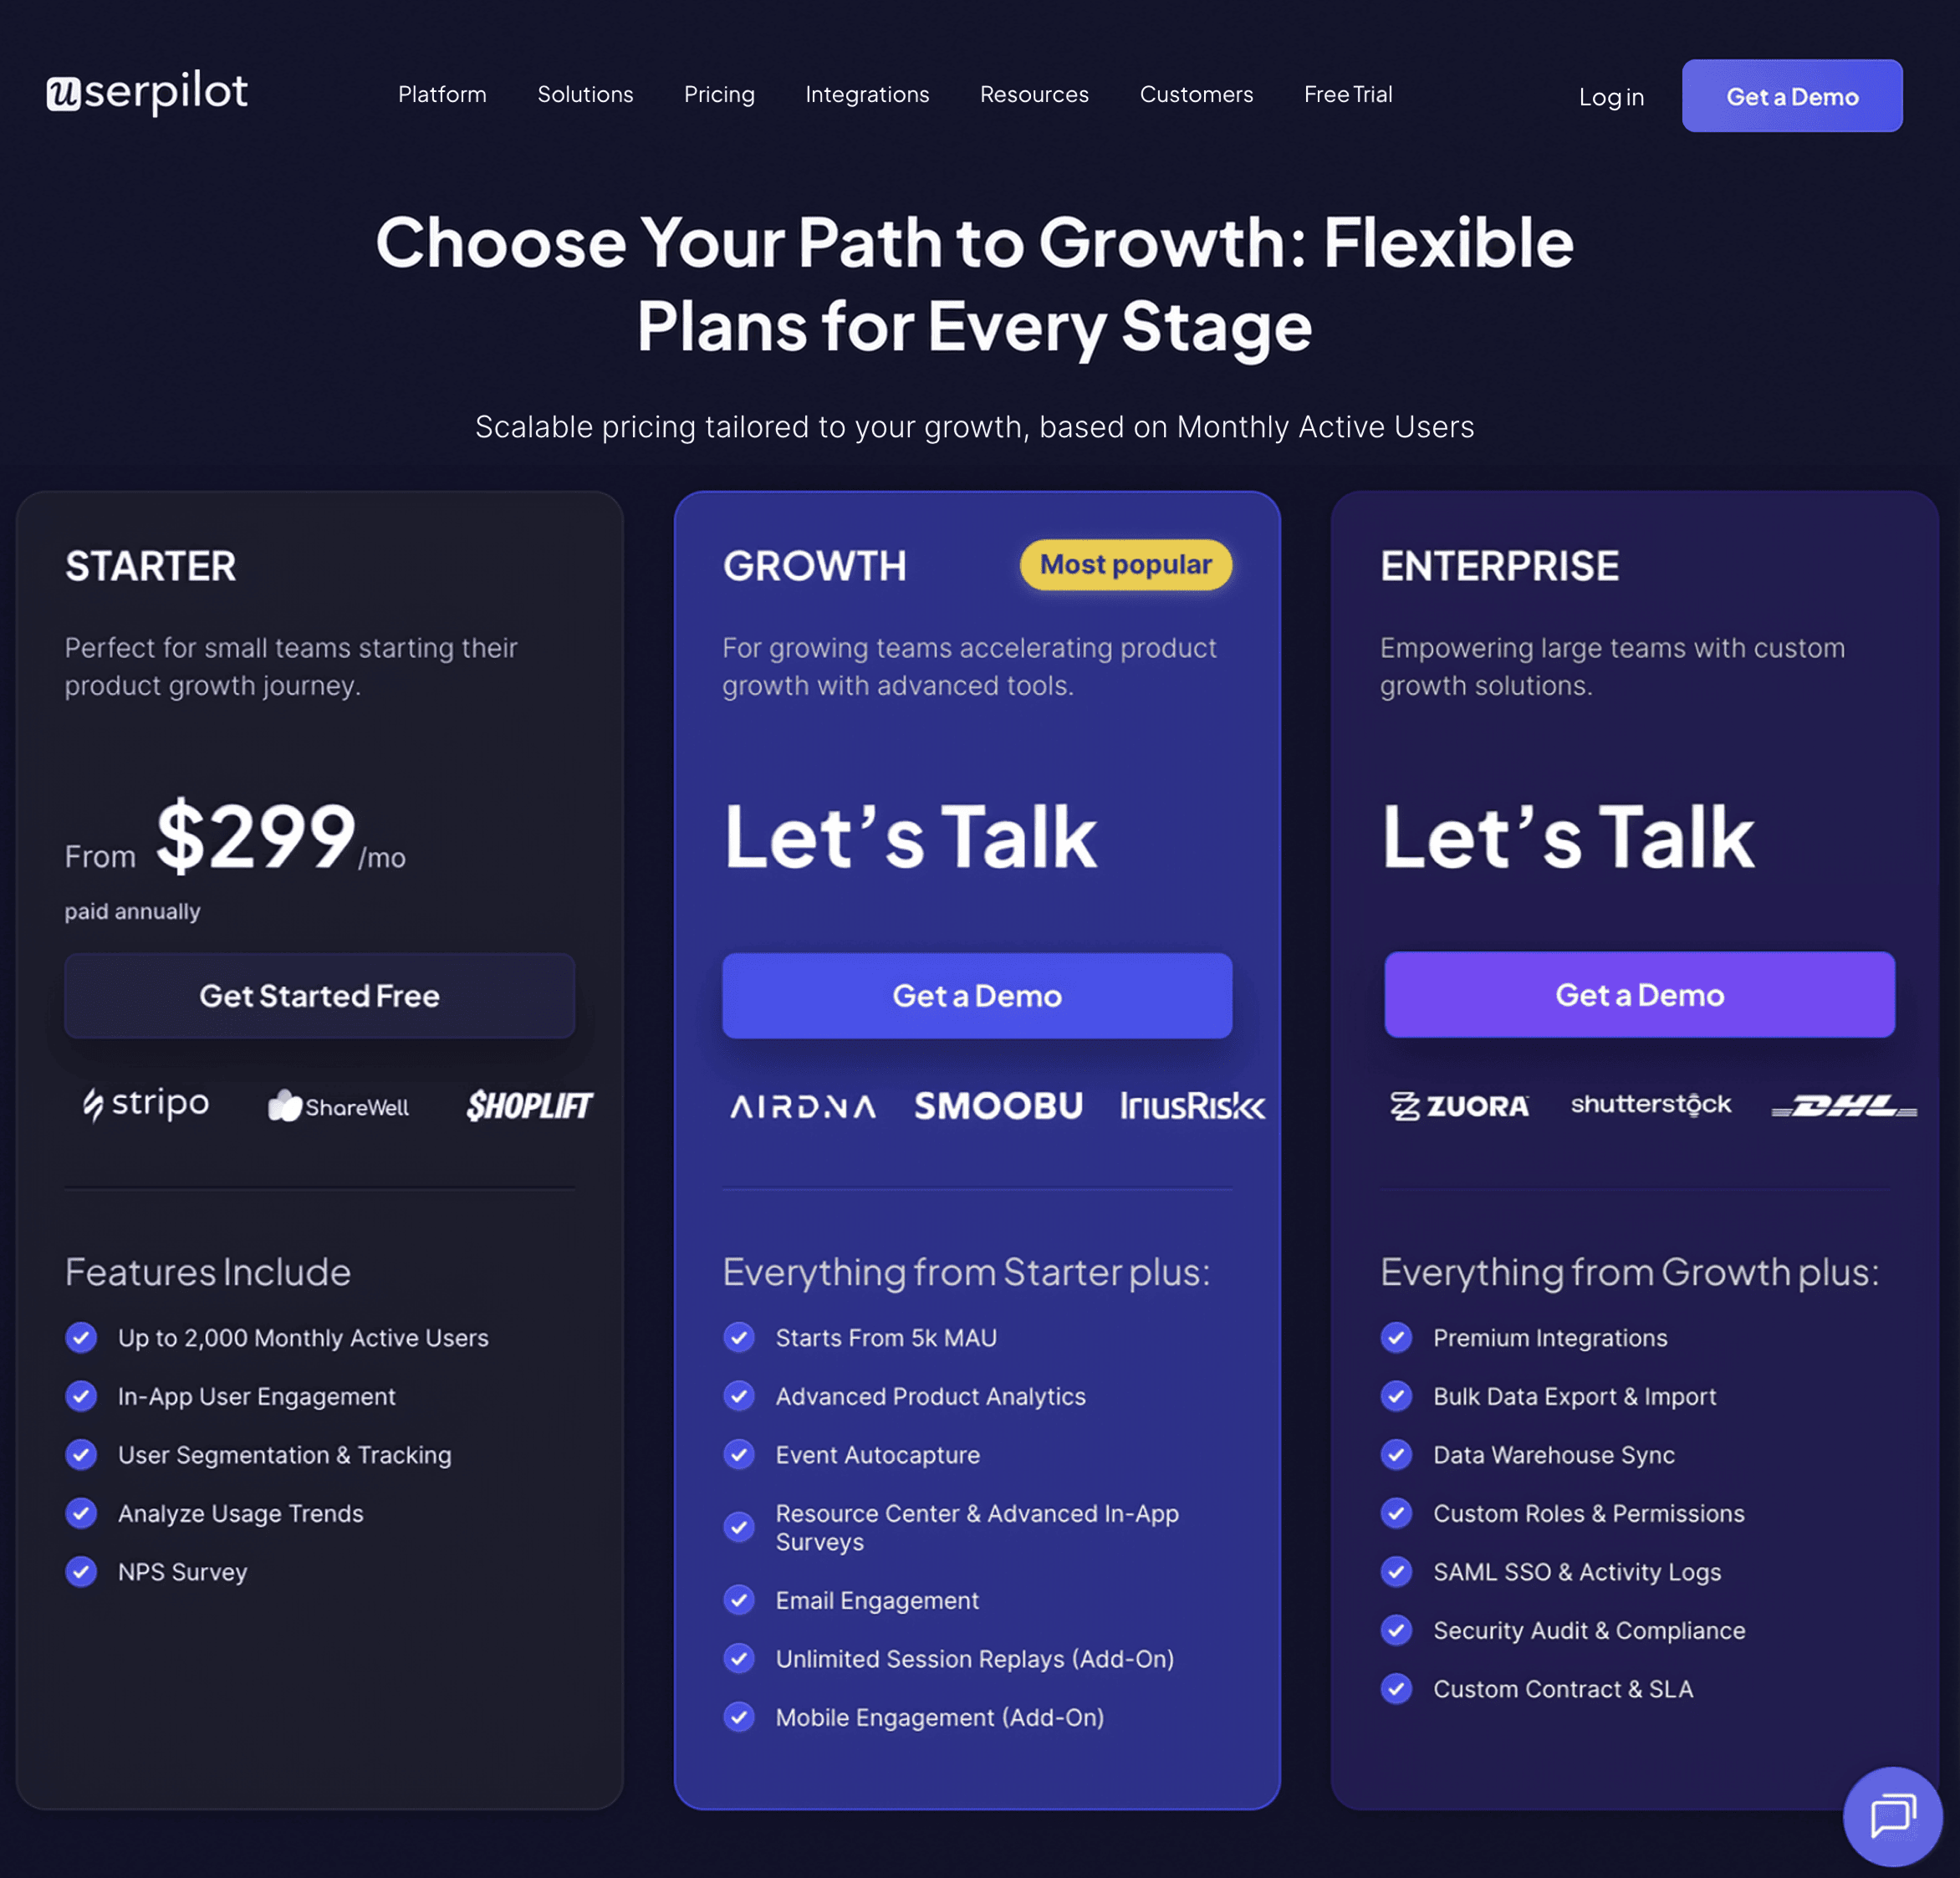
There are three Userpilot pricing categories:
- Starter: The entry-level Starter plan is priced at $299/month, billed annually. It includes up to 2,000 Monthly Active Users (MAUs) and features like segmentation, product analytics, reporting, in-app user engagement, NPS surveys, and UI customization. This plan is only available on an annual subscription basis.
- Growth: Custom-priced, the Growth plan adds support for custom MAUs, advanced product analytics, retroactive event auto-capture, in-app surveys, session replay (add-on), mobile engagement (add on), resource centers, AI-powered content localization, EU hosting options, and a dedicated Customer Success Manager.
- Enterprise: Custom-priced and designed for large organizations, the Enterprise plan includes everything in Starter and Growth, plus premium integrations, bulk data export/import, data warehouse sync, custom roles and permissions, SAML SSO, activity logs, priority support, custom contracts, SLAs, and security compliance (SOC 2 Type 2/GDPR).
Appcues – Best for mobile customer activation
Appcues is yet another no-code customer onboarding platform that aids non-technical teams with tracking and analyzing product usage. It helps users publish onboarding tours and product announcements, and launch surveys.
Once famous for its onboarding templates which made it easy to create onboarding flows, Appcues sunset this feature at the end of 2022 to remove the “restrictions” that templating provided.
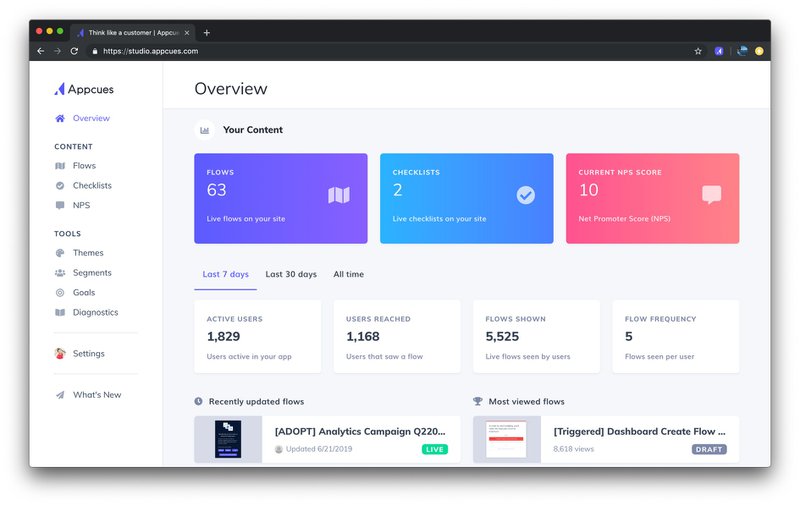
Here’s what you can expect from Appcues:
- An easy-to-use UI for building in-app flows (the building blocks for in-app communications and product tours in Appcues) without writing code.
- A WYSIWYG chrome editor. Simply install the chrome extension, select a UI pattern, and customize it live.
- Create checklists and prompt users to take action. Note that this feature is not available in the Essentials plan and is limited compared to alternatives like Userpilot (e.g. it can’t trigger JS functions or add gamification elements).
- Tag UI elements and track engagement using the Events explorer.
- Build custom user segments based on user interactions and properties or the custom events you set up.
What users think about Appcues
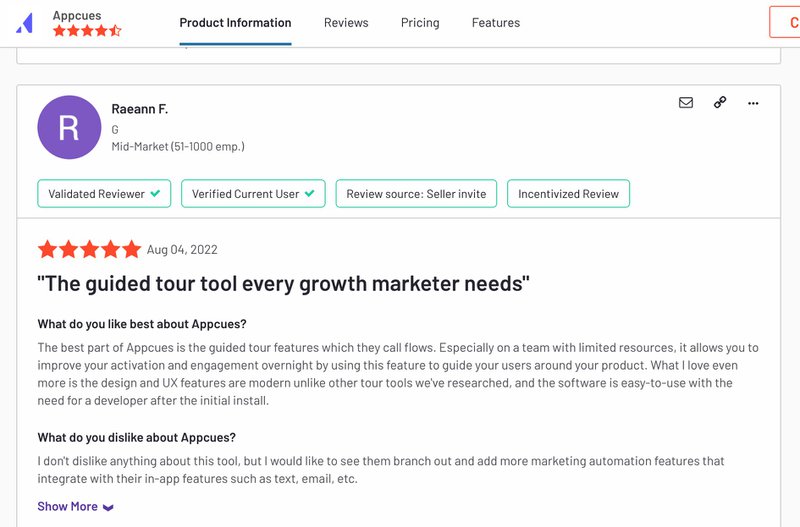
Appcues enjoys a 4.7-star rating on G2, with one user noting that it is…
“The guided tour tool every growth marketer needs.”
Appcues pricing
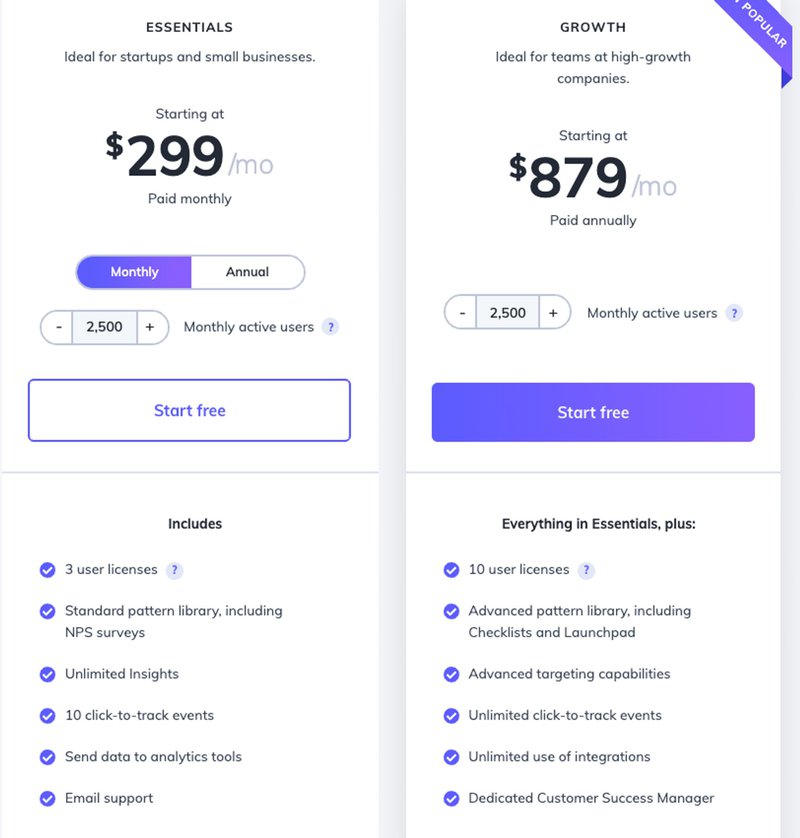
All things considered, Appcues does not offer the best value for money compared to some Appcues alternatives – at $300 per month. If your product has 2,500 active users, the pricing for different plans are:
- Essentials: $300/month (Up to 3 user licenses).
- Growth: $879/month (Up to 10 user licenses).
- Enterprise: Custom (Unlimited user licenses).
Pendo – Best for detailed product and user analytics
Pendo is a comprehensive customer onboarding tool and digital adoption platform with impressive analytics and feedback collection features.
Perhaps the most advanced analytics tool on this list, Pendo is designed (and priced) primarily for enterprise users. It offers guides that help you follow onboarding best practices while creating onboarding flows for web and mobile.
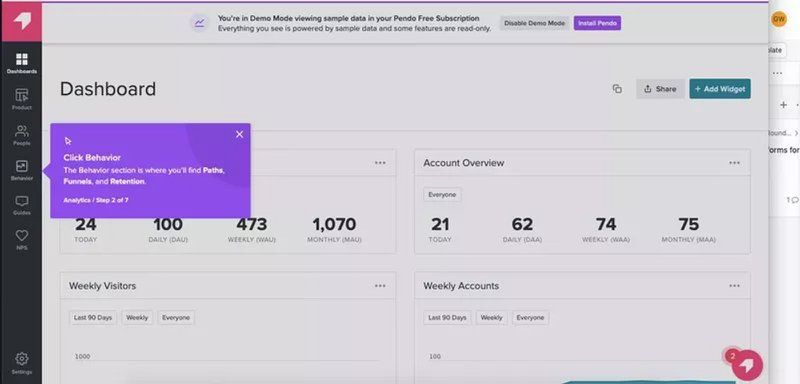
Here’s what you can expect from Pendo:
- Build guides using a pre-set template or create from scratch using a WYSIWYG editor.
- A free version with limited features and basic analytics.
- Create user onboarding guides, including Lightboxes, Banners, Polls, Walkthroughs, and Tooltips. Note, though, that coding is needed to fully customize your elements.
- Build checklists as part of your resource center but not as standalone elements.
- Design a mobile customer onboarding process that works across Android and iOS.
- Create and collect customer feedback with its feedback module. However, you can’t measure satisfaction with it and it isn’t available for free users.
What users think about Pendo
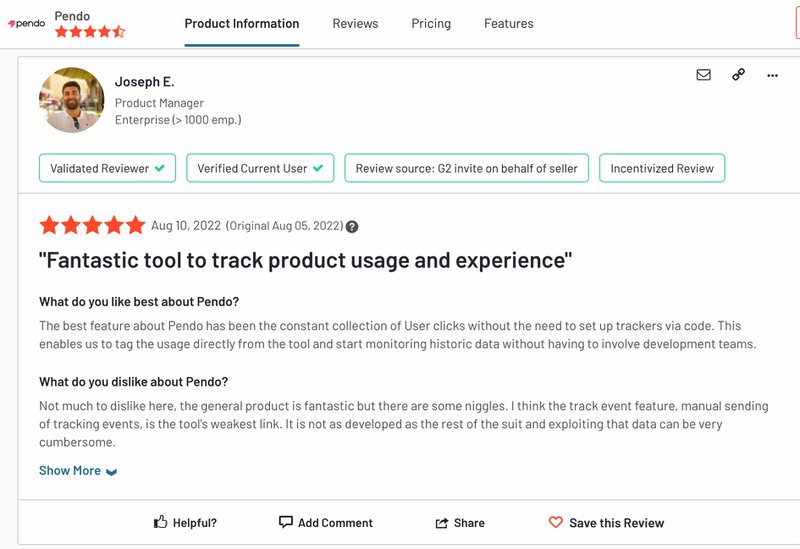
Pendo enjoys a 4.4-star rating on G2 and has been described as a…
“Fantastic tool to track product usage and experience.”
Pendo pricing
Pendo’s pricing is only available to you if you ask for a quote. The company doesn’t list pricing on its site for the higher tiers.
However, some reviews say they have prices starting at $20,000-$25,000 per year for a single product, and around $50,000 per year for the mid-tier package. The tricky part when it comes to Pendo’s pricing is that you get to pay separately for different modules:
- Pendo Free: up to 500 MAU, single-app, and basic functionality and analytics.
- Pendo Starter $7000/year: 2,000 MAU limit, multi-app, and access to premium features like NPS but it doesn’t include advanced analytics or integrations.
- Pendo Growth: Custom MAU, single-app, NPS and PES, resource center, and access to support compared to lower plans.
- Pendo Portfolio: Custom MAU, multi-app, cross-journey reports, experimentation, and 1 free integration included.
- Pendo Feedback: Collecting feature requests is a separate module with custom pricing.
- Pendo Adopt: Employee onboarding is a separate module with custom pricing.

Conclusion
An effective product onboarding process is crucial to setting your customers up for success with your product. Successful onboarding boosts engagement, drives retention, and eliminates churn.
Userpilot is an excellent onboarding software for creating and managing onboarding flows, tracking product data, and collecting user feedback.
Book a demo today to learn more about how Userpilot helps you complete your product onboarding tasks.

