Customer Success Journey Map: How to Build One and Drive Success in SaaS
Creating a customer success journey map is necessary for:
- Creating a customer success strategy.
- Building customer success playbooks.
- Measuring success across the buyer journey.
- Offering the right in-app experiences to engage your customers.
This article covers the entire process of creating a customer journey map.
So if you’re yet to define one for your SaaS, read this post and get started as soon as possible.
Try Userpilot Now
See Why 1,000+ Teams Choose Userpilot

What is a customer success journey map?
A customer success journey map illustrates each step, stage, touchpoint, and milestone that your customer needs to go through to achieve success. Its purpose is to provide a repeatable blueprint that the customer success team can use to help users achieve their goals.
Customer journey maps are segmented for specific user types, include detailed steps for achieving goals, and there are multiple types for different purposes.
Benefits of mapping your customer success journey
Building a success map is not optional or a nice-to-have. It’s an essential component for any customer success process, and it’s highly beneficial to:
Understand where customers get stuck and remove friction
With a customer success map, you can have clarity over:
- The current stage of your customer
- The next milestone they need to achieve
- The end goal of your customers and the steps they need to take
This lets you identify if a customer got stuck at a specific point in their journey.
So if—for instance—a user didn’t finish the signup process, you can quickly tell what step generated the most friction and fix it.
What’s more, reducing friction constantly across the customer success lifecycle makes it easier for the customer to advance through—thus improving the user adoption flywheel:

Improve customer experience and reduce churn
In-app communication is vital for keeping users engaged and reducing customer churn.
So instead of using generic tactics like product tours, you can use a customer journey map to determine:
- What the right in-app message is for each stage.
- What specific actions are needed to reach the next milestone.
This way, you can create a communication strategy that focuses on “micro-conversions” and drive customer success with granular in-app guidance and decreasing churn by providing value when the customer needs it.
Also, you don’t have to limit yourself to in-app communication.
You can also use your customer success map to spot which users are showing signs of churning and reach out to them proactively to offer personalized help.
Increase the customer lifetime value
With a customer success map, you can identify the stage where an upgrade would bring more value to the customer.
So instead of upselling randomly, you can offer a relevant upgrade to the right customer at the right time—allowing you to increase account expansion MRR continuously and boost LTV.

8 Steps to map the customer success journey
A customer success journey map sounds simple, but how exactly do you create one?
We’ve determined eight steps to create a success map that’s accurate and helpful for your team and includes:
- Choosing the type of customer success map you have to create
- Describing the user persona, you’re going to target
- Defining what success looks like for your user persona
- Decide which part of the customer lifecycle you’re going to cover
- Identify the milestones across the journey
- Specify the touchpoints required between each milestone
- Use a tool to create a visual representation of your customer success map
- Implement and track progress across the journey
Let’s explain each of them:
Step 1. Which type of customer success journey map should you create?
No customer success map can fit every purpose. That’s why there are many map types designed for specific goals in mind, and they include:
- Current state maps. Shows how your users are interacting with your product today, so you can iterate on what’s not working.
- The future state journey map. Which predicts how users will interact with your product in the future. It’s used for setting goals once you’ve fixed the problems from the current state map.
- Service blueprint. This one tracks and evaluates every touchpoint with your customer so you can improve their experience.
- Day in the life journey map. It covers the customer’s day-to-day habits, behaviors, and motivators so you can design a user experience that fits them.
- Empathy journey map. A map that focuses on understanding the customer experiences from the user’s point of view. Includes what the user says, thinks, feels, and acts about your product.
- Experience journey map. Which visualizes and focused on the experience of accomplishing a goal in general so you can create and improve the journey to success.
Once you know the purpose of your customer success map, you can get started with this current state template by Brightvessel:

Step 2. Which customer persona’s journey are you mapping?
You can’t create one journey for every single user segment.
Even if some touchpoints would overlap, it’s essential to define the user persona for each map and describe what a successful customer journey looks like for them. Just like this customer success manager (CSM) persona example:

Note: A fictional persona is useless. You must build your user persona based on interviews, customer feedback, and microsurveys.
Step 3. Define what success looks like for your persona
You can’t achieve success without knowing what success is in the first place.
Each user persona will have different goals and desires. So if you want your customer success map to be effective, you must understand what your user is looking to achieve with your product.
Think of: What are the jobs to be done they need to complete? What’s making it harder? What obstacles are they facing?
Once you find out how your persona can succeed with your product, you can start laying out the specific steps.
Step 4. Which customer lifecycle stages are you mapping?
Your customer journey map doesn’t have to cover the entire customer lifecycle.
In fact, starting with a few stages is better since you can focus on the details and expand later on.
Here are the main stages of a post-purchase customer journey:
- Purchase decision. The stage where the user signs up for a trial, a freemium account, or a product demo.
- The Aha moment. When the user understands the value of your product and decides to move forward.
- User activation. The moment the user starts engaging with the product’s core features and experiencing its value.
- Product adoption. When the user engages with primary and secondary features repeatedly. Meaning the product is part of their habit.
- Retention. When the user decides to stay with your brand and become a paying customer.
- Expansion. The moment a customer upgrades their account to grow and achieve bigger goals.
- Loyalty and advocacy. The stage where they become advocates of your brand and drive positive word-of-mouth.

For example, mapping out the first three stages could be a good idea if you’re struggling to activate users because you’re not clear when the “aha” moment happens.
But, what do you have to “map out” exactly?
Step 5. Identify customer milestones for the journey stages you are mapping
The next step is to map out the success milestones required to win at each journey stage.
But what do we mean by milestone? Well, Lincoln Murphy defines “customer milestones” as:
“Customer-centric milestones within the product. They’re not activity for activity’s sake. They will be the result of meaningful activity and will be tied to other inputs to ensure we know that the customer is actually achieving their desired outcome.”
Determine the main goals that your customer wants to achieve within each stage.
For example, let’s stick to the activation stage.
You want your user to reach the activation milestone as soon as possible, and for this, they must engage with a series of features first.

Step 6. Map specific touchpoints in between milestones
Once your milestones are laid out, think of the specific steps required to reach them depending on:
- The channel where the user is (inside the app, website, chat, etc.)
- The element they’re engaging with (The product’s UI, website content, a support agent, the customer success team, etc.)
For the activation stage example, users are likely inside your app and interacting with your product.
So—if the milestone is to reach the activation point—your customers should engage with at least two or three core features, depending on your product’s purpose (if you can’t identify them, then you have a customer-product fit problem).

With this information, you can use in-app communication to encourage customers to follow those steps and reduce friction (e.g., adding a checklist to guide the user to the activation point).
7. Use tools to build and visualize your customer journey map
Next up, you want to visualize your customer journey map. And for this, you need an app that provides:
- Design tools to create a visually appealing map
- Templates to avoid starting from scratch
- Team collaboration to discuss details.
There are multiple options in the market. But Miro offers a good number of templates already:

8. Track progress across the customer journey
There’s no point in mapping the journey to success if you’re not using it to identify and track users’ progress.
Using a customer success tool, you can set specific goals and trigger in-app messages to help customers reach their milestones and succeed.
How Userpilot can help you drive customer success across each stage of the journey
Mapping the customer journey is not enough for a complete customer success strategy.
What about communicating with your users? Or providing proactive support?
Userpilot isn’t helpful for mapping your customer journey, but it does help you implement the strategies and make use of your map.
Here’s how:
Trigger custom in-app experiences based on the customer’s journey stage
Imagine in-app communication as the oil that removes friction in your customer success machine.
As a customer success software, Userpilot can trigger in-app messages based on:
- Different user segments
- User’s in-app behavior and engagement
- User’s journey stage
- Specific events and the count of them using custom attributes
This way, you can show relevant UI patterns such as modals, slideouts, and other in-app guides based on where they are in the journey.
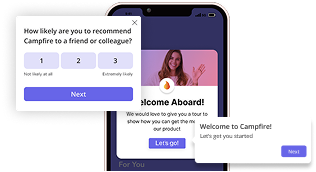
And with Userpilot’s new mobile SDK, you can now extend these experiences by creating targeted onboarding flows, slideouts, carousels, and push notifications for your mobile app users, all without writing extra code.
With Userpilot, you can to create “flows” to add these widgets:

For example, if you’re struggling with product adoption, you can add tooltips to help users discover relevant features, offer tips, and move them through the journey, using a progressive onboarding strategy.

Also (coming back to the activation example), you can create activation checklists to encourage users to engage with core features:

Offer contextual help and remove friction across the journey
Often, users deviate from the plan, or the product doesn’t work as intended—so they’ll rely on support to solve problems.
This creates friction, and the best way to minimize it is with self-service support.
For this reason, Userpilot allows you to build resource centers inside your product, and include a knowledge base, video tutorials, how-to articles, and instant access to a support ticket.
Why?
So your customers don’t have to leave your product to find answers or waste your support team’s time on common issues—which means less customer service gap.

And that’s not all. You can use targeting options to show content based on a specific URL path, user segment, localization, and behaviors:

This way, users don’t have to browse through an endless sea of resources to find the article they’re looking for—making them less likely to churn.
Conclusion
We know creating a customer success journey map is essential to:
- Spot and remove friction.
- Improve the customer experience with in-app communication.
- Drive account expansion by upselling at the right moment.
But as we said, this is just the first step toward a solid customer success process.
So if you want to go beyond and use your customer success map profitably, get a Userpilot demo and see how you can improve customer retention.


![What are Release Notes? Definition, Best Practices & Examples [+ Release Note Template] cover](https://blog-static.userpilot.com/blog/wp-content/uploads/2026/02/what-are-release-notes-definition-best-practices-examples-release-note-template_1b727da8d60969c39acdb09f617eb616_2000-1024x670.png)


