![How to Create a User Onboarding Checklist [+ Tips and Examples] cover](https://blog-static.userpilot.com/blog/wp-content/uploads/2022/03/how-to-create-a-user-onboarding-checklist_17dc050d028c91a964dd052601698817_2000-450x295.png)
One of the best features you can hope to find with the user onboarding software you’ve chosen is a checklist. Having a user onboarding checklist will make it easier for users to find the next step and ensure that they don’t drop off before hitting their activation point.
In this article, we’ll go over why you should build user onboarding checklists, how to create one, and tips that can help you through the process!
Try Userpilot Now
See Why 1,000+ Teams Choose Userpilot
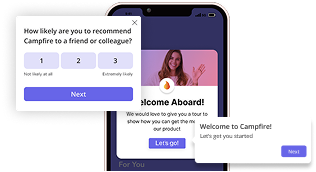
Why should you build user onboarding checklists?
You should build user onboarding checklists to minimize confusion, guide your users through the onboarding flow, and give them a structured roadmap to ensure they don’t skip any important steps or fail to discover core features.
How to create an onboarding checklist?
Creating your onboarding checklist doesn’t have to feel like rocket science since you can boil the entire process down into five steps:
- Define the goals of what you want to achieve with the checklist
- Map out the entire user journey and all related touchpoints
- Identify the sequence of onboarding tasks for new users
- Create onboarding content for each checklist task
- Analyze results and optimize through iteration
Let’s take a closer look at each of these steps in the sections below!
Define your onboarding checklist’s goal
First and foremost, you need to figure out what you’re trying to achieve by creating an onboarding checklist. Are there any crucial actions that users should take or key features that they need to discover to fully experience the value that your product provides?
How do those milestones change across different user personas or use cases?
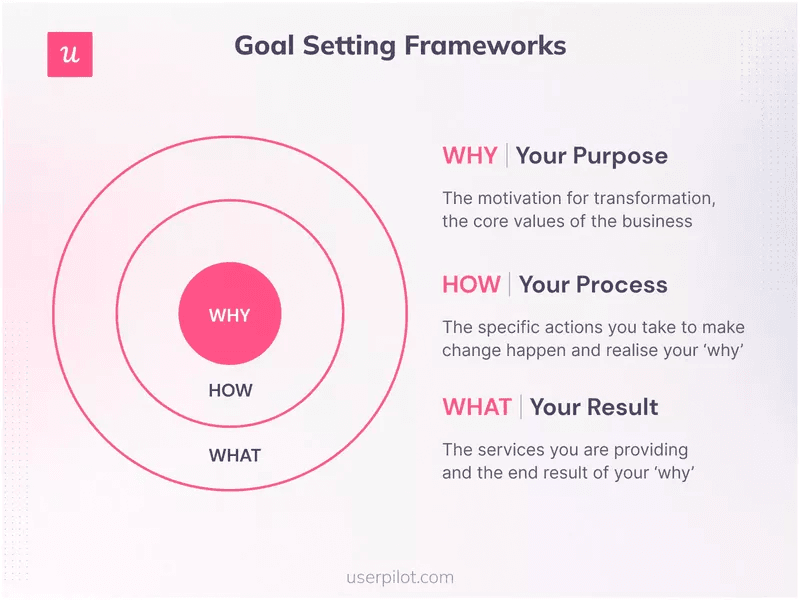
Answering these questions will give you the foundation for your onboarding checklist goals. If you’re still struggling to put everything together, you can use a goal-setting framework to organize the objectives in a specific and measurable way.
This will help you list down the “why, how, and what” of your onboarding checklist:
Map out the user journey and important touchpoints
Now that you’ve outlined the objectives for your onboarding checklist, it’s time to map out the customer journey itself along with all the relevant touchpoints that it’s comprised of. You should highlight particularly important moments in the user journey, so you know where to focus your efforts.
The Aha! moment is the point where users begin to understand the core function of your product and the value that it provides. In contrast, the activation point is the event that occurs when users actually experience that value for themselves.
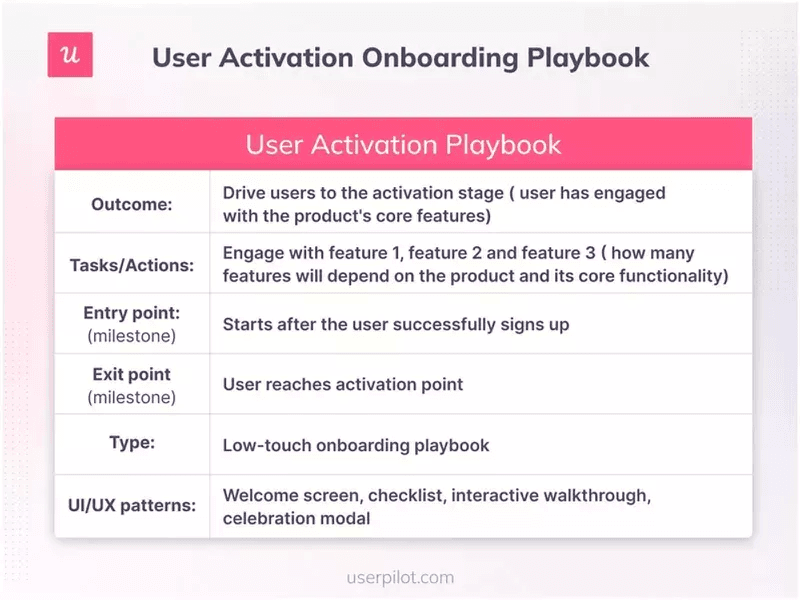
These paramount moments will set the groundwork for your onboarding tasks since all your checklist needs to do is walk them through each step and guide them toward the next milestone in their journey. Here’s our user activation playbook that you can use as a starting point:
Build a list of onboarding tasks in a sequential order
Now that you know what your goals are and where customers need to end up for that to happen, it’s time to list down the actual onboarding tasks (in sequence) that have to occur. This list should be structured in order of when they’ll be accomplished hen divided into distinct steps.
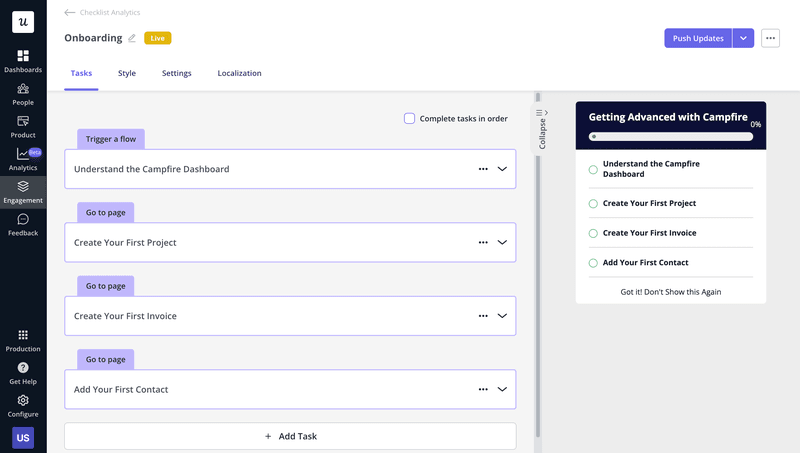
Your onboarding tasks may look something like this:
- Familiarize users with their home dashboards and walk them through what all the buttons/dashboards mean or do.
- Get them to create their first task, project, or campaign (depending on the type of product you’re onboarding them to).
- Prompt users to invite their collaborators, import their contacts, or share with clients (again, depending on what the product does).
These are just three broad examples that you’ll likely need to tweak based on the specific features and target audience of your product. In any case, dividing things into distinct onboarding steps will make the checklist creation process more manageable for you.
Build onboarding content for each of the tasks
It’s finally time to create the actual onboarding content for each of the tasks that users will need to complete while going through your onboarding checklist. The content can be in any format, but which medium you choose will depend on the type of task that the user needs to complete.
A few onboarding content formats you could consider include:
- Text. Help articles, product documentation, and other written guides help users learn more about using the product or self-solve any obstacles they may run into.
- Video. Recording microvideos for feature overviews, product tutorials, or other onboarding forms of onboarding guidance can help your new users learn in a visual way.
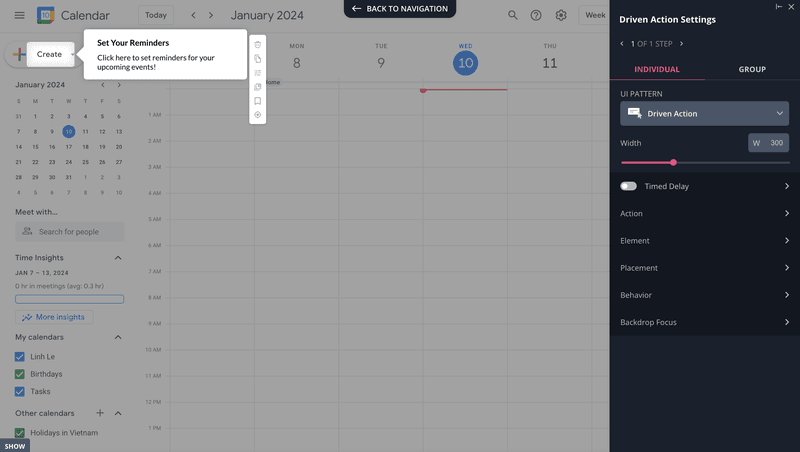
- Interactive. Interactive in-app guidance is the best way to guide users through each checklist task. These include tooltips, modals, and other UI patterns available to you.
For instance, you could use a tooltip to offer more context around specific features and explain how they work to users:
Analyze the checklist engagement and iterate
The process doesn’t end once you’ve built and published your onboarding checklist. Your next step should be to analyze the data and then continuously improve your onboarding checklist with every new iteration.
One approach would be to ask for user feedback after users complete the final task in the SaaS onboarding checklist so you can gather insights on what they liked or disliked. A more quantitative approach would be to review the engagement rate for each task in the checklist.
Userpilot shows you the exact number of people who started, completed, and dismissed your onboarding checklist so you can conduct funnel analysis to diagnose the bottleneck of the checklist’s performance:
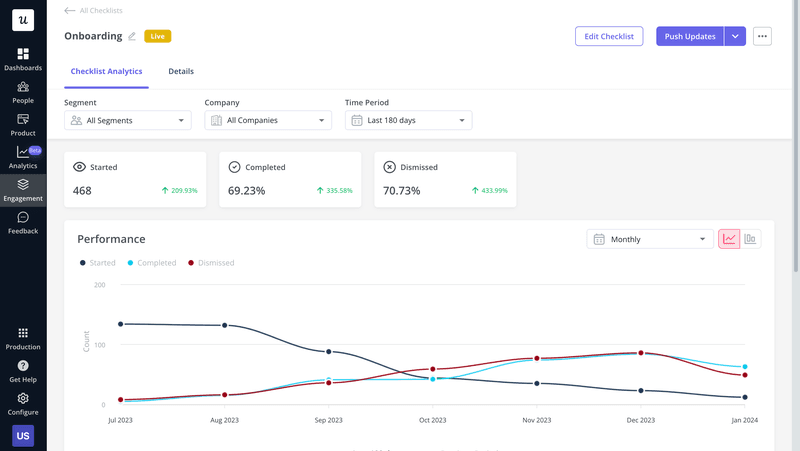
This will help you see which checklist item most users drop off before completing. If the data shows you that not enough people are starting the checklist or too many are dismissing it, this could be a sign that you need to redesign your entire onboarding process to increase engagement.
Tips to build an effective checklist for the user onboarding process
Creating a successful onboarding checklist is about more than just adding tasks and seeing if the user completes them. There are some best practices that you need to follow when integrating a checklist into your user onboarding process.
The five tips we’ll go over below are:
- Personalization
- Progress bars
- Interactive UI
- Gamification
- Messaging
Personalize the onboarding checklist
Your onboarding checklist should be personalized to the use case of the customer being onboarded. The easiest way to collect this information early on is through the use of welcome surveys. You’ll then be able to use the response data from these surveys to personalize the customer experience early on.
You can even use your welcome survey to ask users what they’d like to start with then redirect them to the most aligned onboarding task accordingly:
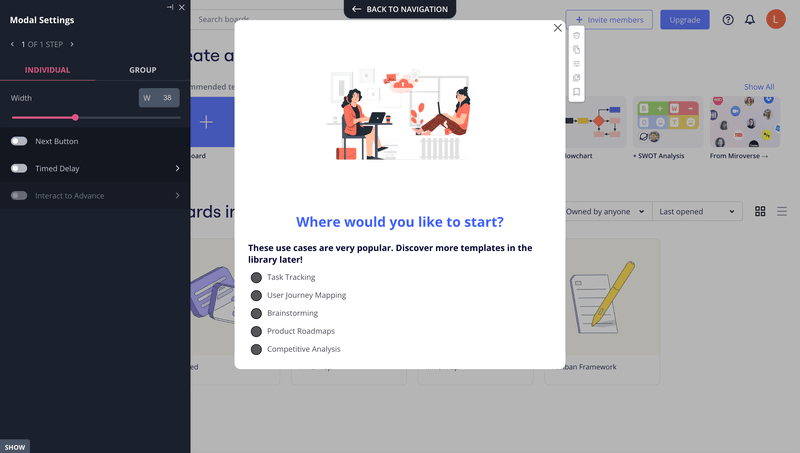
The more personalized a checklist is, the more engaged a new user will be when going through its tasks.
Include a progress bar to create a sense of achievement
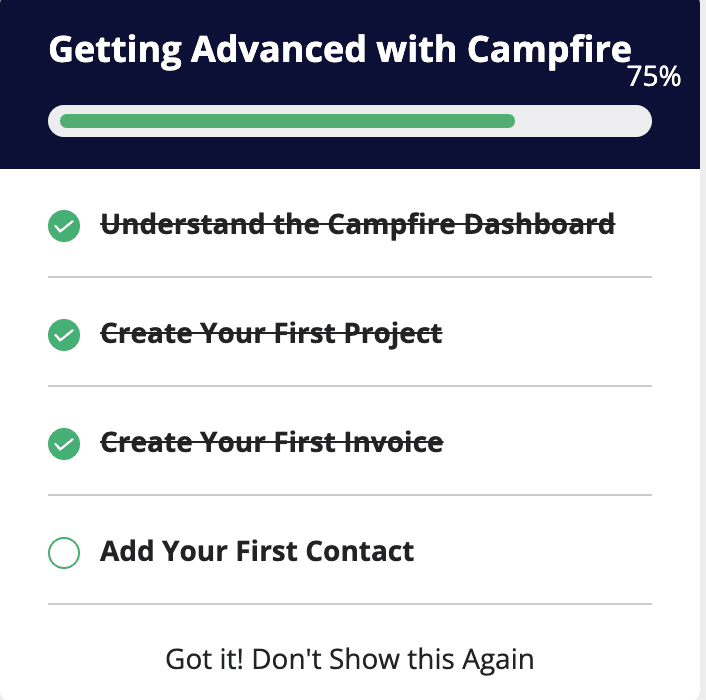
If you really want users to complete tasks, then your comprehensive checklist should include a progress bar. This will give users a visual representation of the progress they’re making and let them know how close they are to the end so they don’t drop off prematurely.
You can display this as a bar, pie, or completion percentage:
Use interactive UI elements to provide guidance
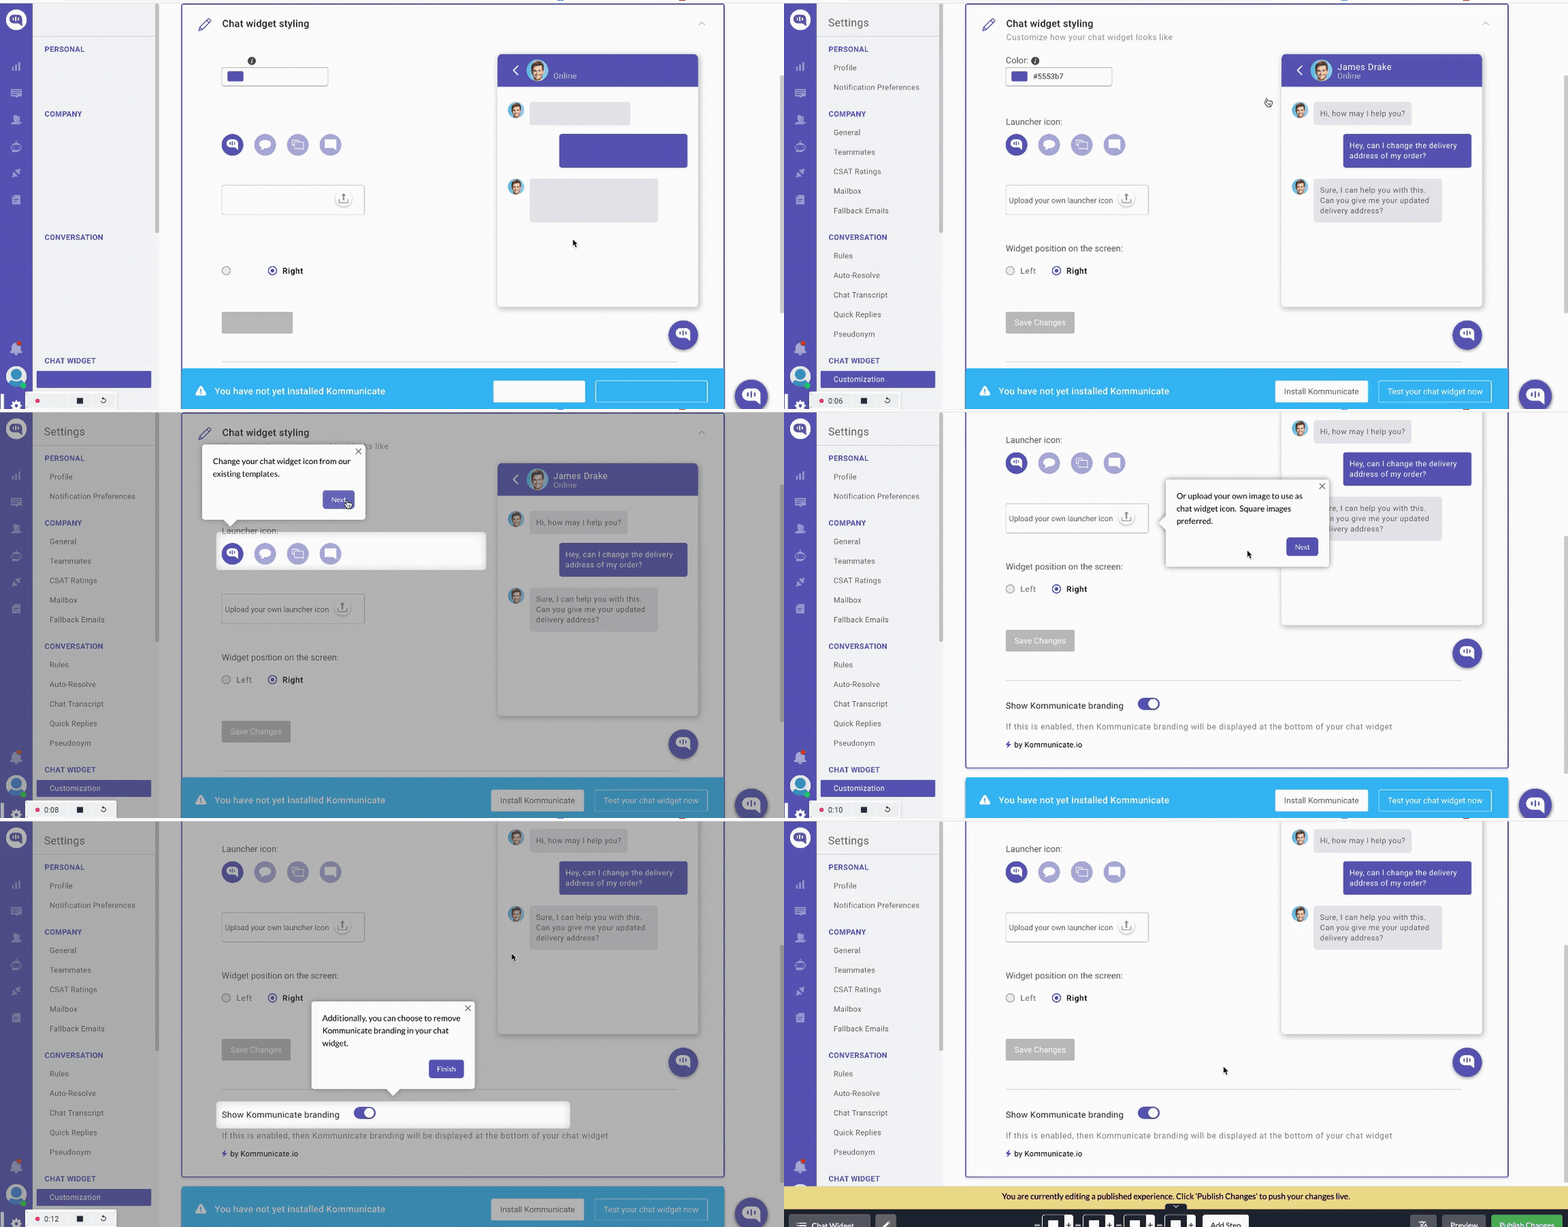
As we mentioned earlier, interactive elements are the most efficient way to guide users through complex tasks on their onboarding checklist. These interactive walkthroughs will also prompt users to take action and “learn by doing” along the way.
This stands in stark contrast to linear product tours where users do nothing but read some text, click next, and then repeat the process multiple times until a congratulations modal pops up. Here’s an example of what an in-app guidance flow could look like within your product:
Add gamification to enhance the user onboarding experience
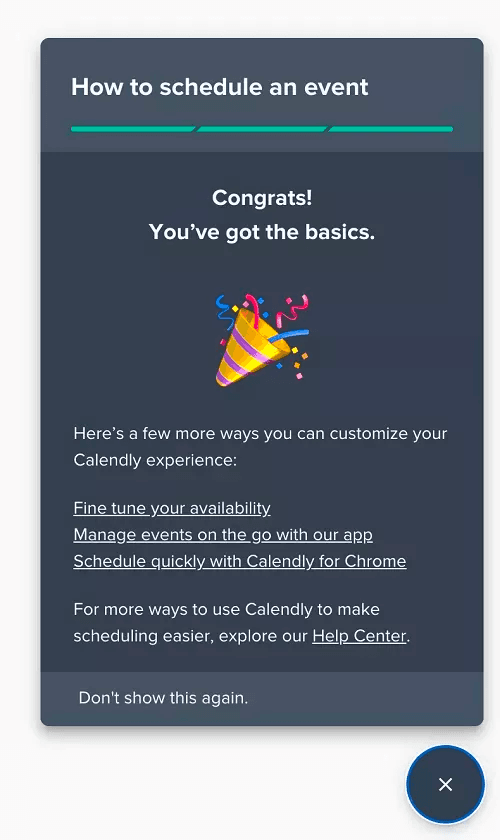
Instead of making onboarding a chore, strive to make your user onboarding experiences fun. The more enjoyable a process is, the more motivated users will be to keep going until they reach the end. Engagement gamification will encourage users to treat the process like play rather than work.
Use simple and straightforward language
Finally, it’s important that you prioritize clarity every step of the way. This will ensure that users actually understand what they’re supposed to be doing and that the onboarding checklist doesn’t serve to confuse them further.
A few practical steps you can take to make your onboarding checklist more understandable include:
- Using terminology that’s familiar to your target audience (instead of jargon or product-speak)
- Offer the checklist microcopy in the user’s native language through content localization
- Pick a minimalist theme that will make your microcopy stand out
These are just a few ways to maximize clarity within your onboarding checklist.
Onboarding checklist examples in SaaS
Below we’ll show you how each SaaS company designed their checklist, which best practice(s) they followed, and how you can do the same to provide immediate value to your new users through onboarding checklists!
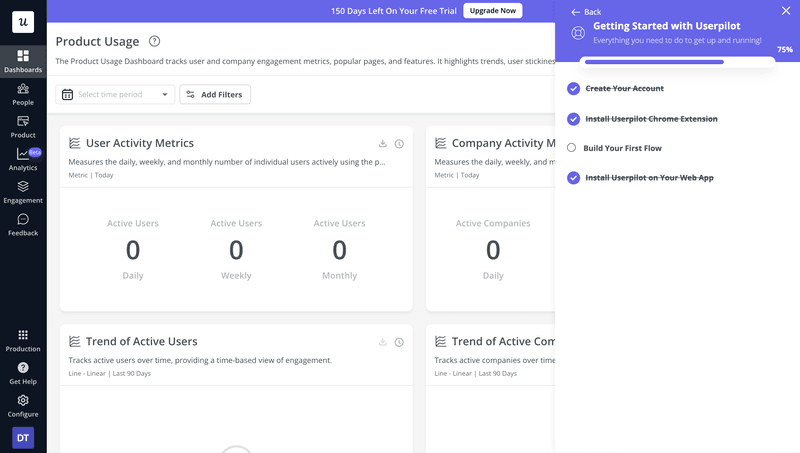
Userpilot utilizes a progress bar
Starting off with one of our own examples, you’ll notice that we practice what we preach by including a progress bar on the onboarding checklist for all new Userpilot customers. This is despite the fact that our checklist is only four tasks long!
Asana drives user engagement using gamification
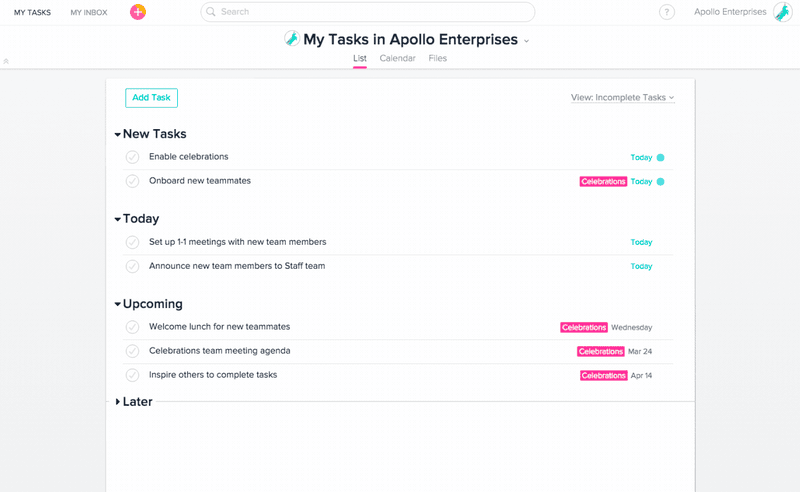
Asana, the widely-used project management tool, uses gamification to make users more engaged with the tasks they’re working on. Asana provides custom celebration animations whenever users complete key tasks, which makes the entire process of using the platform feel more rewarding.
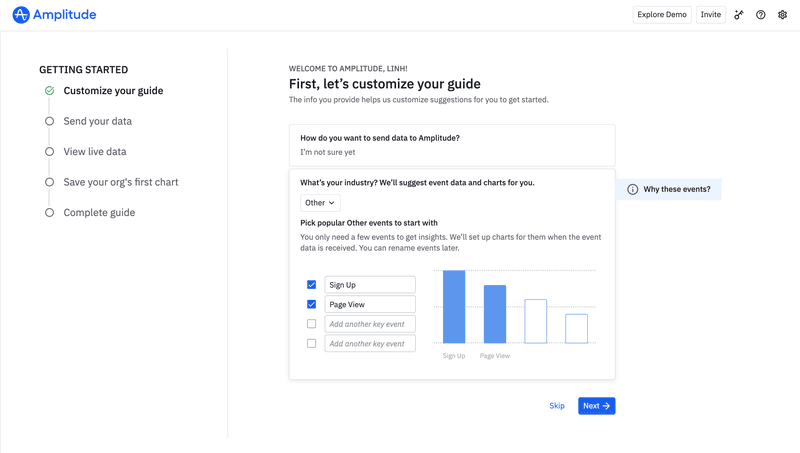
Amplitude includes step-by-step guidance
Amplitude has created detailed guides for their customers to read through while completing each task in the onboarding checklist. This maximizes customer success by providing the necessary context to work through the checklist as efficiently as possible.
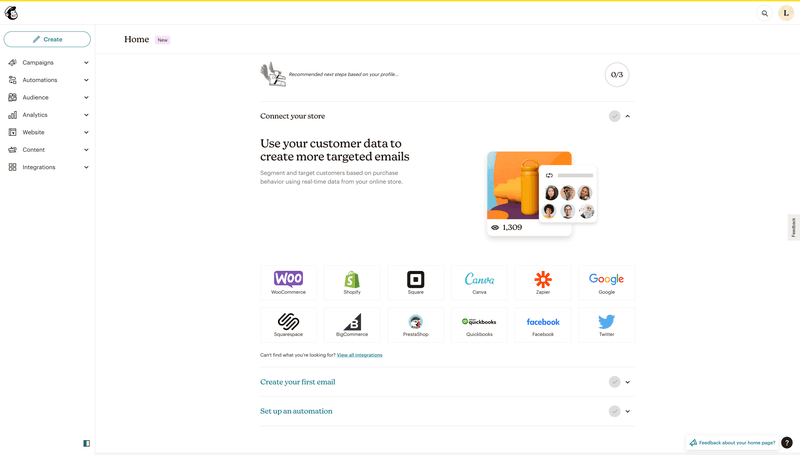
Mailchimp presents the checklist on the homepage
Because users failing to discover the onboarding checklist is a genuine issue that’s more common than you think, Mailchimp gets around the problem by putting the checklist right on its homepage. This makes users far more likely to see it and complete all the tasks.
Building an effective onboarding checklist with Userpilot
If you’re ready to start building your own onboarding checklist then Userpilot is the right tool to do it with. The process is quite intuitive so we’d recommend you sign up for a free trial and test our checklist builder out for yourself.
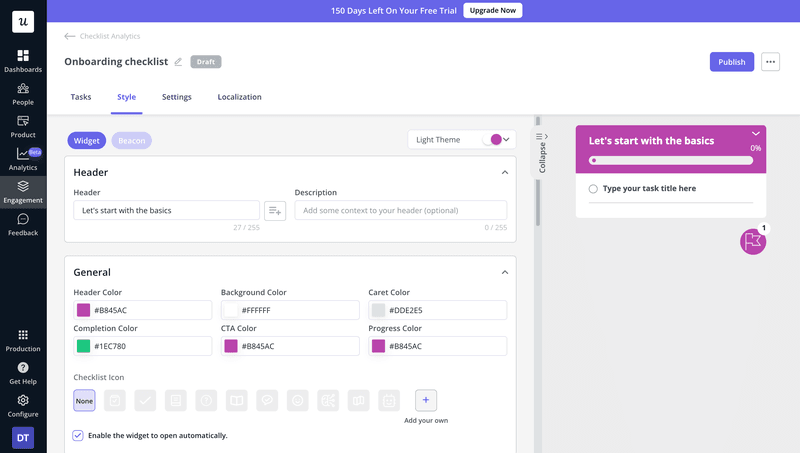
Here’s a quick overview:
- Advanced checklist settings. You get native customization, personalization, localization, and segmentation options when building any onboarding checklist with Userpilot. This ensures that the right checklists show up to the right users at the right time.
- Diverse UI elements. With a myriad of UI elements to choose from, Userpilot makes it easy to build the best checklists for your user base and support each task with comprehensive in-app guidance to help customers across each step of their journey.
- Checklist analytics. Userpilot’s detailed checklist analytics will help you track the performance of your checklist and the downstream impact it has on the rest of the user journey. This makes it easy to iterate, analyze, and then optimize based on the results of your tweaking.
Beyond checklist analytics, Userpilot also includes other advanced analytics features built right into the platform to help you understand (and improve) the impact of your checklists. These include funnel charts, retention tables, path tracking, product metrics, and data trends!
Conclusion
As you can see, user onboarding checklists can be an incredibly effective way to onboard new users to your product. If you use the process outlined in this guide, follow the tips we shared, and draw inspiration from the examples above, then you’re bound to build an effective checklist!
If you’re ready to start creating your own onboarding checklist then you can get started with a free Userpilot demo!


