Interactive Software Walkthroughs Aren’t Dead, They’re Inverting: Here’s What To Build Instead


I once ran an A/B test on an interactive software walkthrough. The treatment was a single tooltip: four words, one action, shown at the exact moment a user first needed it.
Users who saw it adopted that feature 200% more than the users who got nothing.
Those numbers confirm what I’d always believed: getting users to value is a real business problem, and many fail at it. To create effective walkthroughs, you must invert your thinking. Your users, not your UI, should be the protagonists in your process.
In this article, I explain why the UI-first thinking is structurally broken and how you can invert your thinking.
Do interactive walkthroughs still work?
The short answer is: Yes.
That’s not to say we haven’t all questioned its usefulness at some point.
In fact, Ramli John, author of Product-Led Onboarding, has been consistent about onboarding’s primary failure mode: you can’t add a product tour and send a few onboarding emails and expect that alone to produce activation. Without a strategy grounded in user research, the tour is useless.
And therein lies the point. Walkthroughs aren’t dead, but poorly implemented walkthroughs are ineffective.
I saw the effectiveness of a good walkthrough firsthand when I conducted the experiment cited in the introduction. A stakeholder at Userpilot had demanded we kill in-app tooltips. I ran a test: half of our users saw a tooltip at the exact moment they first encountered a new feature, and half saw nothing. When I pulled the feature adoption data, the difference was 200%.
So, while some may dislike tooltips and walkthroughs, the data indicates they remain very effective at driving activation or adoption.
Why is the old walkthrough model breaking down?
I’ve dealt with SaaS products long enough to recognize the pattern behind most SaaS walkthroughs: a tooltip tour. But that model is breaking. Three structural forces are limiting its effectiveness, and none of them is going away soon.
“Click here, then here, then here” stops working as products get more surface area
You know the tooltip tour, don’t you? I must have seen it a million times by now.
Click here.
Then here.
Then here.
With each tooltip, the user simply clicks the “Next” button.
These tours were designed to point to a product interface, showing users which buttons exist and, sometimes, describing what they do. The problem is that most products quickly expand from their limited workflows into 10, 15, or even 20 workflows.
Lauryn Isford, Head of Product Growth at Notion, is direct about why the format strains as products grow:
“Tooltips are actually pretty hard to learn from. They’re a fast, transient series of information tidbits that you have to memorize, and that’s a lot to ask of a new user.”
Phil Vander Broek, co-founder of Dopt and former Head of Growth Design at Dropbox, puts it more plainly:
“An 8-step tour that points out UI elements one after another will not work well.” He, thus, concludes that the best tours are 1 to 3 steps long.
This is where your thought inversion must begin. Regardless of how complex your product may be, the best tours contain only a few steps. When building a walkthrough for a multi-featured product, therefore, your primary design question should be: “What is this user trying to accomplish, and what’s the minimum path to get them there?” It shouldn’t be “How can I show them what all the buttons do?”
A framework I find useful for this process is the jobs-to-be-done framework. Instead of a lengthy tour of the dashboard, you can create a 4-step flow that ends with the user having done the first thing they came to do. Everything else can come after.
The 2-product mental model trap
I’ve seen this in a lot of startups.
The company starts with a limited MVP of 2 core features and designs its onboarding flow for them. Then, the product expands to add even more functions. But nobody rewires the front door; the tour stays the same, narrating the same original two features.
By the time a user completes the tour, they leave with a mental model that actively limits their own expansion.
That is the 2-product mental model trap. You suffer a product adoption problem because your onboarding tells a narrow story, and your buyers believed it.
The fix here is the same as the other: replace feature-first walkthroughs with job-first ones. If you do so, as your product expands and jobs now depend on more features, you’ll be forced to revisit your walkthroughs.
Of course, while doing this, you must also be careful never to expand your tour to highlight more features. Instead, streamline the primary onboarding tour to an activation task, and highlight other features later as needed.
Dev teams are shipping faster than you can build or maintain tours
Regardless of how good your current walkthroughs are, you’ll struggle to keep up if your product changes every other day. For better or worse, though, that’s where we find ourselves in this era of AI-assisted product development.
Our CEO at Userpilot, Yazan Sehwail, described this problem precisely when he said:
“The same force driving feature velocity is making manual tour maintenance untenable.” When a team ships 7 or 8 features a quarter, building and updating in-app guidance for each one is a full-time job that nobody actually has.
I’ve heard many within product circles complain about their growing graveyard of tours pointing at UI elements that no longer exist. Many are also struggling to create tours/walkthroughs fast enough to keep pace with the dev team’s shipping velocity.
All of this has created 3 simultaneous product failure modes:
- False confidence in users who completed an outdated flow.
- Broken trust in the product from users who encountered a broken flow.
- Uncertainty in users who encounter a new feature without any guidance.
This time, the fix isn’t to follow the job-first approach. Your approach won’t impact your velocity.
No, the only viable path I’ve found to keeping guidance current without burning out is to adopt AI yourself. AI-assisted walkthrough generation is a necessity, not just a nice-to-have.
Interactive software walkthroughs are undergoing a fundamental shift
When I first got into product marketing, the assumption was simple: the product knows more than the user about what the user should do next. As a result, the product narrated itself, and the user followed. But that’s no longer the case.
The rise of AI has led to a change in product usage patterns, problem-solving practices, and overall user expectations. These changes have led to a fundamental shift in what interactive software walkthroughs are supposed to be.
What is this shift, and what does it mean for you and your product?
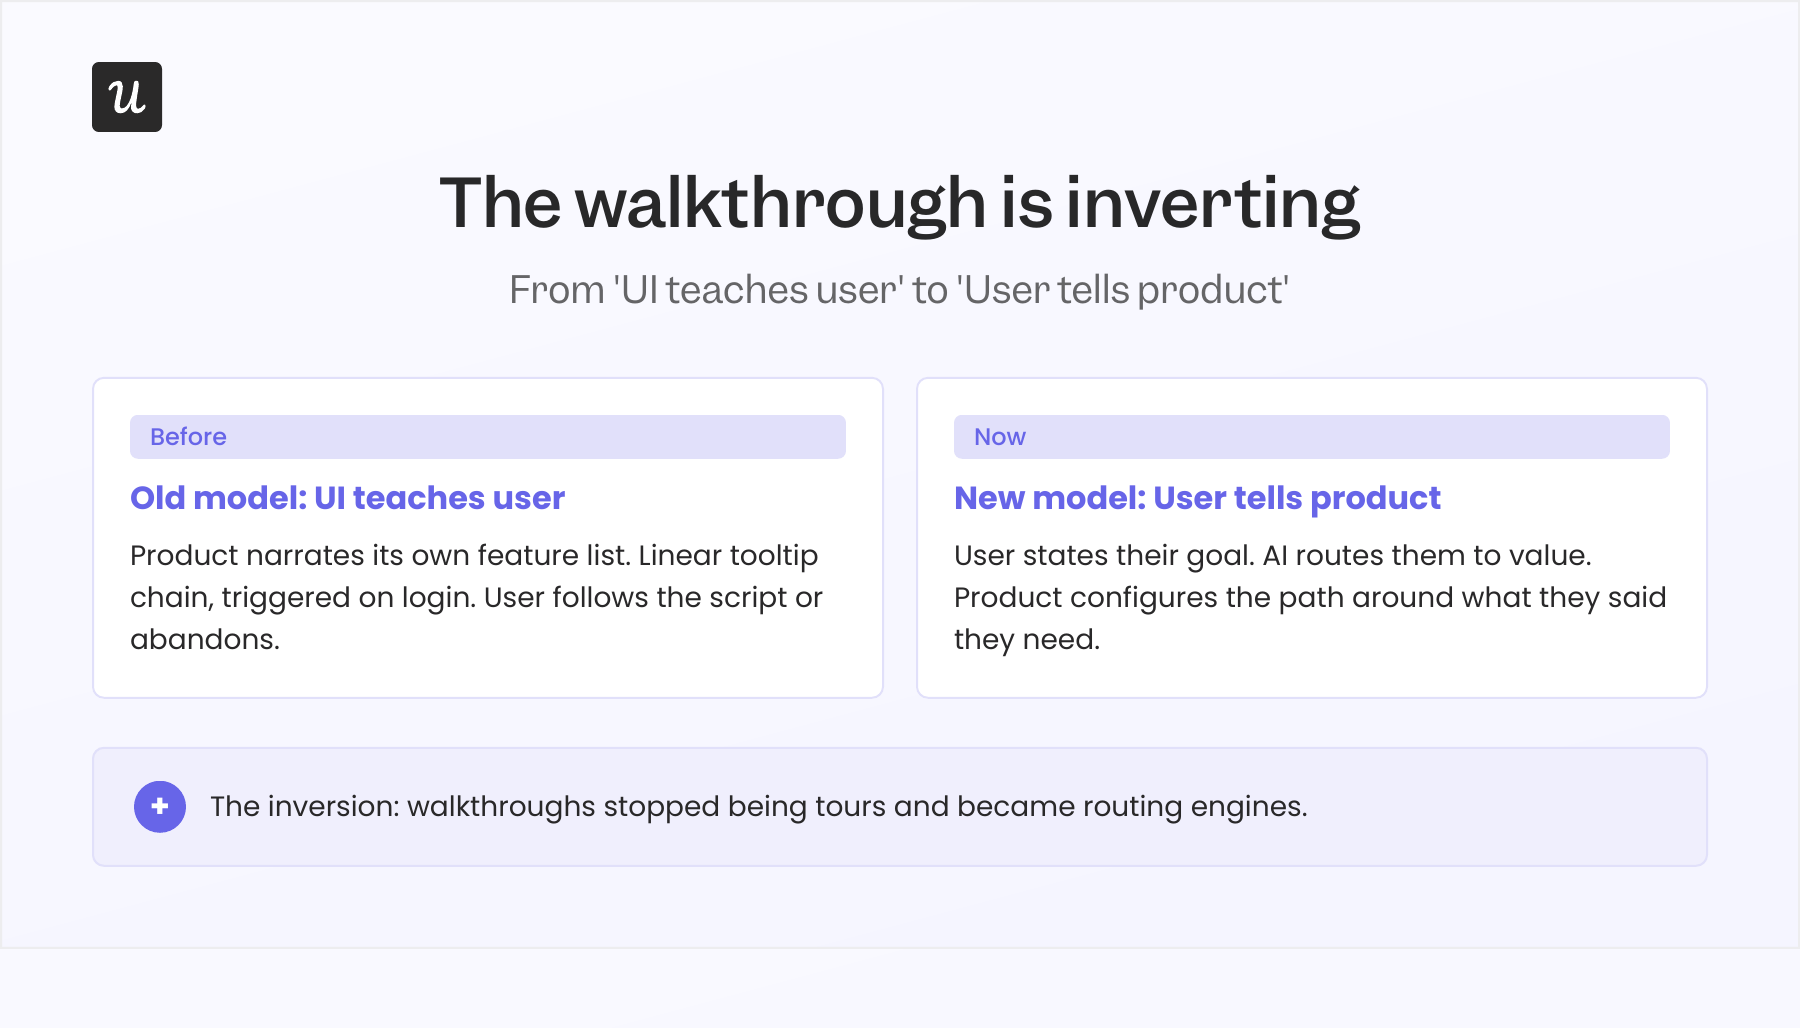
From “UI teaches user” to “user tells product”: the walkthrough shift shaping the future
The products winning on activation today ask users what they want to achieve and configure the experience around that stated goal without requiring them to learn the interface first. Instead of a welcome modal and tour explaining the dashboard layout, the best onboarding experiences I see today open with a question: “What are you trying to accomplish?”
Georgiana Laudi, founder of Forget the Funnel and a growth advisor to SaaS companies, frames the promise of AI-led onboarding around exactly this shift: the product stops explaining itself and starts routing users to the outcome they named.
Of course, if you’ve been paying attention, you’ll realize that this shift started even before the rise of AI. The importance of segmenting users based on real-time behavior has been well-documented and accepted even before AI entered the scene.
But segmentation is more crucial than ever before. Thankfully, it’s also easier to implement than ever.
Gone is the time when PMMs needed some knowledge of CSS selectors, dynamic attributes, and more to build and maintain tours. AI has removed that dependency. With an AI agent today, you can prompt any walkthrough you desire into existence.
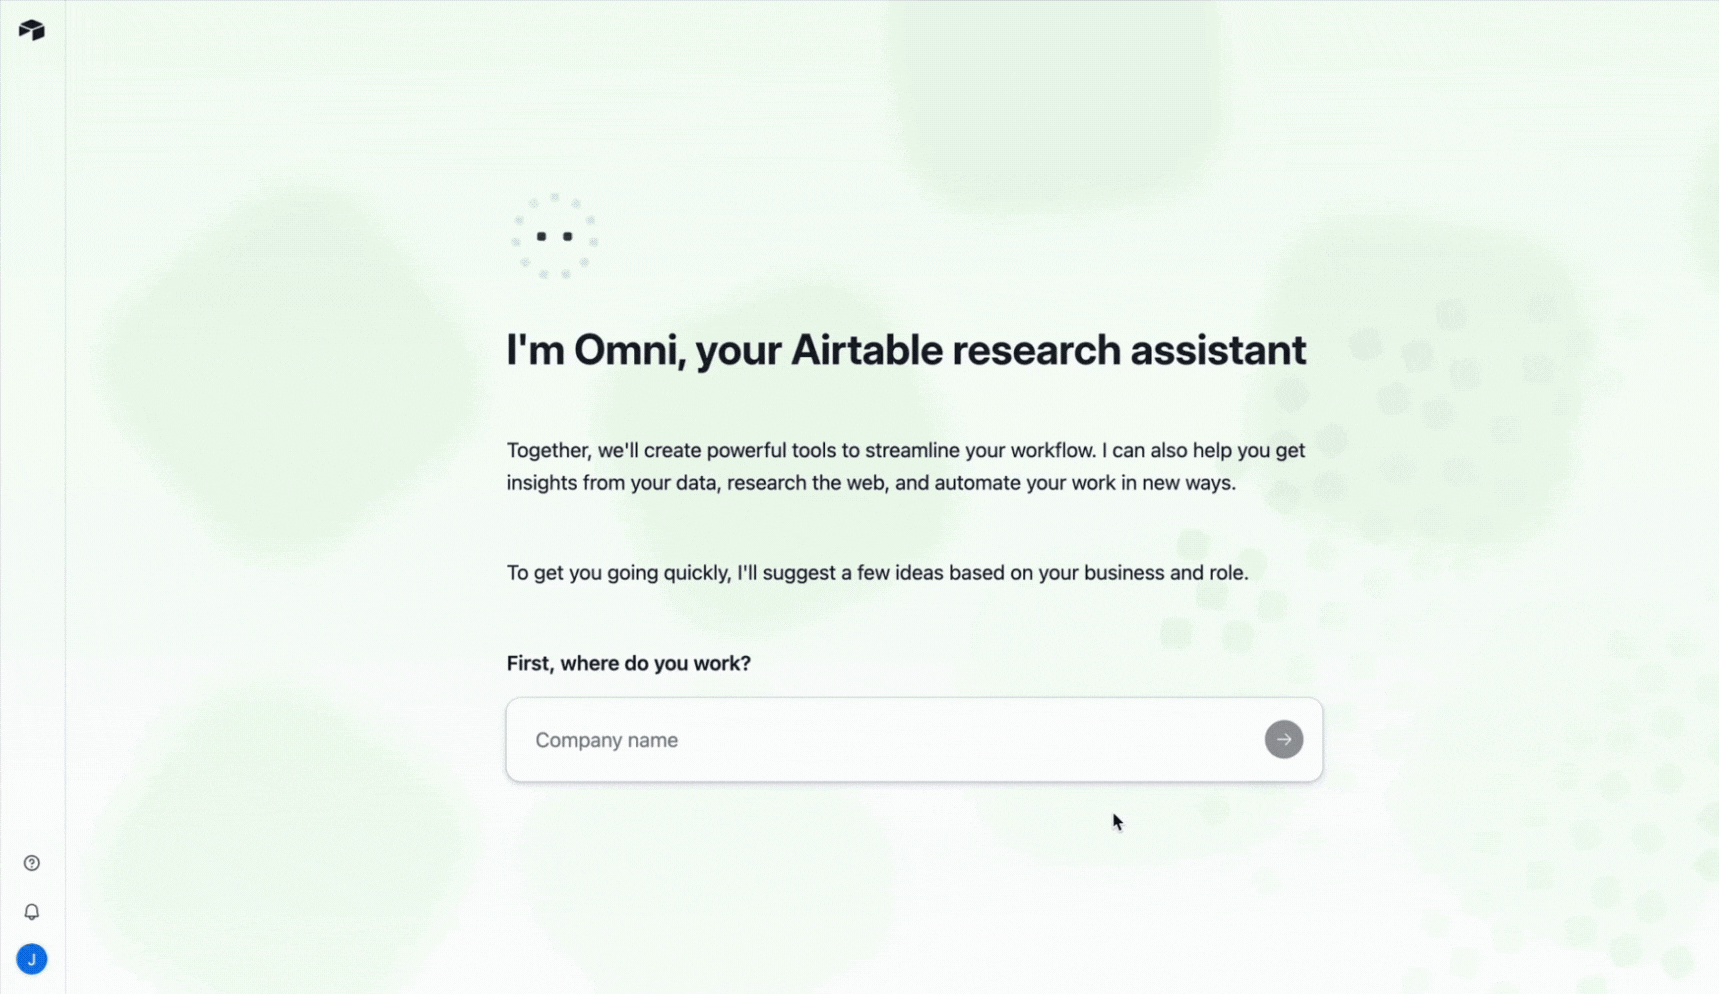
Alternatively, you can embed a conversational AI agent in your product to provide on-demand guidance, like what Airtable does with their onboarding agent Omni.
All of this means you can more easily curate narrow onboarding paths for smaller, targeted segments, or allow users to define their own onboarding path.
What does agentic onboarding actually look like in practice?
One of the most striking descriptions of agentic onboarding I’ve seen was provided by Allen Yang, a product and growth operator. In his LinkedIn post, he noted that a product onboarding experience felt “magical” because the product immediately “understood” what he was trying to do and built the setup around him. As a result, it felt less like a tour and more like a real-time personalized configuration by an expert.
That is the power of agentic onboarding come to life.
As our CEO at Userpilot, Yazan Sehwail, notes:
“You’re no longer operating. The AI is operating. You’re just basically evaluating and monitoring the agent workflow.”
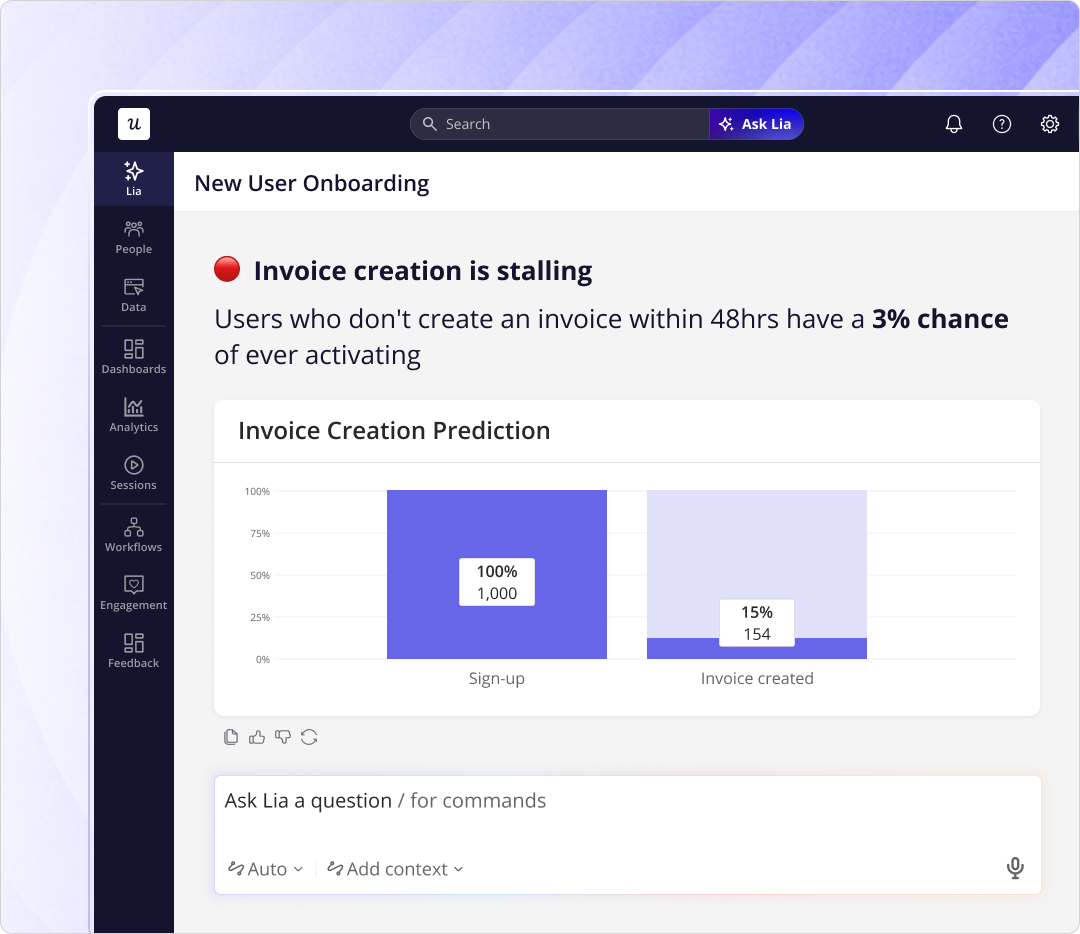
With Userpilot Lia, for example, all you have to do is describe your desired outcome. The agent explores your product and builds out the flow, no CSS selectors or engineering tickets required. As buttons change and flows break, Lia will also be on hand to point out broken flows and suggest fixes.
For teams building user onboarding today, that means the job is shifting from “build and maintain tours” to “define outcomes and review what the AI generates.”
Why does this shift make activation and expansion the same problem?
When onboarding is organized around a job-to-be-done rather than a feature, every product capability that serves that job surfaces naturally as the user progresses. As a result, activation and expansion happen along the same path rather than as separate motions handed off between teams.
Remember Sidharth Sundaram’s Ramp analysis from earlier? Let’s assume I’m tasked with restructuring it.
The first thing I’ll do is to define the different jobs a user will want to complete with the product. Let’s assume one of those jobs involves managing company spend. After briefly exploring the corporate card, my onboarding flow will highlight targeted Procurement, Travel, and Treasury features.
To the user, the features become reasonable tools to desire from the start, rather than a separate upsell ask.
As Ben Williams, publisher of the Product-Led Geek newsletter, puts it:
“In B2B, you’ll almost always want your activation, engagement, and retention metrics to be team-based, not individual user-based.”
But that framing only holds when onboarding treats the job as the organizing unit. Feature-first tours produce feature-sized mental models, which is why expansion conversations feel like selling rather than a natural continuation of activation.
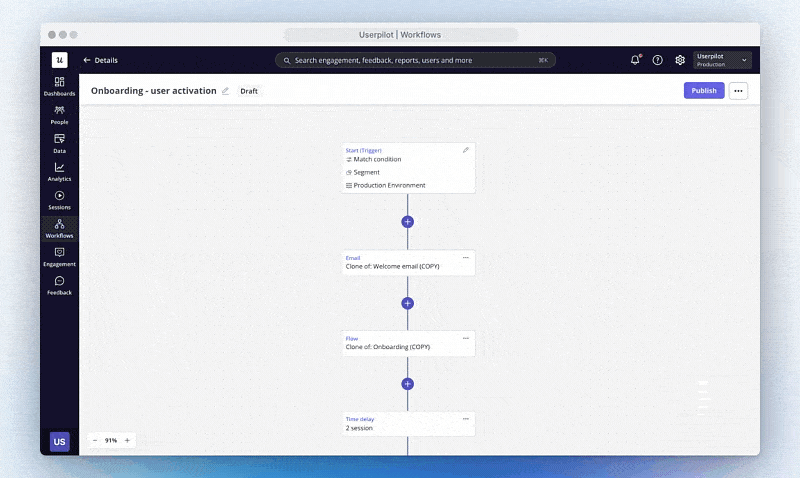
Userpilot’s Workflows feature exists for exactly this goal. You can build cross-product onboarding paths that follow the user’s job and adapt to their in-app actions, progress, and attributes. Activation and expansion are designed together from the start, not treated as two different teams’ problems.
What has to be true before AI walkthroughs can work for you?
If you’re thinking it’s time for you to find an AI tool to create a walkthrough for you, let me remind you that AI walkthroughs are only as good as the context they have. Before the inversion makes sense for your product, four things need to be in place.
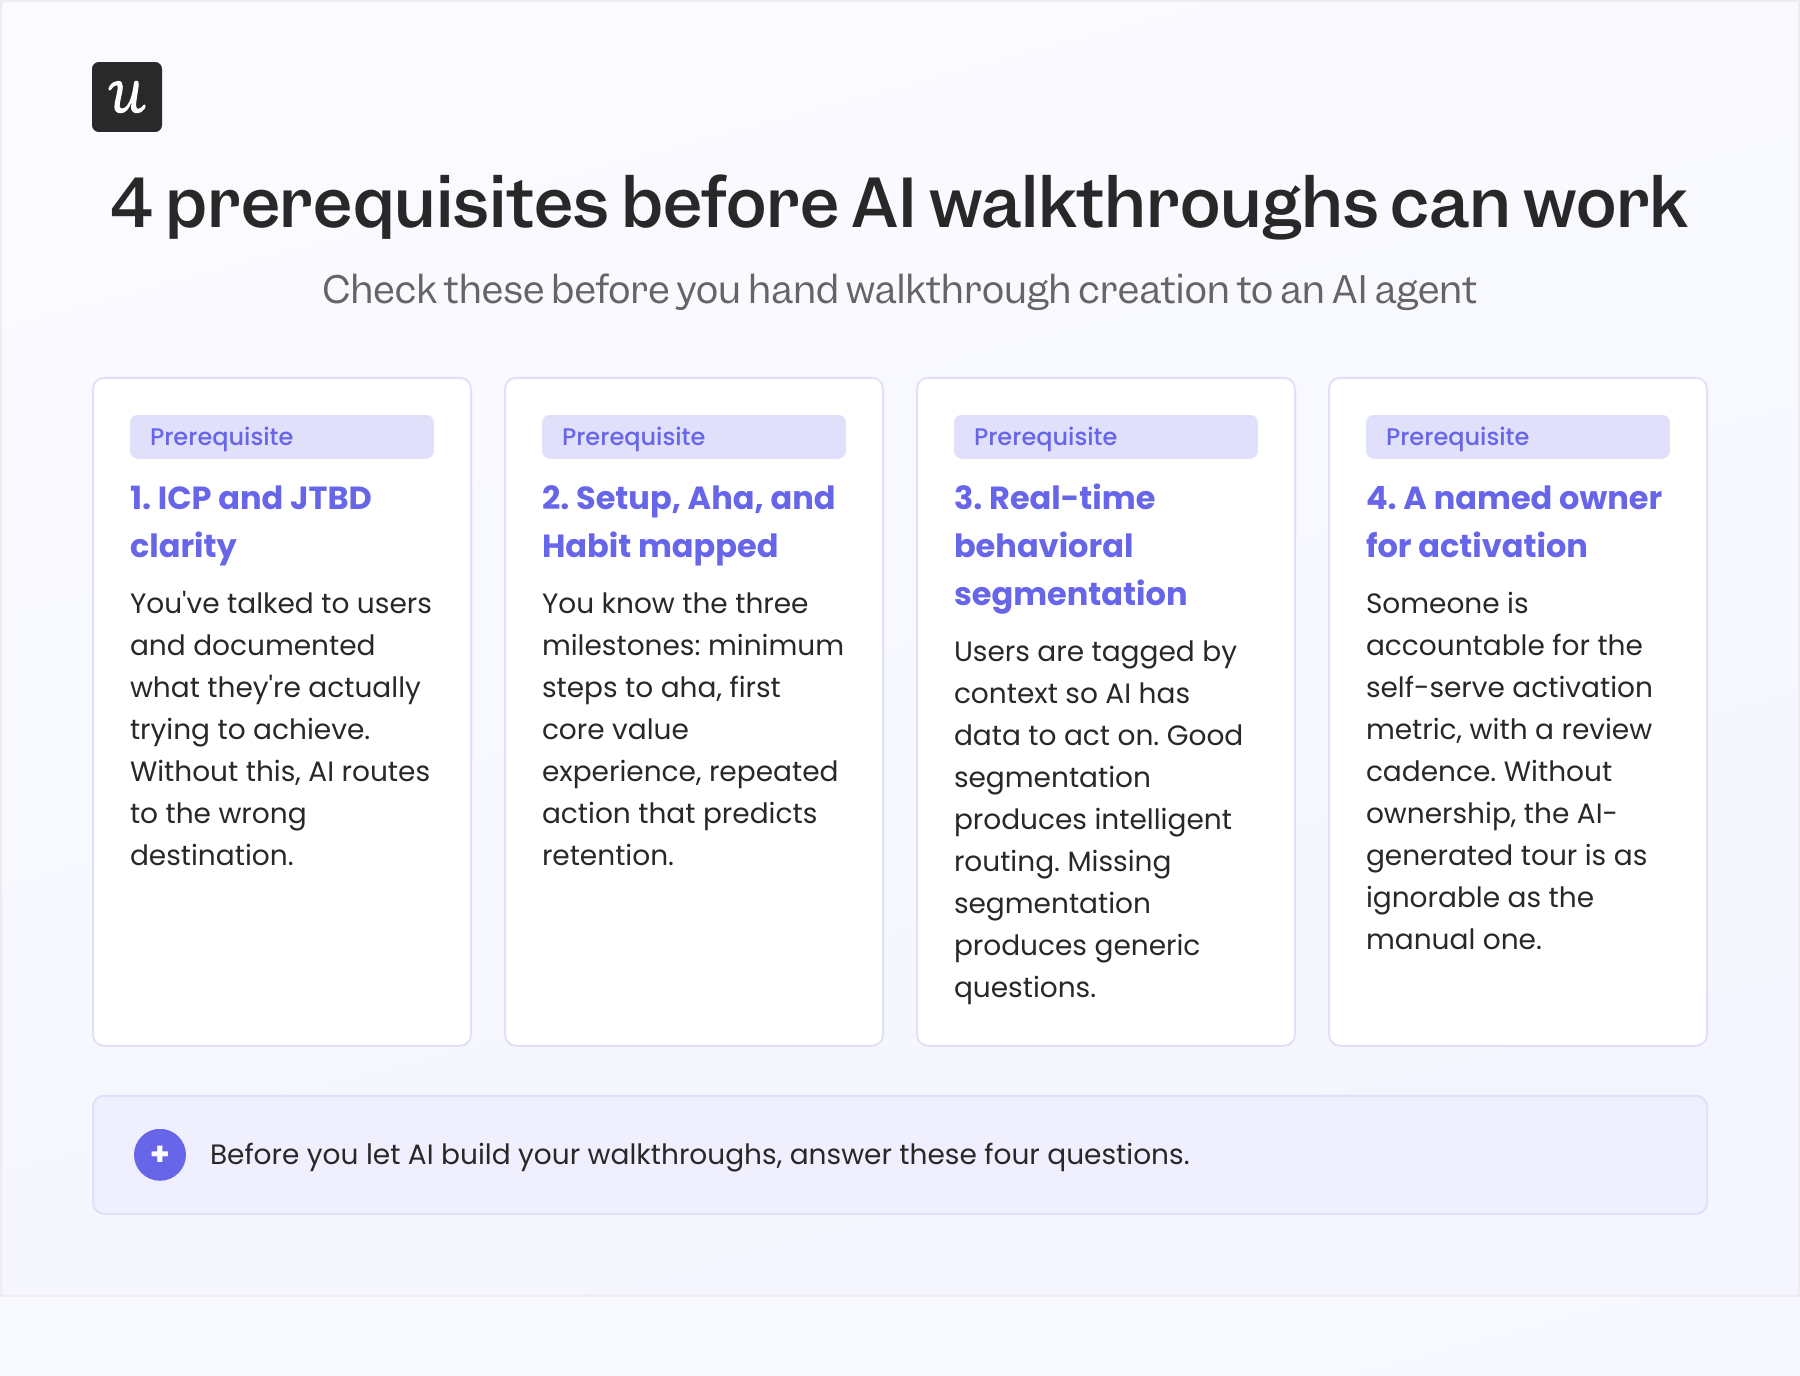
Do you actually know your ICP and JTBD well enough?
Who makes up your product’s ICPs? How well do you know their pain points and goals with your product? To avoid guessing when answering those questions, you must put in the work.
For example, Gaurav Vohra, Head of Growth at Superhuman, noted that Superhuman hand-onboarded its first customers specifically to understand “their deepest pain points, jobs to be done, and aspirations with email.” Only then did they finalize their ICPs and build out an automated onboarding flow.
Stressing the importance of this first-hand research, Lauryn Isford, Head of Product Growth at Notion, states:
“Only conversing directly with customers will help you understand their ‘why’ and arrive at the right solution.”
An AI routing users to value can only do its job if you’ve done yours first.
Have you mapped your Setup, Aha, and Habit moments?
Following his dealings with customers at Dropbox and Dopt, Phil Vander Broek created an onboarding framework built around three milestones: the Setup moment (minimum steps to reach the aha), the Aha moment (first time the user experiences core product value), and the Habit moment (the repeated action that predicts long-term retention).
My workflow for AI onboarding creation follows a similar pattern. I first define the Aha moment. Then, I identify the minimum steps required to get users there. Finally, I define the habit moment. Only then do I consider employing an AI agent to build the flow.
Mapping these is what turns your AI from a tour generator into an activation engine. Without them, the AI has no destination to route users toward.
Have you segmented users so AI has context to act on?
If you answered question 1 using real customer data, you should have segmented your users by now. Each segment will, of course, have its own setup, aha, and habit moments.
But your job doesn’t end there.
At Userpilot, I run every in-app messaging campaign off a single segment I set up once. To ensure these segments remain accurate, I update them automatically using real-time product signals. That behavioral context is exactly what an AI needs to decide which onboarding path a given user should see.
The moment your user segments fall behind, your onboarding goals fall apart.
Is anyone actually accountable for self-serve activation?
Ramli John has previously noted that an effective walkthrough program needs a named owner, a metric, and a review cadence. I agree with him fully.
Without someone to hold accountable for a clear goal, your AI-generated tour is just as ignorable as the manual one. It will define success poorly and quickly fall behind as the product evolves around it.
How should you rebuild your walkthrough today?
As I matured in my role, I had to audit and rebuild several walkthroughs. Here’s my go-to strategy for doing that today:
1. Strip it down to 4 to 5 steps, self-triggered, action-oriented.
Phil Vander Broek’s guidance is simple and backed by completion data: the best tooltip tours are 1 to 3 steps, and flows under seven steps consistently hit 50 to 75% completion. If your current walkthrough is 12 steps, don’t try to optimize it. Cut it.
Remove every step that doesn’t move the user toward their first moment of value. Completions follow structure: long flows with multiple actions per step are where users drop off.
If possible, keep your tour down to 3 steps or fewer. If not possible, ensure it’s not longer than 5 steps.
2. Replace “click here” with a reason tied to a job-to-be-done.
Rewrite each tooltip step as a reason, not an instruction.
For example, instead of “Click here to view the dashboard tab,” you can use “Set up your first report: you’ll see exactly where users are dropping off before they activate.”
The instruction is identical, but the framing isn’t.
Framing 1 shows the user the dashboard tab. Framing 2 shows them the tab, tells them why it’s important, and gets them to complete an activation event: creating their first report.
Sidharth Sundaram’s observation applies at the micro level here: steps that don’t connect to the user’s job create friction instead of removing it. Each step should answer the question “why does this matter to me right now?” not “what is this feature called?”
3. Connect products, not just features within one product.
If your product has more than one module, the walkthrough should model the relationship between them from day one.
Show users how their job spans multiple products as an honest picture of what fully solving it requires. The mental model formed in onboarding becomes the ceiling on every expansion conversation.
4. Use AI to configure based on user context.
The foreseeable future will be defined by who best applies the AI models and agents at their disposal.
AI tools like Lia ensure that onboarding can finally become a fully no-code process. The PMM defines the outcome, and AI handles the implementation: step copy, targeting rules, trigger conditions, etc. You review the implementation, approve, and ship.
5. Sign up for your own product every month to see what’s broken.
A fresh signup is the only honest audit of your onboarding experience. Every time you go through the flow as a new user, you find something stale, confusing, or missing entirely.
Shipping velocity guarantees your tour is almost always at least a little out of date. Monthly fresh signups are what keep that gap manageable: a first-hand experience of what a new user sees, not a quarterly review meeting or a ticket in the backlog.
Where does this go next?
Interactive software walkthroughs aren’t going anywhere. However, products that win on activation in the next few years won’t be the ones with the most polished 12-step tooltip tours. They’ll be the ones who figure out what each user is trying to do and build the shortest possible path to get them there.
If your current walkthrough is a lengthy linear tour triggered on login, it’s time to rebuild it. My own A/B test showed a 200% adoption lift from a single well-placed tooltip, and benchmark data confirms that flows under seven steps consistently hit 50 to 75% completion. So, start building.
All you need to build an effective interactive software walkthrough is already in Userpilot (Book a demo to see it in practice!). The only question left is who owns the activation number at your company. Start there, and the rest of the rebuild becomes a sequence instead of a project.
About the author