Product Launch Checklist for 2026: The Execution Playbook


A product launch checklist is only useful if you run it. Most of the ones online read like a definition with a to-do list bolted on, and they fall apart the moment a real product launch starts moving.
Structure is what separates the launches that land from the ones that fizzle. Companies with a defined go-to-market process hit a 63% launch success rate versus 53% without one, and post 3x higher median revenue growth.
So this is built as two execution checklists, one for a new product and one for a new feature, plus a short set of tips for the parts that a checklist cannot capture. It is the execution playbook: copy it into your project tool of choice and work through it as you ship.

New product launch checklist
A brand-new product is the heaviest launch you will run, because nobody is waiting for it yet. The work splits cleanly into three phases: pre-launch planning, launch week, and post-launch evaluation. Run the phases in order, since each one depends on the decisions locked in the phase before it.
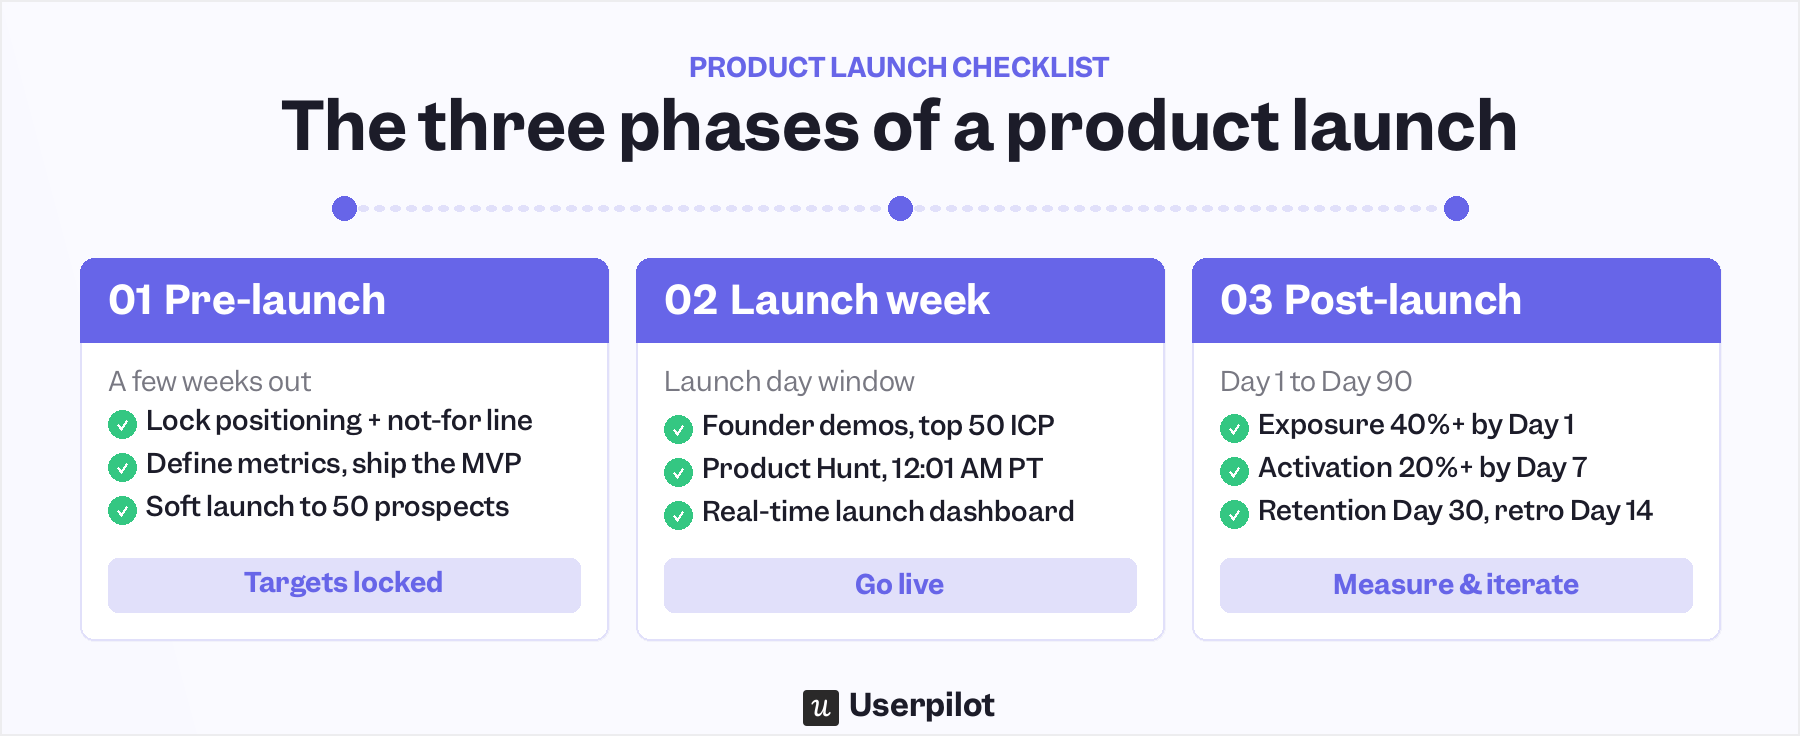
Pre-launch
Map 5 direct and 3 indirect competitors
Before you write a word of copy, build a simple grid of five direct competitors and three indirect ones, the workarounds people reach for instead of a tool like yours. For each, note how they position, who they are clearly for, and where their reviews say they fall short. The gap nobody is filling is usually where your launch message belongs.
Run 5 to 10 customer discovery interviews with your target ICP
Talk to five to ten people in your target ICP and ask user research questions about the problem. You are listening for the exact words they use to describe the pain, because those words become your headline later. Desk research can support this, but it never replaces hearing a real buyer explain what nearly stopped them from solving the problem.
Validate the idea with 3 pre-launch paying customers
A waitlist signup costs nothing, so it proves almost nothing. Three customers who pay before the product is finished is a far stronger signal that you are building something people genuinely want. If you cannot find three, treat that as data and revisit the problem before you keep building.
Lock the positioning statement, including a “who this is not for” line
Your positioning statement should fit in one sentence and answer three questions: who it is for, what it does, and what it replaces. Then write a second statement that most teams skip, which is who this is not for.
A position trying to be for everyone lands with no one, so naming the adjacent personas you are not serving sharpens the message and helps sales disqualify faster. Lock both statements before you build launch assets, because every piece of copy that follows depends on them.
Define your ICP and primary use case in one sentence each
If you cannot describe your ideal customer and their primary use case in one sentence each, the rest of the launch will wander. Write both down and pin them where the whole team can see them. Every targeting decision, from ad audiences to in-app triggers, traces back to these two lines.
Build and ship the MVP
Ship the smallest version that delivers the core value, not the version that covers every edge case. Agile teams release in small increments so each one can be tested and validated with real users before the next. A minimum viable product (MVP) exists to help you learn in public, and not to win an internal completeness contest.
Define success metrics (exposure rate, activation rate, time-to-value, Day 7 retention)
Decide what a good launch looks like in numbers before launch day. For a new product, the four that matter most are exposure rate, activation metrics, time-to-value, and Day 7 retention. Write the targets down now, because a metric you define after the fact is a story you tell yourself.
Draft the GTM plan and confirm your primary launch channel
Your go-to-market plan pulls positioning, pricing, channels, and the launch date into one place. Pick a single primary launch channel rather than spreading thin across six, then list the two or three that support it. A launch is a campaign, so sequence the channels to feed each other.
Decide on the pricing model and lock the pricing page copy
Choose your SaaS pricing model deliberately, whether tiered, usage-based, or freemium, based on what competitors charge and what buyers signaled in discovery. Price to sell and learn rather than to squeeze out maximum revenue on day one. Lock the pricing page copy before launch, since changing it mid-launch confuses both prospects and your own reps.
Create launch assets (landing page, demo video, email sequence, social posts)
Build the minimum kit that carries the message: a converting SaaS landing page, a short demo video, an email sequence, and the social posts. Keep every asset on the same positioning and the same proof points, because three slightly different value props make a small company look unsure of itself.
If resources are thin, prioritize the landing page and the demo, the two assets that do the most selling.
Build the sales enablement deck and objection-handling doc
Sales enablement is the part that quietly decides launch day. Give reps a tight pitch deck and a one-page objection-handling doc so they can answer the hard questions on a live call without improvising. A launch where reps cannot articulate the value prop generates leads that die in the pipeline.
Train customer support on the technical details and common questions
Brief your support team well before launch day. They need the technical details, the common questions, and the known rough edges so the first wave of users gets fast, accurate help. Looping them in early also buys time to build the help articles and tutorials they will lean on once volume hits.
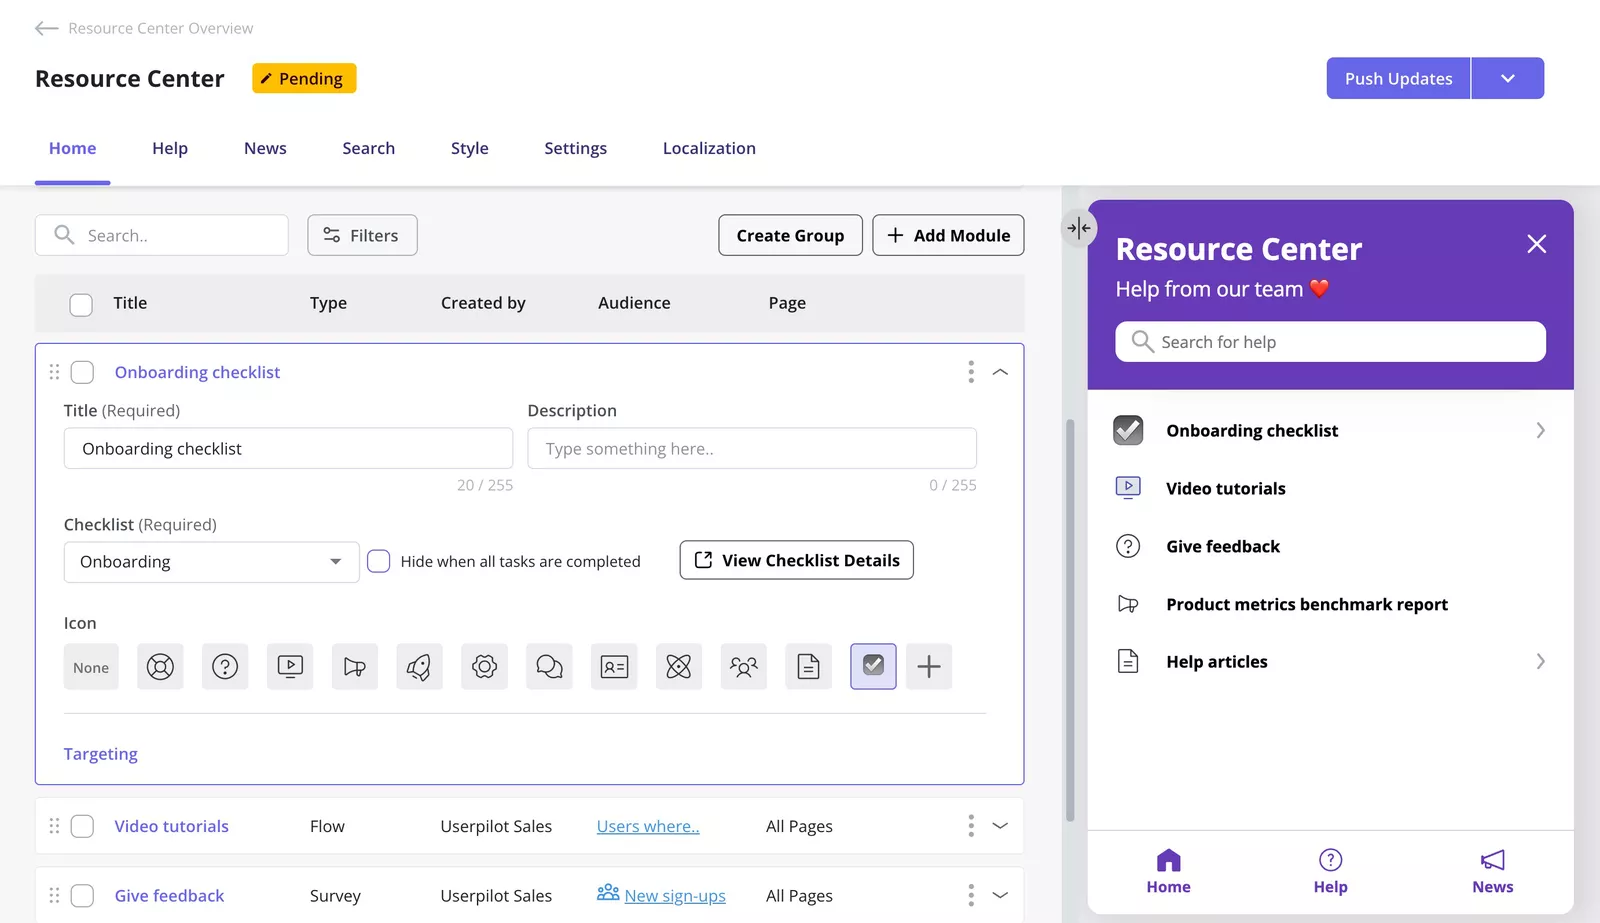
Build resource center content (help articles, video tutorials, FAQ)
Stock a resource center with help articles, short video tutorials, and an FAQ before users arrive asking for them. Self-serve content deflects support tickets and lets new users solve problems at the moment they hit them. With Userpilot, you can build and update this resource center without code, so support and product keep it current themselves.
Run a soft launch with 50 hand-picked prospects to surface real-world bugs
Before the public launch, release to around fifty hand-picked prospects to surface the bugs that only appear in real use. Run functional, security, and performance checks alongside it, because a technical failure on launch day can do lasting damage to a brand’s reputation. A smaller, clean launch almost always beats a bigger, messy one.
Launch week
Confirm the Product Hunt slot (Tue/Wed/Thu, 12:01 AM Pacific, maker account 30+ days old)
If Product Hunt is part of your plan, lock the logistics early: launch on a Tuesday, Wednesday, or Thursday at 12:01 AM Pacific, from a maker account that is at least 30 days old. The first six hours set your initial ranking, so concentrate your warmest supporters there. So treat it as a coordinated event.
Schedule founder-led demos for your top 50 ICP-matched prospects
For an early-stage launch, the founder is still the best salesperson on the team. Book demos with your top fifty ICP-matched prospects, frame the first call as problem discovery, then move fast to a live demo where product fluency shines. Warm introductions convert better than cold outreach, so write a short blurb that others can forward.
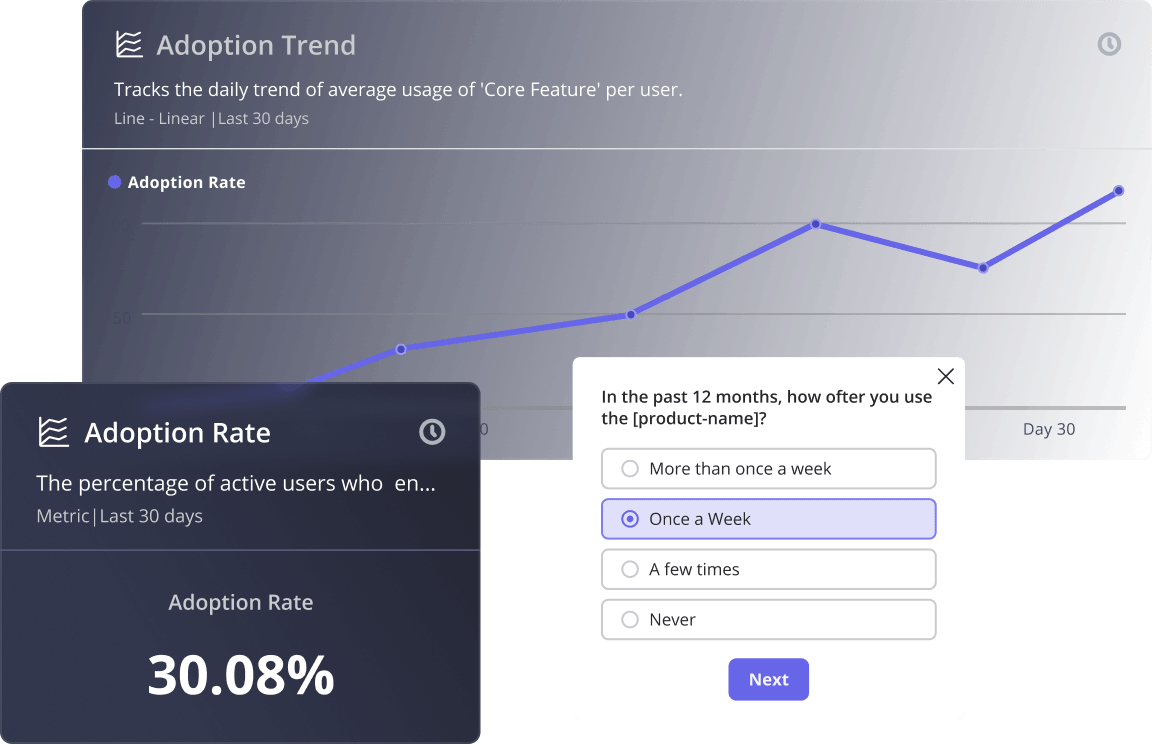
Set up a real-time launch dashboard for exposure, activation, and support signals
Stand up one dashboard that shows exposure, activation, and support signals in real time, with UTM codes wired in so you can see where traffic and conversions come from. When everyone watches the same numbers, you avoid the silos where each team reads a different version of the truth.
Userpilot’s custom analytics dashboards can surface these signals in one place, so product, marketing, and support are not stitching together separate tools on launch day
Brief the team on the launch-day comms protocol and dedicated Slack channels
Decide before launch day who says what, and where. Set up dedicated Slack channels for launch comms and bug triage so issues get routed instead of lost in DMs. The most common cause of launch chaos is a coordination gap, where teams work from different timelines and the message drifts.
Send the product launch email to existing contacts
Email your existing contacts the moment the launch goes live, since they are your warmest, highest-intent audience. Segment the list so the message matches what each group cares about rather than blasting everyone the same copy. A targeted note to people who already know you often outperforms any amount of cold reach.
Publish the Product Hunt listing and reply to every comment within 15 to 30 minutes
Publish the listing at 12:01 AM Pacific and then stay present, replying to every comment within 15 to 30 minutes for the full day. Each reply keeps the thread active, which feeds the ranking algorithm and signals that a real team stands behind the product. Going dark for a few hours is how a promising listing stalls.
Have the founder personally respond to inbound for the full launch day
Speed of response in the first day is one of the strongest predictors of early conversion. Put the founder on inbound for the full launch day, because a fast, human reply to an early question often impresses a prospect more than a flawless demo would. Every inbound signal should also land in the CRM so nothing gets lost in the rush.
Post-launch (Day 1 to Day 90)
Measure exposure rate by the end of Day 1
By the end of Day 1, check exposure, which is the share of your target audience that saw the launch. If exposure is lower than expected, investigate distribution channels, announcement timing, audience targeting, and in-app triggers before making changes to the product itself. Low adoption often starts with a discovery problem rather than a product problem.
Measure activation rate by Day 7 (target: 20%+ took a first meaningful action)
By Day 7, measure activation, the share of new users who took a first meaningful action rather than signing up. Aim for 20% or more, and treat it as your earliest reliable read on whether the product delivers on its promise.
The window is brutal, with top performers losing nearly half their activated users between Day 1 and Day 7, and more than 98% of users are lost to customer churn within two weeks if they never reach value.
Track support tickets and friction reports daily for the first 14 days
For the first fourteen days, read support tickets and friction reports every day, not weekly. At a previous company, our activation dropped suddenly, and everyone told me to fix the onboarding. However, I knew the onboarding worked, so I went into session replays and found an intermittent bug we could never have reproduced from a ticket alone.
Watch the users, because the cause of a post-launch dip is often something a dashboard cannot show you.
Run a launch retrospective by Day 14
Hold a launch retrospective by Day 14 while the details are still fresh. Walk through what went well, what broke, and which assumptions turned out wrong, then write it down. A retro that lives only in people’s heads helps no one plan the next launch.
Measure retention rate by Day 30
At Day 30, measure how many of the launch cohort are still active. This is the first real test of whether the product earned a place in users’ routines or just borrowed their attention for a week. Weak Day 30 retention usually traces back to a slow time-to-value.
Compare adopters vs comparable non-adopters at Day 60 and Day 90
At Day 60 and Day 90, compare the people who adopted against a comparable group who did not. The difference in user retention, expansion, and user engagement is the cleanest measure of the launch’s business impact. This is also where you separate a feature that drives outcomes from one that simply got attention.
Document the learnings for your next launch
Close the loop by documenting what you learned somewhere the next launch team will find it. Note the channels that worked, the messages that landed, and the steps that caused friction. Each launch should make the next one faster, which only happens when the lessons outlive the people who ran it.
New feature launch checklist
A feature launch is lighter than a new product launch, because you already have a product and a user base to draw on. That shifts the work: less convincing strangers, more making sure the right existing users notice and adopt.
The checklist below starts earlier than most, at the question of whether to build the thing at all.
Before you decide to build
Review feature request volume and feedback patterns
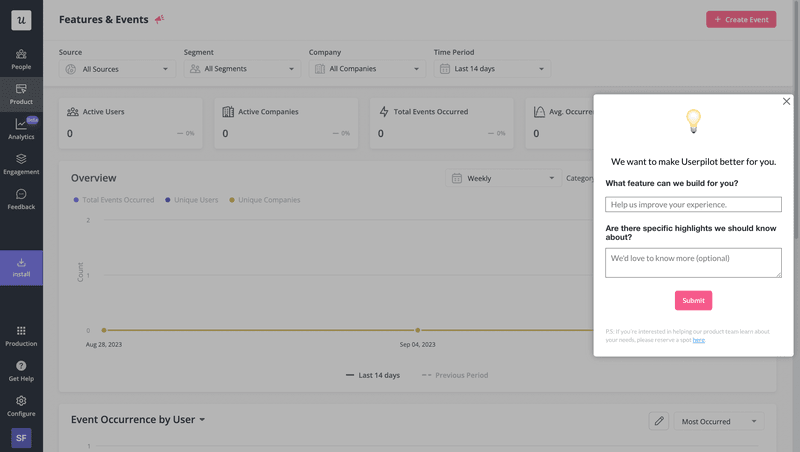
Start with the evidence you already have: feature request volume, in-app survey responses, and recurring themes from customer interviews. Look for patterns across sources rather than reacting to the loudest single voice. A request that shows up everywhere is a signal, while a request that shows up once is an anecdote.
Prioritize using a framework (Kano, RICE, Value vs Effort)
Run the candidates through a prioritization framework such as Kano, RICE, or Value vs Effort. Which one fits depends on your product’s maturity and how fast you need to decide. The framework exists to make the tradeoff explicit.
Confirm the feature solves a real workflow problem, not a discovery problem
Before you commit engineering time, confirm the feature solves a real workflow problem. Users often ask for something that already exists but is buried where they cannot find it.
As Abrar Abutouq, one of our PMs, points out, the drop-off is frequently not in engineering at all, just in the in-app messaging.
Size the launch: Major feature, enhancement, or minor update
Right-size the launch before you plan it. A major feature earns the full pre-launch sweep, an enhancement needs a marketing announcement and a sales heads-up, and a minor update needs little more than release notes and support awareness. Matching effort to scope is what keeps a Tier 3 update from eating a Tier 1 amount of time.
Pre-launch (for major features only)
For a major feature, the pre-launch work is the same sweep you would run for a new product, so use the execution notes from the first checklist rather than repeating them here. Then run through the same items:
☐ Map 5 direct and 3 indirect competitors
☐ Run 5 to 10 customer discovery interviews with your target ICP
☐ Validate the idea with 3 pre-launch paying customers
☐ Lock the positioning statement, including a “who this is not for” line
☐ Define your ICP and primary use case in one sentence each
☐ Build and ship the MVP
☐ Define success metrics (exposure rate, activation rate, time-to-value, Day 7 retention)
☐ Draft the GTM plan and confirm your primary launch channel
☐ Decide on the pricing model and lock the pricing page copy
☐ Create launch assets (landing page, demo video, email sequence, social posts)
☐ Build the sales enablement deck and objection-handling doc
☐ Train customer support on the technical details and common questions
☐ Build resource center content (help articles, video tutorials, FAQ)
☐ Run a soft launch with 50 hand-picked prospects to surface real-world bugs
Launch day
Roll out the feature to the targeted segment
Release the feature to the segment you defined, not to everyone at once. A staged rollout to the users who will get the most value first gives you a cleaner read on adoption and contains the blast radius if something breaks. You can widen access once the early numbers hold.
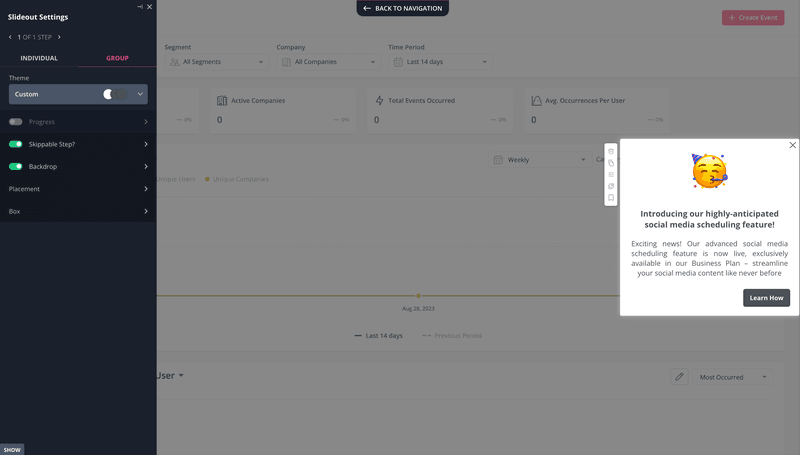
Trigger the chosen in-app announcement format
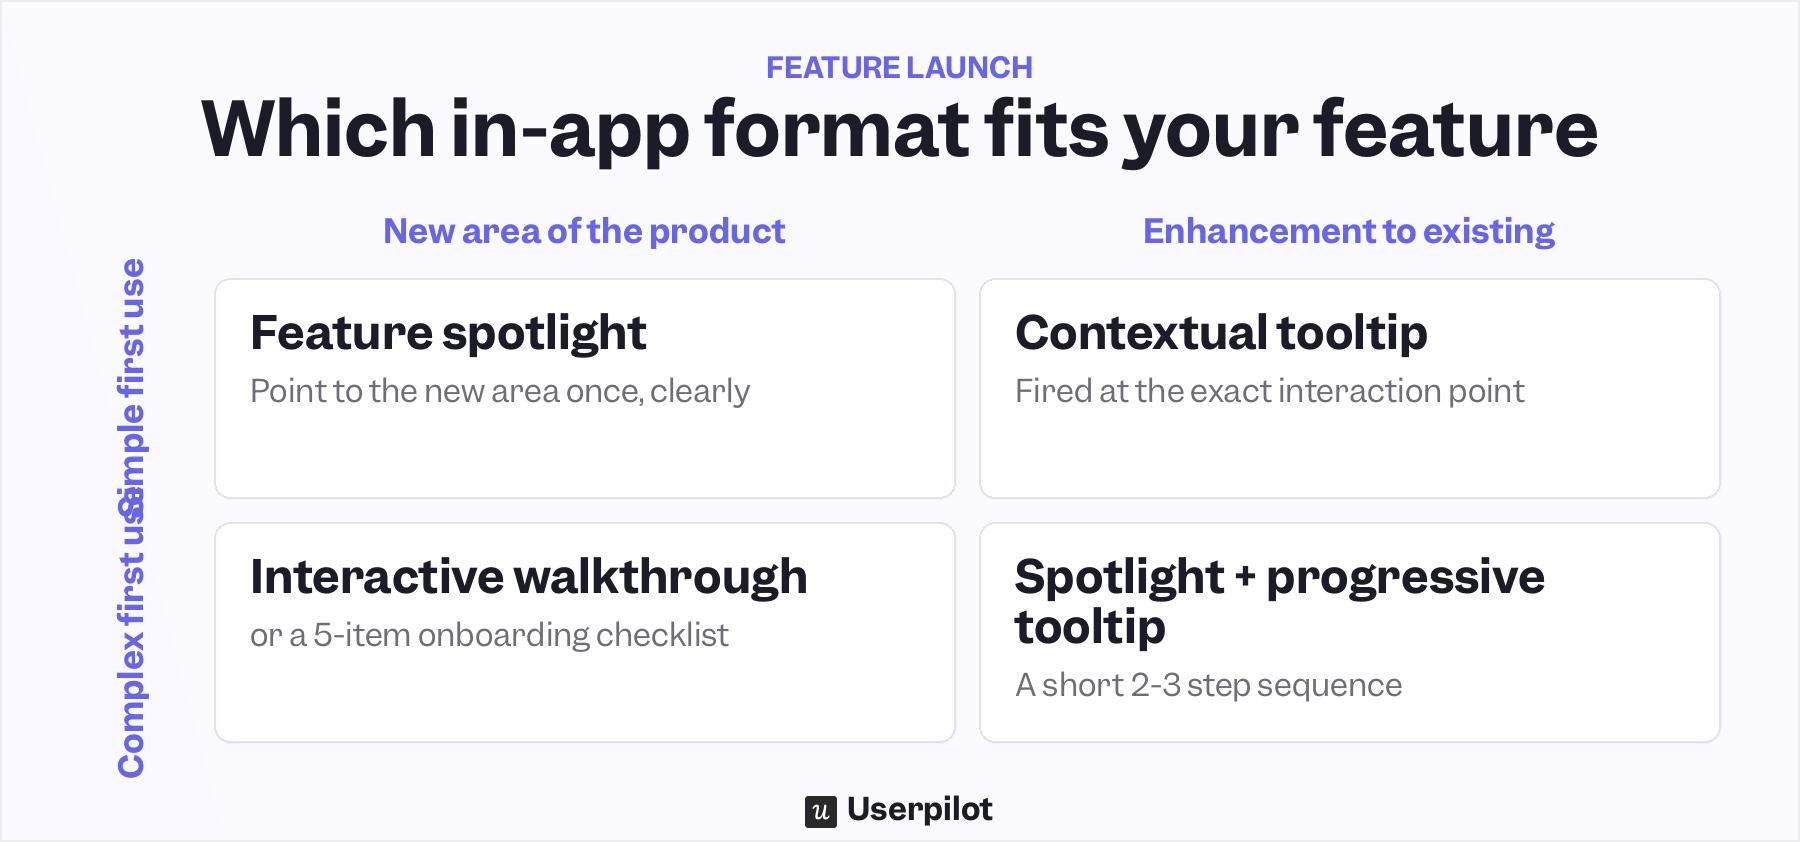
Trigger the in-app announcement in the format that fits the feature. The right choice depends on two things: how complex the first use is, and whether the feature opens a new area of the product or enhances something users already do.
For a simple first use in a new area, a feature spotlight does the job, while a simple enhancement lands better with a contextual tooltip fired at the exact interaction point. When the enhancement is complex, pair a spotlight with a short two or three-step progressive tooltip sequence. For a complex new area, reach for an interactive walkthrough or a five-item onboarding checklist.
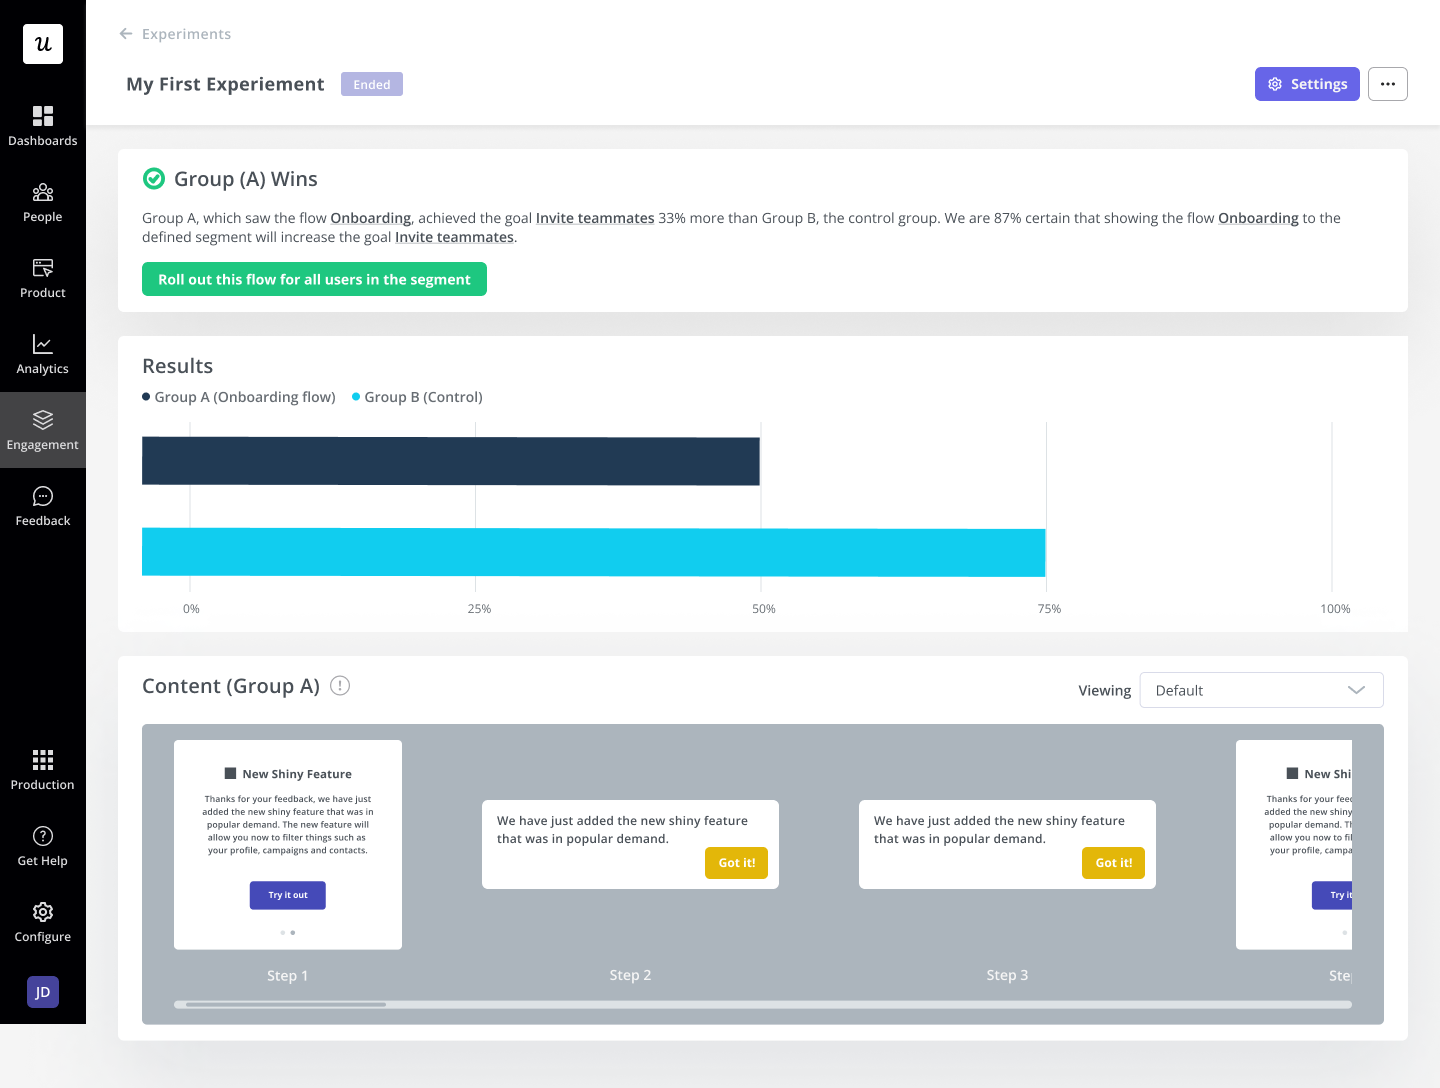
When we launched a feature recently, I ran an A/B test: Half the segment got a simple in-app tooltip pointing to it, and half got nothing.
The group that saw the message adopted the feature roughly 200% more than the group that did not, which is the kind of evidence that ends a debate faster than any opinion in the room.
Send the external announcement (email, release notes, social)
Announce externally through email, release notes, and social, so the feature reaches both active and dormant users. Active users respond best in-app, while email is what pulls back the people who have not logged in lately. Release notes also give prospects and analysts a reason to take another look.
Watch the exposure rate in real time and fix the trigger if it is under 40% by end of day
Keep an eye on exposure in real time on launch day. If fewer than 40% of the target segment has seen the announcement by end of day, the trigger is misfiring, so adjust the targeting or the timing before you blame adoption. A feature nobody sees cannot become a feature nobody wants.
Post-launch (Day 1 to Day 90)
Watch activation rate at Day 1 and Day 7
Track activation at Day 1 and again at Day 7 to see whether users who saw the feature used it. A healthy Day 1 number that collapses by Day 7 usually means the first experience did not deliver on what the announcement promised. This is the moment to tighten the onboarding for the feature.
Watch retention rate at Day 30
At Day 30, check whether the feature is holding users or whether usage spiked and faded. Sustained use is the only proof that the feature solved a real problem. Feature-level retention at 30 and 90 days is the number that separates adoption from a launch-week bump.
Collect contextual in-app feedback at the moment of feature use
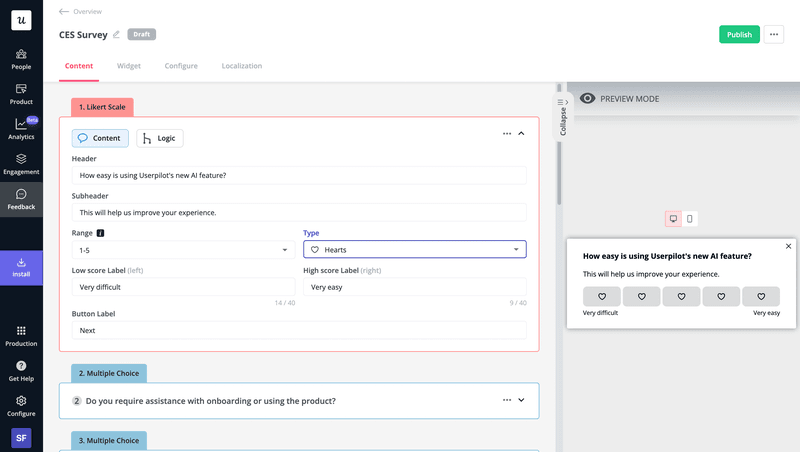
Ask for feedback in-app, at the exact moment someone uses the feature, while the experience is fresh. A contextual in-app survey triggered on the feature gets you the why behind the usage numbers. Pair one quick rating question with a single open-ended follow-up so you capture both the score and the reason.
Measure new feature success with a business impact comparison at Day 60 and Day 90″
At Day 60 and Day 90, measure the feature against the benchmark that matters: are the users who adopted it retaining, expanding, or converting better than those who did not? Best-in-class products see usage spread across 28% of their feature set versus just 11% for the average, so a single feature that pulls usage deeper into the product is worth real money.
Decide the next move: iterate, expand, sunset, or pivot
Close the launch with an explicit decision. Based on the numbers, choose to iterate on the feature, expand it to more segments, sunset it, or pivot the approach. A feature with no owner and no decision after 90 days quietly becomes maintenance debt.
How to use these checklists
Two checklists this long can look like a mandate to do everything, but they are not meant to be run top to bottom every time. Right-size the list to the launch: a new product needs the full pre-launch sweep, while a Tier 3 update needs only a fraction of it. Treat the checklist as a menu and choose the items that match what you are actually shipping.
Before you start, assign an owner to every item you keep. Each checkbox should have a single name attached, because shared ownership reliably becomes no ownership. Run the list with your launch team and tag every item before kickoff, so the “it is someone else’s job” gap never opens.
A week before launch, block 30 minutes for a launch readiness review and walk the unchecked items together. The goal is a clear Go or No-Go on each one: which incomplete items are genuine blockers, and which the team has consciously decided to defer. Most launch chaos comes from items nobody decided to skip, not from items that were truly forgotten.
Tips for executing a successful product launch
The checklists cover the tasks. These tips cover the judgment calls that no checkbox can make for you.
Start with clear objectives
Begin by setting the goals the launch should hit: a number of signups, an activation rate, or a revenue milestone. Goals only work when they are clear and measurable, so structure them with something like SMART rather than leaving them as vibes.
With targets in place, every team shares one definition of what a successful product launch even means.
Involve customers throughout the process
It’s hard to launch well without your customers in the room at each stage. You need them early to validate the idea, during the build for prototype and beta feedback, and after launch to spread the word through referrals. For large features, ensure you get your users’ opinions across more than one stage.
Build a cross-functional team
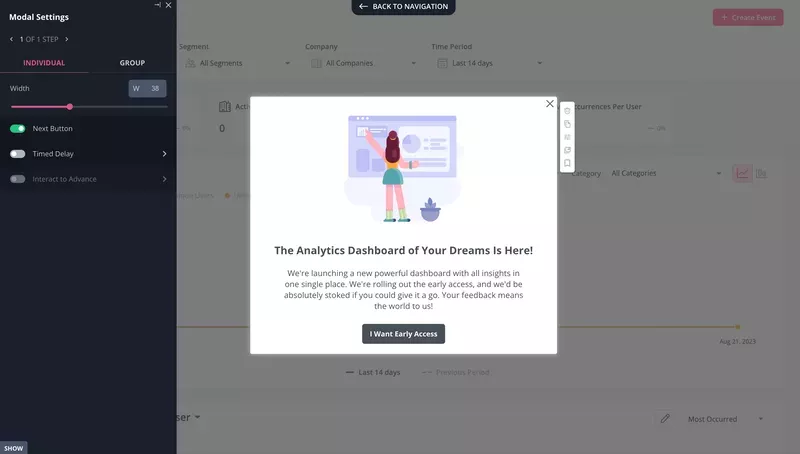
A launch needs a range of skills, so build a cross-functional team rather than dropping it all on one person. The core roster is a product manager to steer, a designer to make it usable, a marketer for research and the GTM, a customer success or support lead for resources, and a salesperson to actually sell.
What is new in 2026 is the operational tail. Marketing teams are increasingly handing the repetitive launch work, such as email sequencing, content distribution, and in-app personalization, to AI agents, which can cut launch readiness time by 40 to 60%. You do not necessarily need a dedicated AI hire, but someone has to own those workflows.
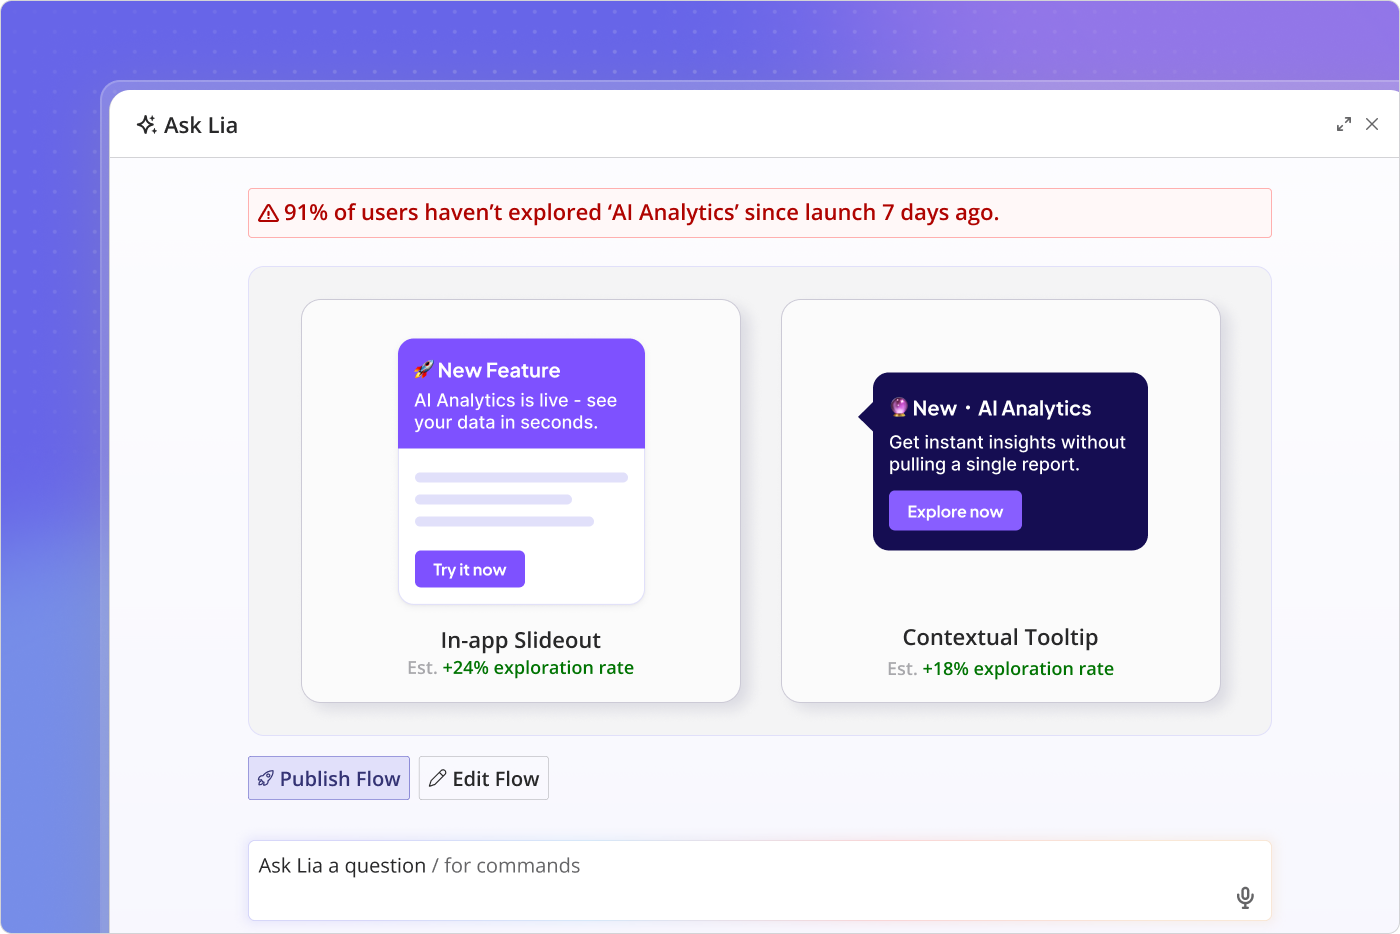
This is the shift our CEO Yazan Sehwail describes as moving from operator to monitor, where you stop doing every step by hand and start evaluating what the agent did. Userpilot’s AI agent, Lia, sits in that role for launches, building the in-app experiences and watching adoption so the team can focus on the calls a machine should not make.
Pick the right launch time
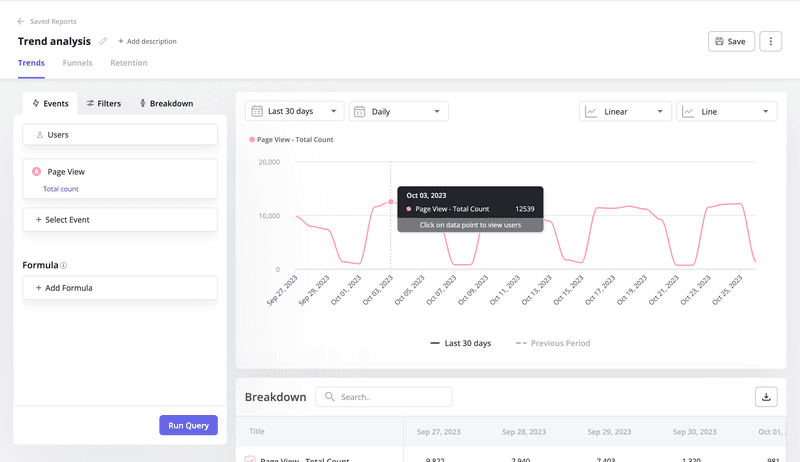
Some launch windows beat others, so do not default to whenever the build happens to finish. For features, use trend analytics to find the days your users are most active, and weigh seasonality alongside what competitors are about to ship.
Anything going on Product Hunt should stick to the midweek, very-early-Pacific slot from the launch-week checklist above, since the platform rewards that timing.
The what, the when, and the strategy
Think of this as one piece of a set. This article is the what: the tasks to check off and how to do each one.
For the sequence and pacing of each phase, the product launch timeline is the “when.”
The strategy behind it all, the thinking that decides what you launch and why, lives in the product launch plan.
Copy these checklists into your project tool, give every item an owner, and work through them as you ship. When you want a launch that measures and announces itself, that is the job Userpilot was built for.
About the author