Onboarding is a crucial part of the product management process but it can be difficult to standardize because every customer and business is different. This onboarding checklist template was designed to walk you through every step of the process!
Note: This guide will focus exclusively on onboarding customers. If you need a new hire onboarding checklist, you’ll have to search elsewhere.
Try Userpilot Now
See Why 1,000+ Teams Choose Userpilot
What is a customer onboarding process?
A customer onboarding process helps new users get set up with a product and start using it.
It encompasses the entire journey from account creation to product activation and full-on adoption.
Customer onboarding strives to reduce the time to value through contextual guidance.
Why use a customer onboarding checklist template?
There are a few reasons why having a customer onboarding checklist template is important:
- Streamlined onboarding. Using a template will streamline the onboarding process since you don’t have to start from scratch and have a system for covering each step in the most efficient manner possible.
- Performance analysis. Measuring the effectiveness of your onboarding process will be a lot easier if it’s standardized. That doesn’t mean you can’t personalize the flow to each user or segment, but you should have enough consistency in place to conduct an accurate analysis afterward.
- Team alignment. A customer onboarding checklist template will help you ensure that all departments (and the team members within them) are on the same page. This fosters collaboration and reduces the likelihood of miscommunications occurring.
New user onboarding checklist template
Because onboarding new users is the most common use case, this first checklist will walk you through the eight steps you need to go through when doing just that.
This will include collecting customer data through welcome surveys, gathering post-onboarding feedback, and everything in between!
Specifically, the onboarding plan template below will go over how to:
- Collect customer data
- Send welcome emails
- Segment new users
- Build onboarding checklists
- Use interactive walkthroughs
- Provide self-service support
- Analyze the onboarding process
- Collect customer feedback
1. Collect customer data
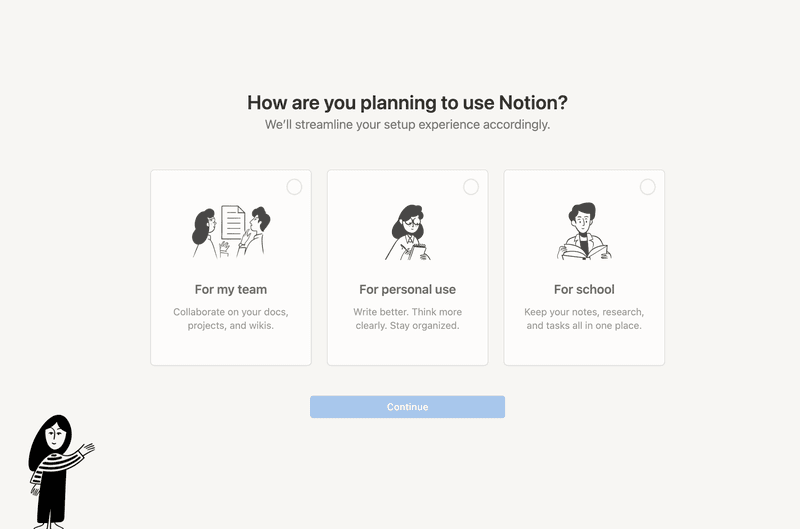
You’ll want to start every onboarding process off with a welcome survey so you can collect customer data early on and personalize everything downstream.
The responses to your welcome survey will yield insights into what the users’ goals, roles, and problems are, so you can tailor onboarding accordingly.
2. Send a personalized welcome email
Sending a welcome email to new customers can be a great way to nudge them into starting their onboarding process and reinforce their decision to pay for your product (or sign up for a free trial).
That said, it only works if you personalize the email and include key information.
At a bare minimum, you’ll want to include:
- The customer’s name
- The product’s name
- The key features and benefits
- When their trial period ends (if applicable)
- A clickable CTA button that takes them to a login screen or onboarding flow
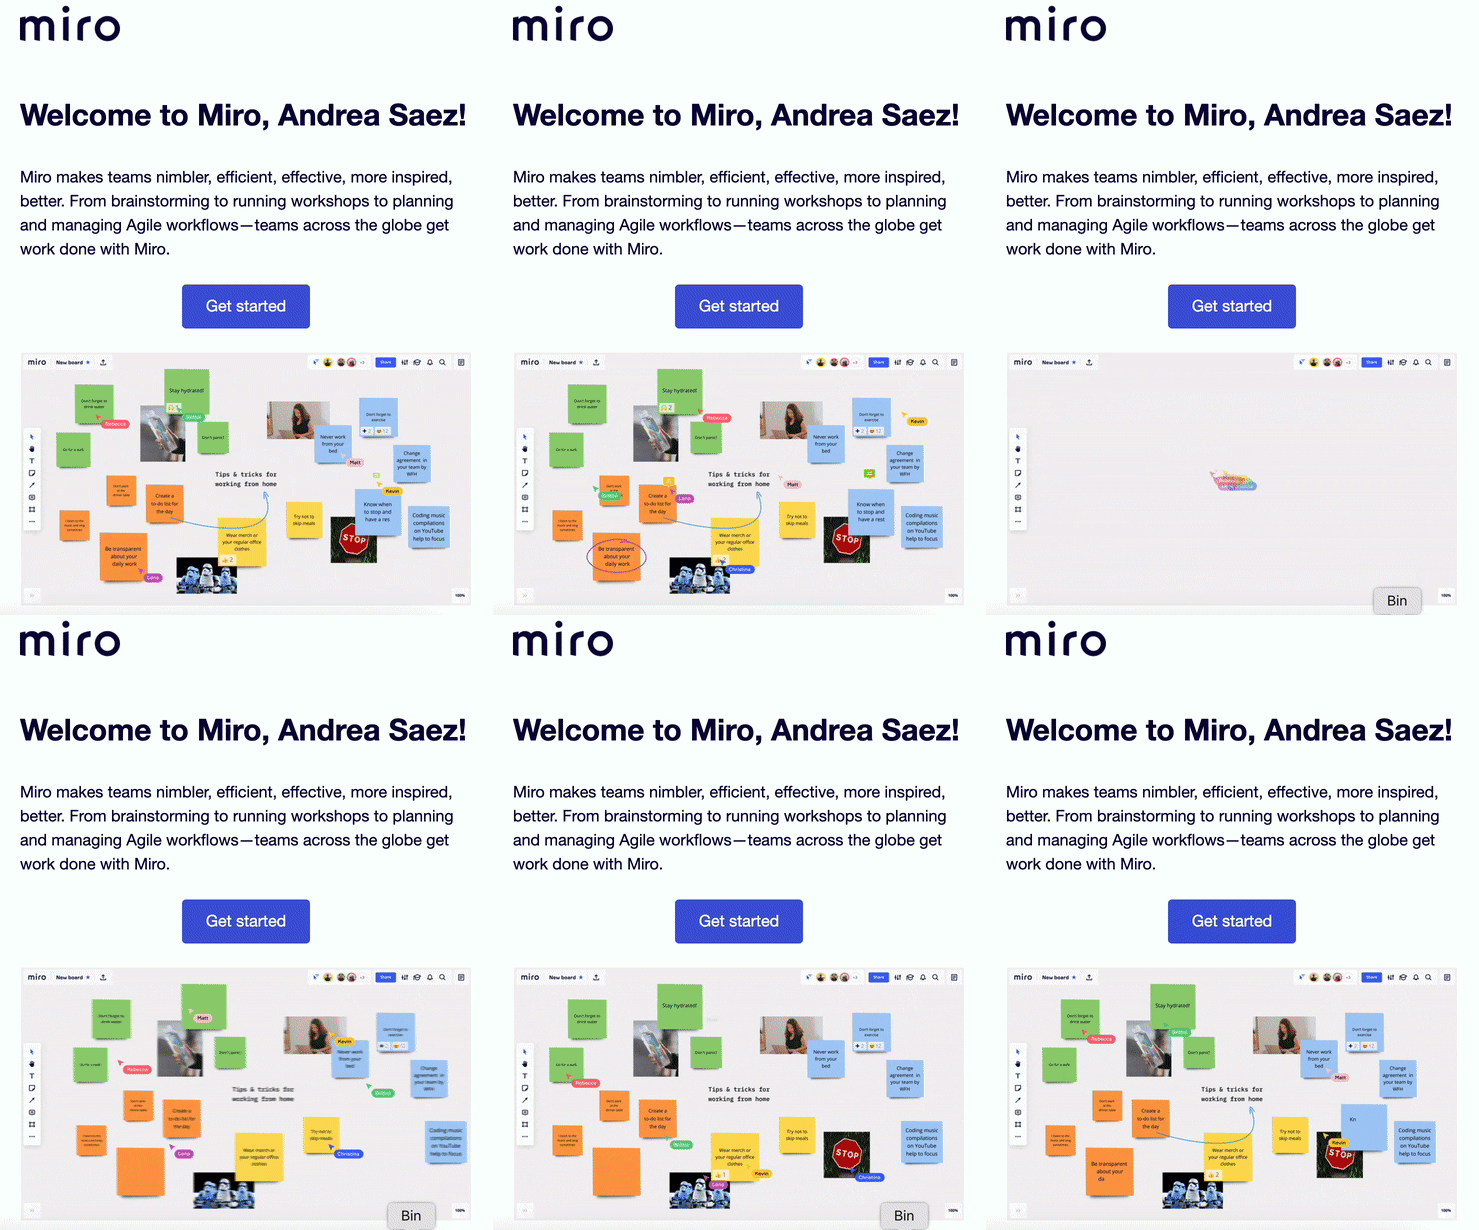
Whenever possible, you should also include some customer education resources like help center articles or tutorial videos to help users learn more about the product before they dive in. Last, but not least, consider including images and GIFs to make the email feel more interactive.
3. Segment new users
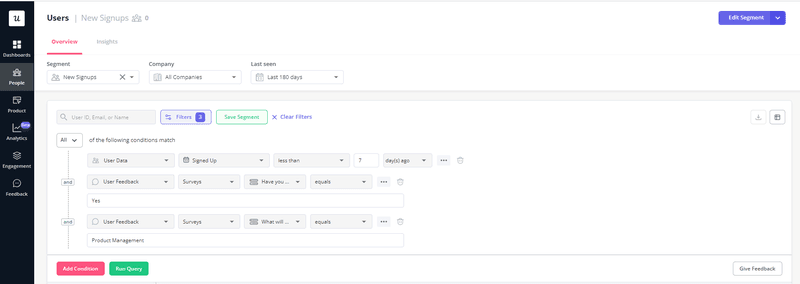
Segmenting new users is incredibly important since it will help you personalize all interactions from that point onward. There are a few approaches to customer segmentation and which one you choose will depend on your unique needs:
- Behavioral segmentation. Use behavioral analytics to segment customers based on their product usage patterns.
- Demographic segmentation. Divide users into groups based on their demographic information like age, gender, income, occupation, and other adjacent factors.
- Data-driven segmentation. Leverage actual customer data and segment your users accordingly to maximize the accuracy of each segment.
Userpilot can help you segment your customer base using filters, logic rules, or even individual user IDs:
4. Use an onboarding checklist to get started with the product
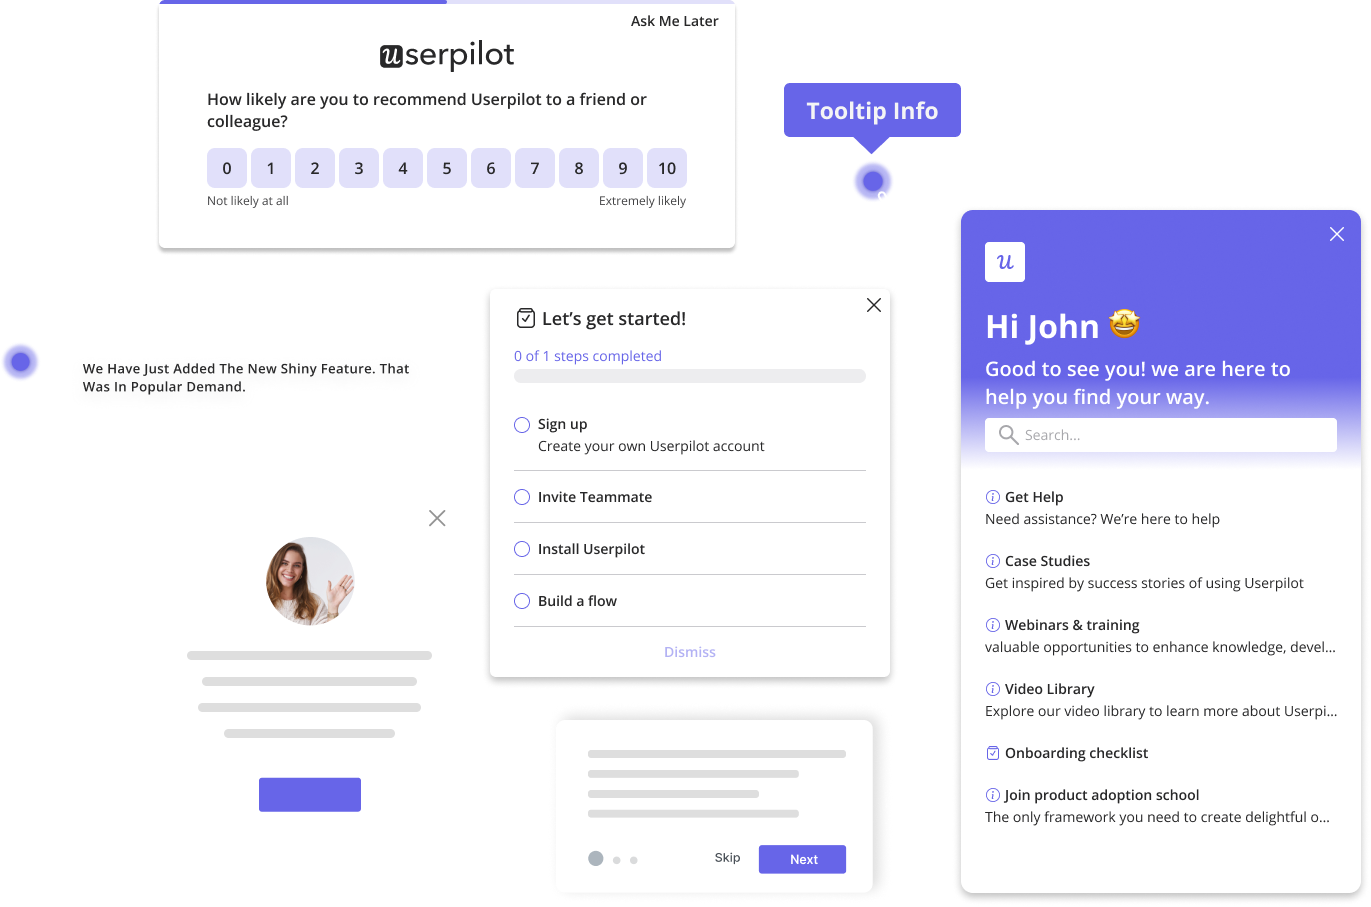
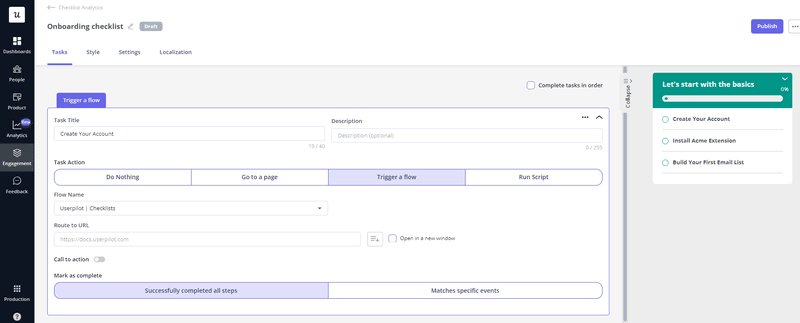
Onboarding checklists are one of the most efficient ways to walk a new user through the earliest stages of their journey. This checklist should cover the most important tasks that each user needs to accomplish while still being personalized:
- Account creation
- Team invites
- Create your first ___ (depending on what your product helps users do)
- Submit feedback
The steps above are just a handful of examples of the most common tasks that you’d find on an onboarding checklist. Feel free to add steps based on your own product but try to keep the checklist short and sweet to avoid overwhelming new users.
5. Couple your checklist with interactive walkthroughs to drive feature adoption
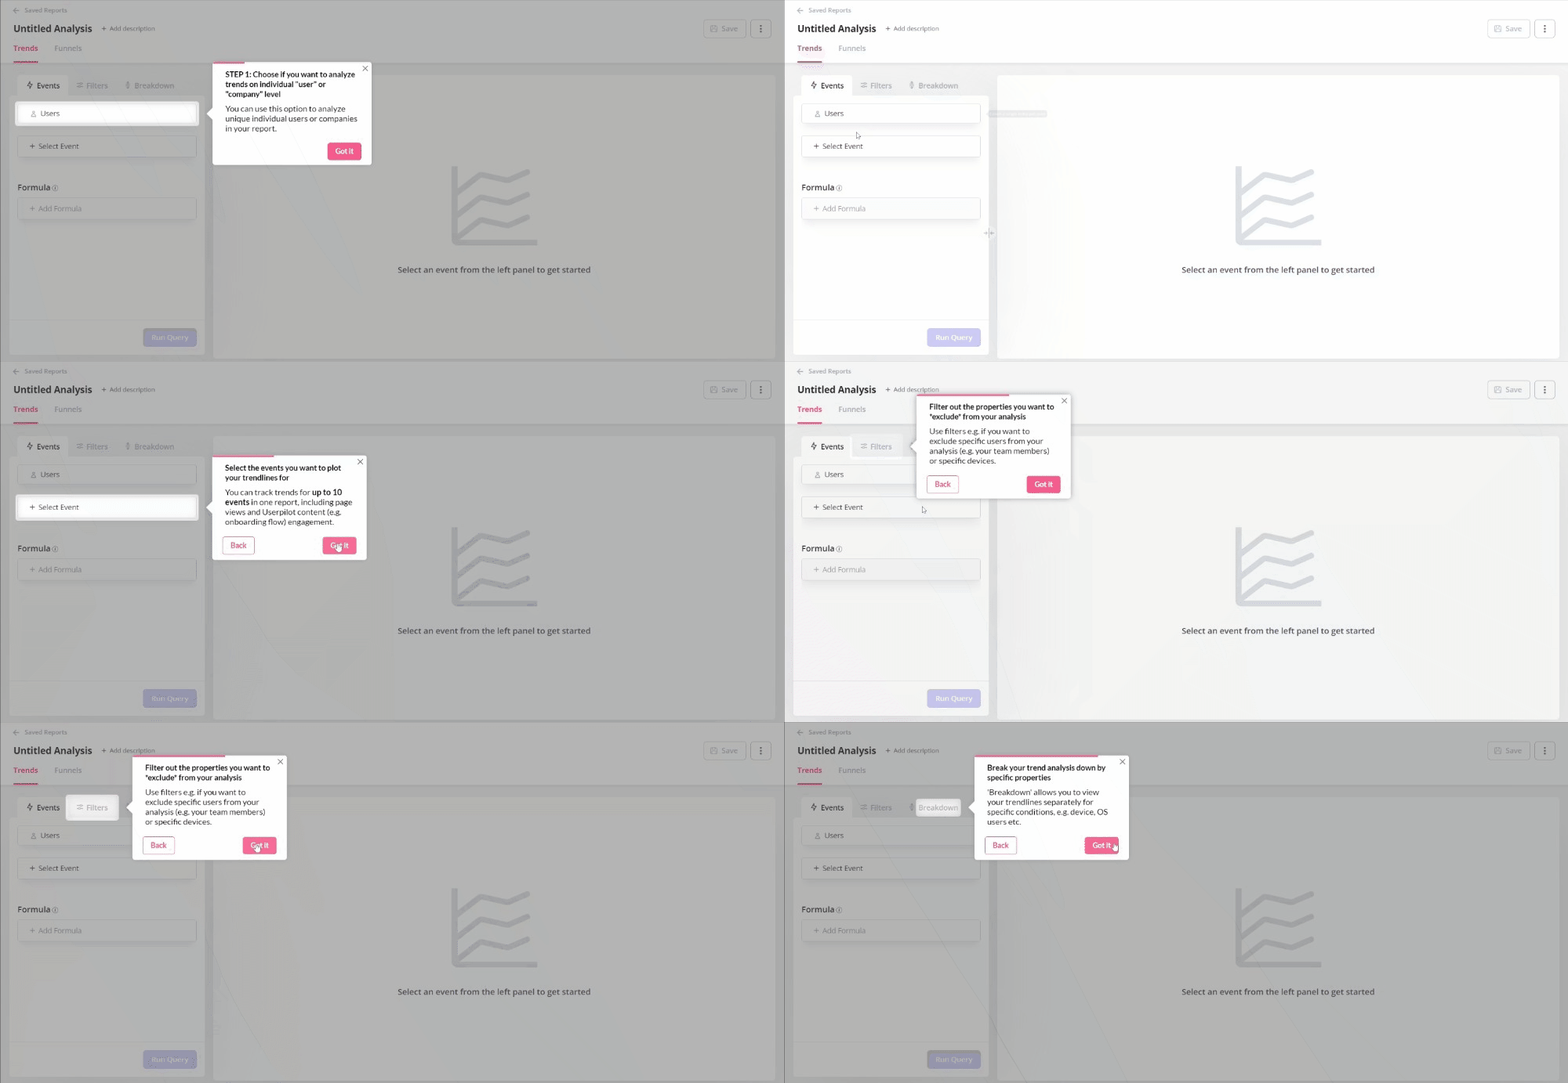
Having interactive walkthroughs will guide your users during each step of the onboarding process. You can even trigger these interactive walkthroughs whenever users complete onboarding tasks from the checklist mentioned in the previous step.
Because interactive walkthroughs overlay contextual guidance on top of the product interface itself, you’ll empower users to learn by doing instead of trying to memorize every line of text from a linear product tour.
6. Provide self-service support
Providing self-service support is incredibly beneficial — on both ends — because it gives users the chance to solve problems themselves while simultaneously saving the time of your customer support representatives.
There are different formats you can use when creating self-service resources like product documentation, help articles, tutorial micro-videos, and even AI-powered chatbots that are capable of answering the most commonly asked questions.
Product documentation and help articles are best used for complex products that require step-by-step instructions. Video tutorials work for both simple and complex products by letting users follow along each step. Finally, AI chatbots are a good first line of defense against recurring support tickets.
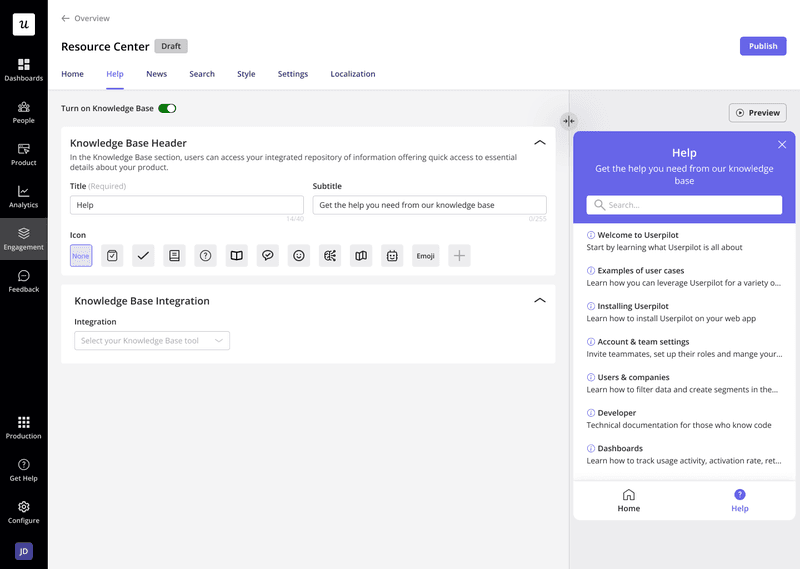
Userpilot lets you create multimedia in-app resource centers without writing a single line of code:
7. Analyze the entire onboarding process to promptly fix friction points
Once your user onboarding process is built and published, it’s time to analyze data to see if everything is working as intended. This is best done using analytics tools so you can generate targeted reports that measure onboarding process effectiveness objectively and efficiently.
Eliminating friction points during the onboarding process is crucial to ensure that nothing blocks new users from reaching their Aha! moment. This will also prevent users from dropping out of the onboarding flow as a result of getting stuck on a high-friction step.
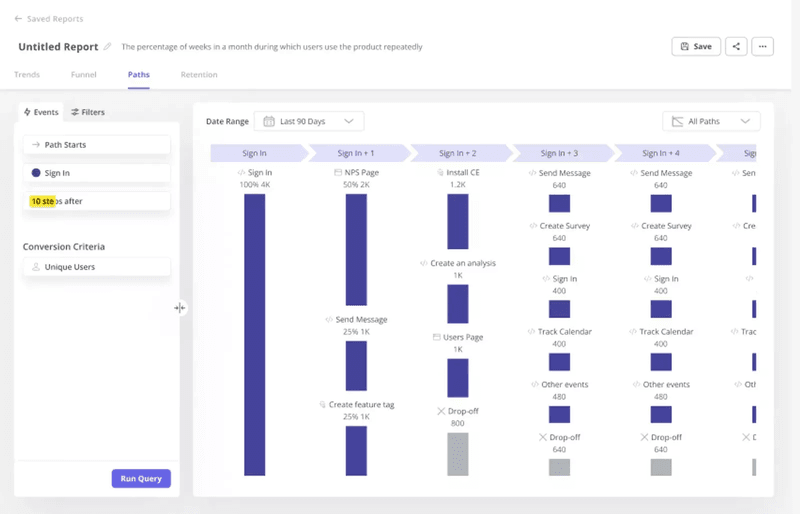
Userpilot’s path analysis report shows the drop-off rates between each step of the onboarding program.
8. Collect feedback and improve customer experience
Finally, collect customer feedback from the actual users going through your onboarding process template. This will help you see onboarding programs through the eyes of your users and spot problems that may not have been as obvious from your vantage point.
You can use a combination of scalar (1-10 or smiley) surveys and open-ended questions:
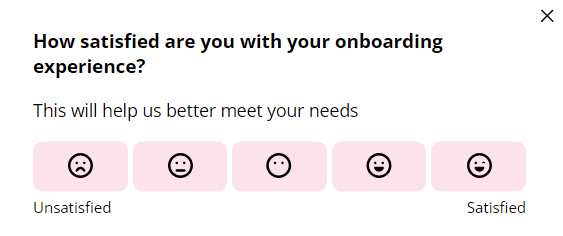
Gathering these actionable insights from real customers will help you identify areas of the customer experience that can be improved upon. In general, you want to collect feedback after milestones like onboarding completion, feature launches, or subscription upgrades.
Secondary onboarding checklist template
Not all onboarding templates are for new users. There are just as many onboarding processes targeted towards existing customers who haven’t engaged with certain parts of the product. The three phases of secondary onboarding are:
- Monitoring feature usage
- Introducing secondary features
- Measuring secondary feature adoption
The sections of this onboarding process template will walk you through each phase in greater depth!
1. Monitor feature usage
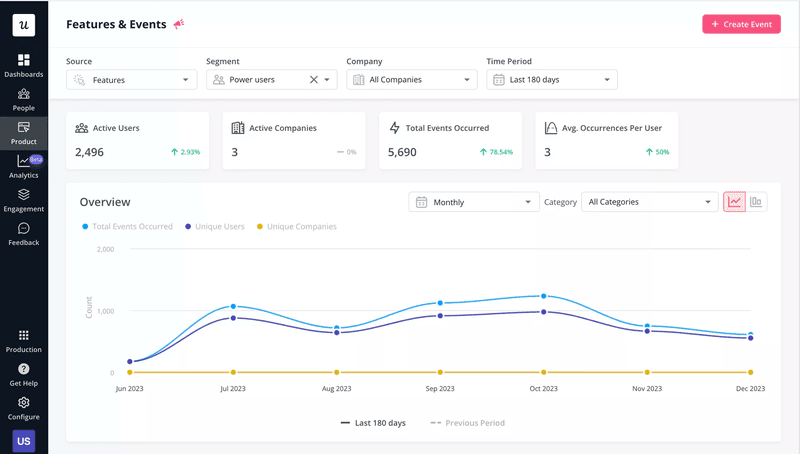
First and foremost, you’ll need to check on the current state of feature usage to make sure that core features have been adopted. If any primary features have been neglected by a large portion of your user base, they should be the priority during this secondary onboarding process.
2. Introduce secondary features
You can use continuous onboarding flows to introduce customers to secondary features and provide additional value. This can be done through in-app guides that highlight specific features using UI hotspots or native tooltips:
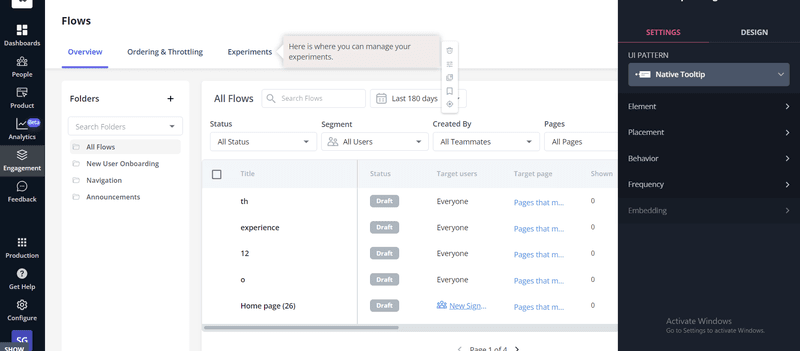
While core features are usually adopted organically during the onboarding process, many secondary features need to be deliberately introduced to users. This is especially important for features hidden within menus that may not be seen during standard feature discovery user paths.
3. Measure secondary feature adoption
Upon taking steps to highlight specific features, you’ll need to analyze your product metrics in the coming weeks or months to see if those changes had the desired impact. This can be done by tagging secondary features and then tracking their usage through analytics dashboards.
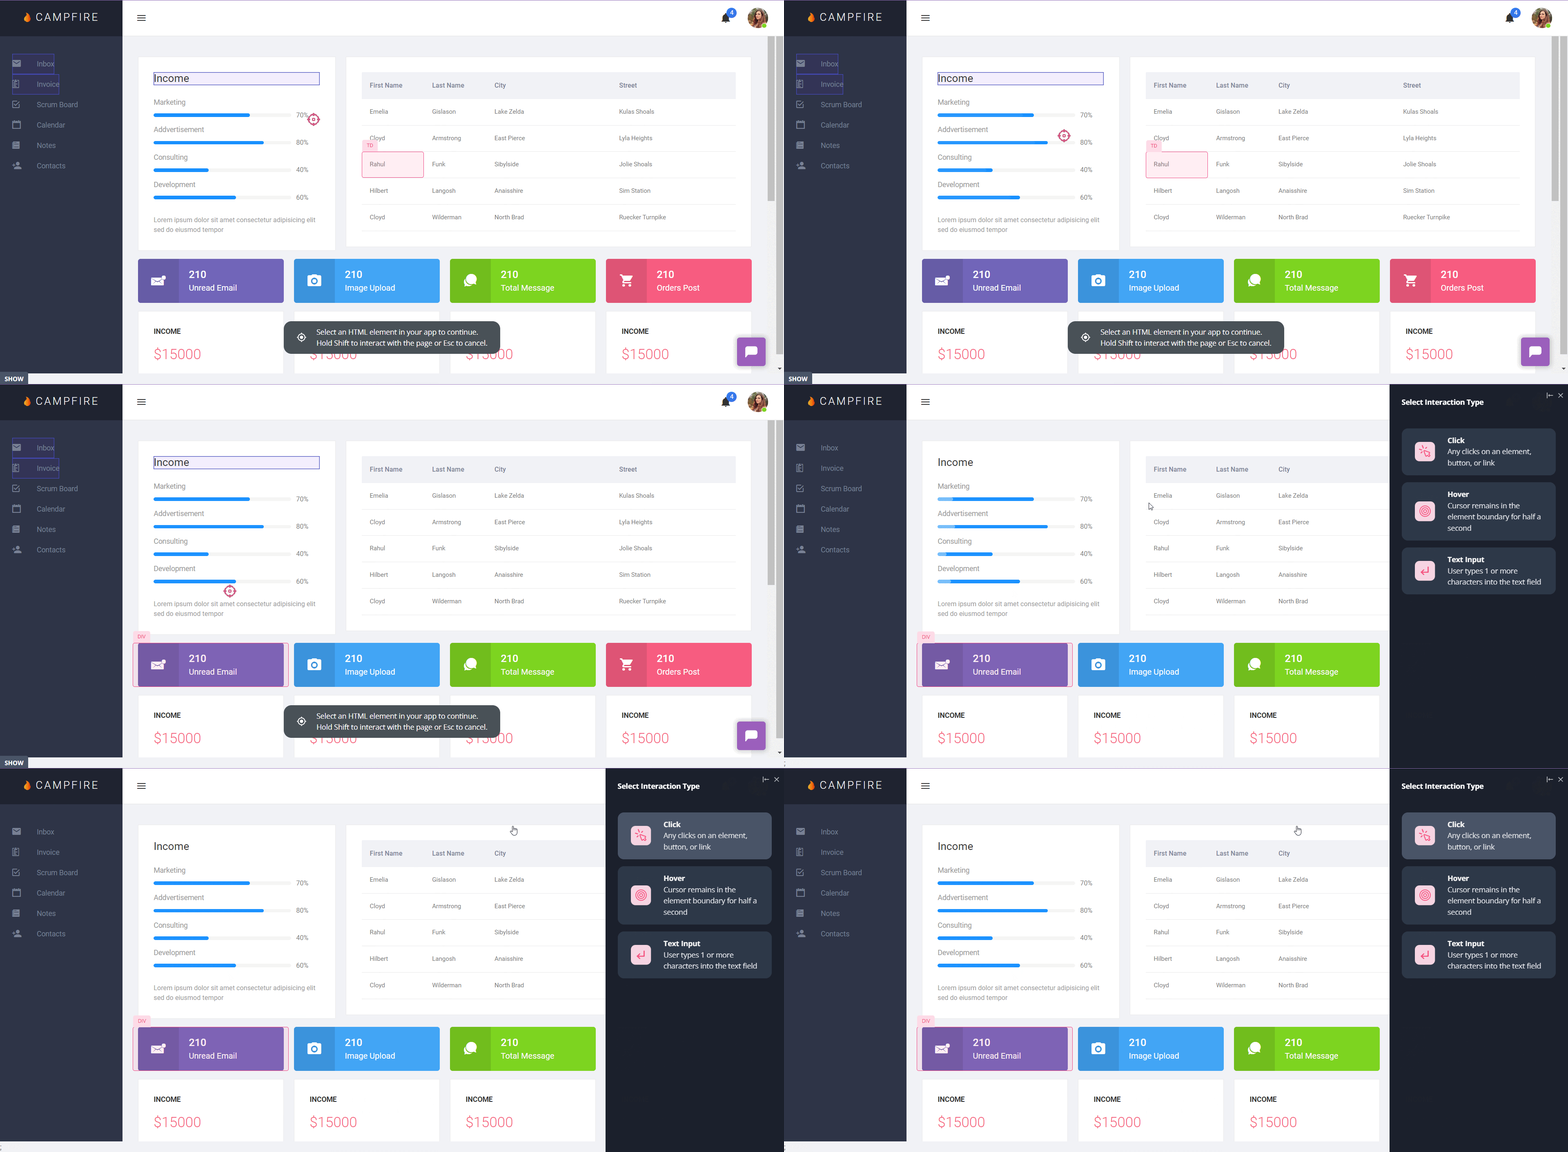
Userpilot supports no-code feature tagging and lets you distinguish between clicks, hovers, or text inputs as the desired interaction. Being able to select the most relevant interaction for each feature will give you a more accurate representation of feature adoption rates.
New feature onboarding checklist template
The final onboarding template we’ll look at today focuses on launching new features to users. The same steps apply whether you’re launching these features to new users or existing customers. The four steps of new feature onboarding are:
- Collecting feature requests
- Publishing in-app announcements
- Creating interactive walkthroughs
- Measuring new feature adoption
- Gathering feedback and improving
Let’s take a closer look at each of the four steps!
1. Collect feature requests from your customers
Start by segmenting all your active users by behavioral, demographic, or customer data. Once you’ve grouped users into multiple segments, collect feature requests from each one to see which features are most requested across the board.
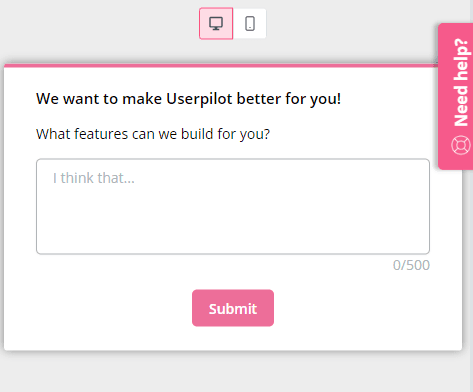
Focus on one or two highly-requested features that would provide the most value and then add it to your product roadmap. The best way to collect feature requests is through in-app surveys since they get far higher response rates than email surveys.
2. Use an in-app announcement for new features
Once you’ve identified the features that your customers want, it’s important to let people know what’s being added to the product. In-app announcements will let users know that you’ve added in the features they asked for and make them more likely to try it out.
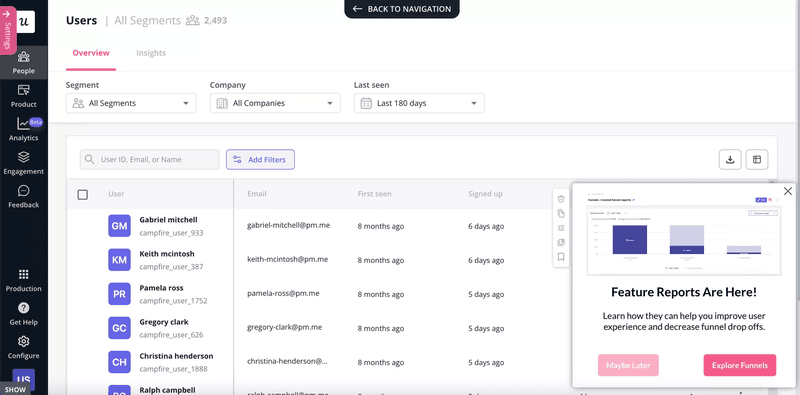
Some companies opt to make new feature announcements through email. However, not all customers read product update emails even if they’re actively using the software. As such, in-app announcements are the better choice to increase visibility and ensure the majority of users find out about new features.
3. Couple in-app announcements with walkthroughs
Telling users how a new feature works is a good start but showing them how to use it should be the ultimate goal. Coupling your in-app announcements with interactive walkthroughs will flatten the learning curve by guiding users through their first time using the new feature.
Tip: You can embed interactive walkthroughs in onboarding materials from your resource center too.
4. Measure new feature adoption among users
After announcing new features and showing users how they work, the next step is to look at how many users are adopting these features. If new features have low adoption rates, then it’s usually the result of one of three things:
- Users didn’t want the feature.
- Users don’t know the feature was added.
- Users can’t figure out how the feature works.
If new feature adoption lags behind expectations, try optimizing these three factors.
5. Collect feedback and improve
The process doesn’t end when customers start using new features. You’ll still need to collect feedback on the feature to determine what people like or dislike. Getting targeted responses will yield actionable insights that you can use to improve new features further.
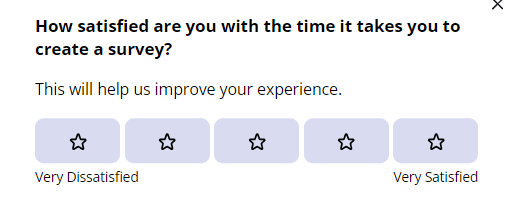
This is especially important for features that were requested by users to verify that their expectations have been met. Running in-app satisfaction surveys with a combination of rating-based and open-ended questions will help you collect a healthy blend of user feedback:
Conclusion
As you can see, a solid onboarding process is one that helps new users get started, highlights advanced features for existing customers, and draws attention to the new features that you launch. We hope that the onboarding checklist templates above help you build your own process!
After all, having an onboarding checklist helps you identify key steps, align company culture, and automate workflows. If you’re ready to improve the onboarding process then it’s time to get your free Userpilot demo today!

