Userpilot Autocapture: Automatically Capture User Interactions with Raw Events


Userpilot autocapture records the interactions users have with your product without asking anyone to instrument each one by hand. Every serious product analytics tool can capture behavior at this point, so capture is not where teams win or lose. The harder question is what you do with everything you collect.
I am a product manager here, and the pattern I see most often is a team sitting on a mountain of interaction data that never turns into a decision. They can tell you how many times a button was clicked, but not whether that click mattered or how to wire it to anything that changes the experience.
So here is the line I want you to keep in mind for the rest of this piece: capturing events was never the hard part; acting on them is. Autocapture gets the raw material into your hands quickly, which is useful, but the raw material is only step one.
I wrote this to cover three concrete things: what autocapture records on web and mobile, how a single interaction travels from raw event to labeled event to a live product experience, and where the honest limits sit so you know what plan and setup you need before you start.

How raw events auto-capture works inside Userpilot
Raw events auto-capture is the setting that lets Userpilot record supported interactions as your users move through the product. You switch it on once, and collection starts from that moment across the pages where Userpilot is installed. There are five beats worth understanding before you rely on it.
The first beat is enabling it. On web you go to Configure, then Settings, then Data Capture & Privacy, and turn on the Raw data settings. The mobile path runs through the Userpilot SDK instead, where your engineering team switches on auto-capture once at install.

The second beat is what gets recorded. On web, raw events capture Clicks, Text Inputs, and Form Submissions as users interact with your product. The mobile SDK goes wider, capturing Taps, Text changes, Selection changes, Value changes, and Presented views, so you get both the actions and the screens they happened on.
The third beat is review. Once data is flowing, you open the raw events table and read which buttons, fields, and areas your users touch, and how often. This is your chance to see real feature usage before you commit to tracking anything permanently.
The fourth beat is labeling, which turns a raw event into a Labeled event you can reuse across analytics, reports, segmentation, and content triggering. Labeling is available on Growth and Enterprise plans, so it is worth knowing that gate exists before you plan a workflow around it.
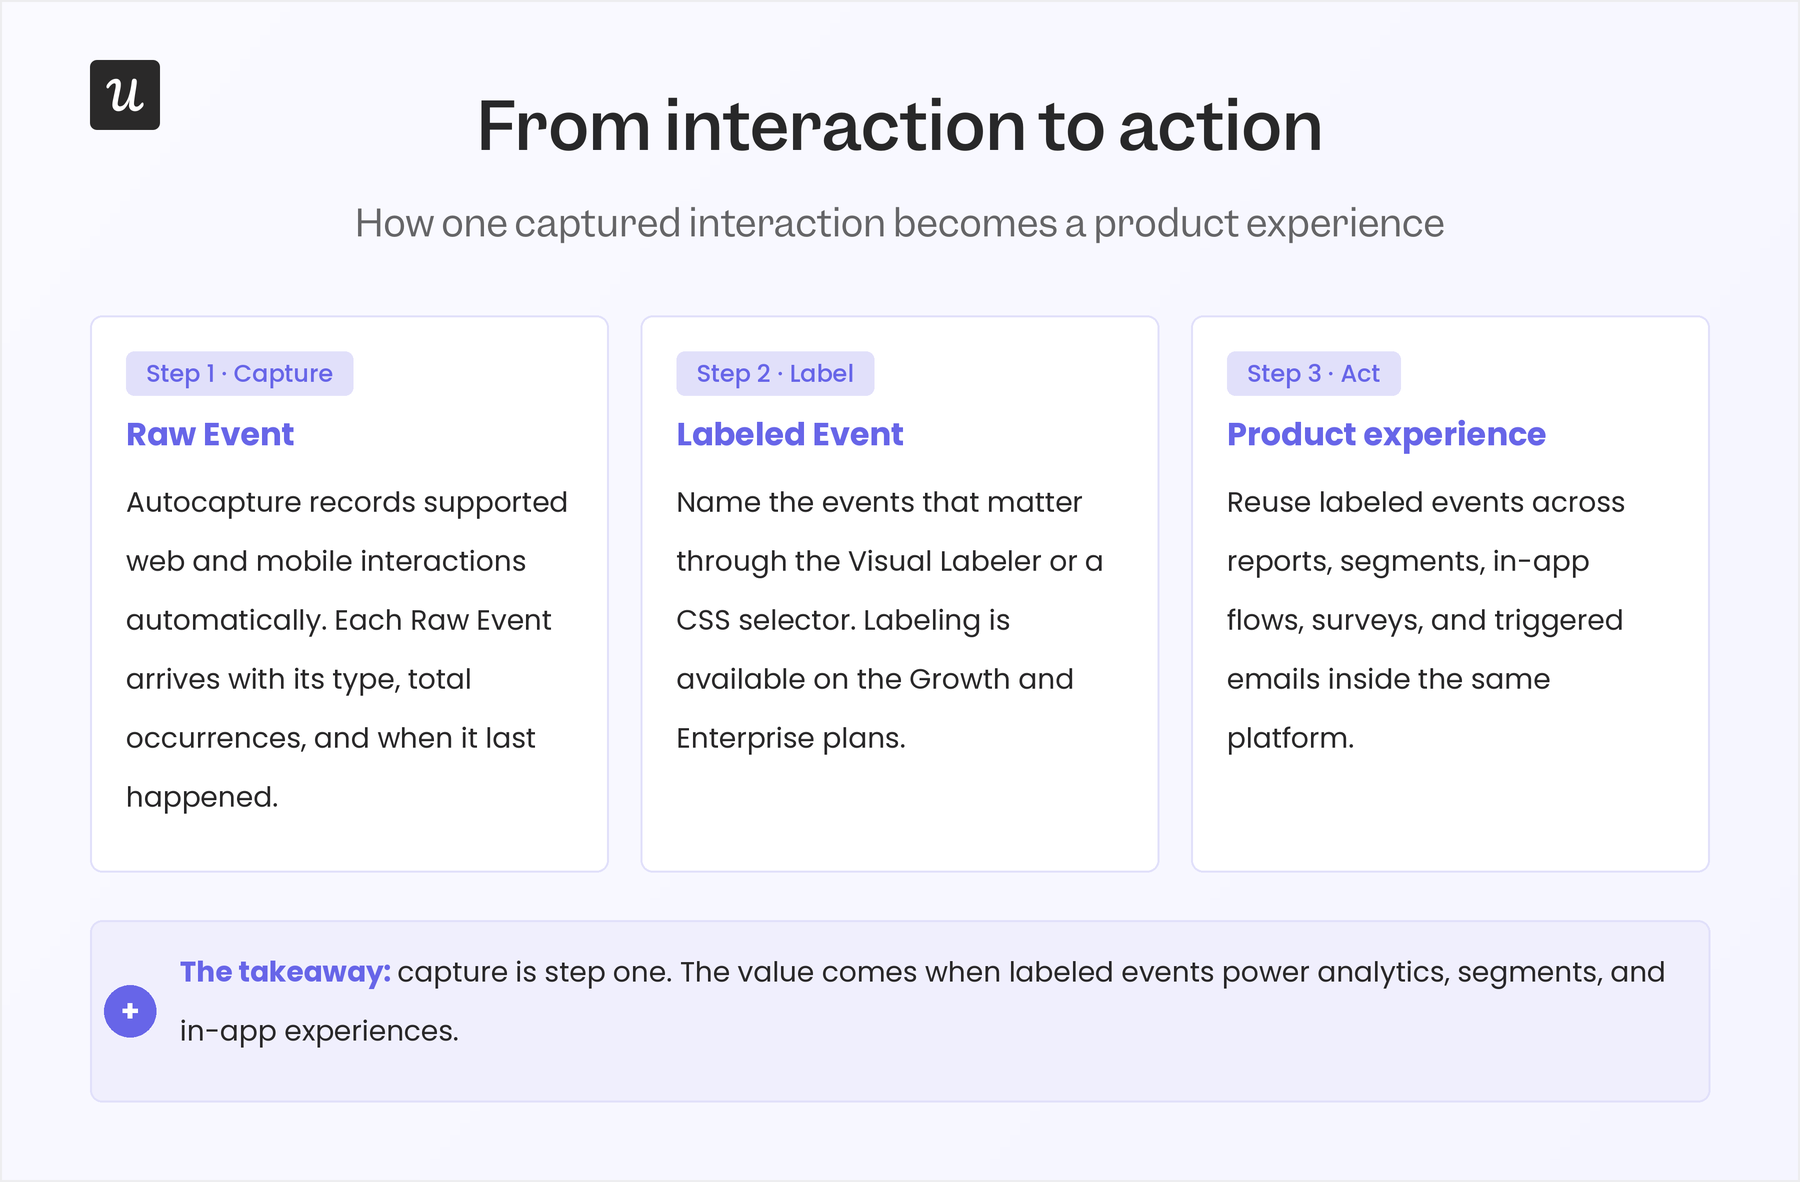
The fifth beat is putting labeled events to work, which is the entire point. A labeled event can power a report, define a behavioral segment, trigger an in-app flow, launch a survey, or fire any other in-app experience keyed to what users do. That is the moment captured behavior stops being a number and starts changing what a user sees next.
When to use raw events vs labeled events
Raw Events exist for discovery. Because Userpilot captures supported interactions automatically, you can look at which buttons, forms, and product areas draw the most activity before you decide what deserves a permanent event. The Raw Events table surfaces interaction frequency, so your team spots the behaviors worth analyzing instead of asking engineering to instrument everything upfront.
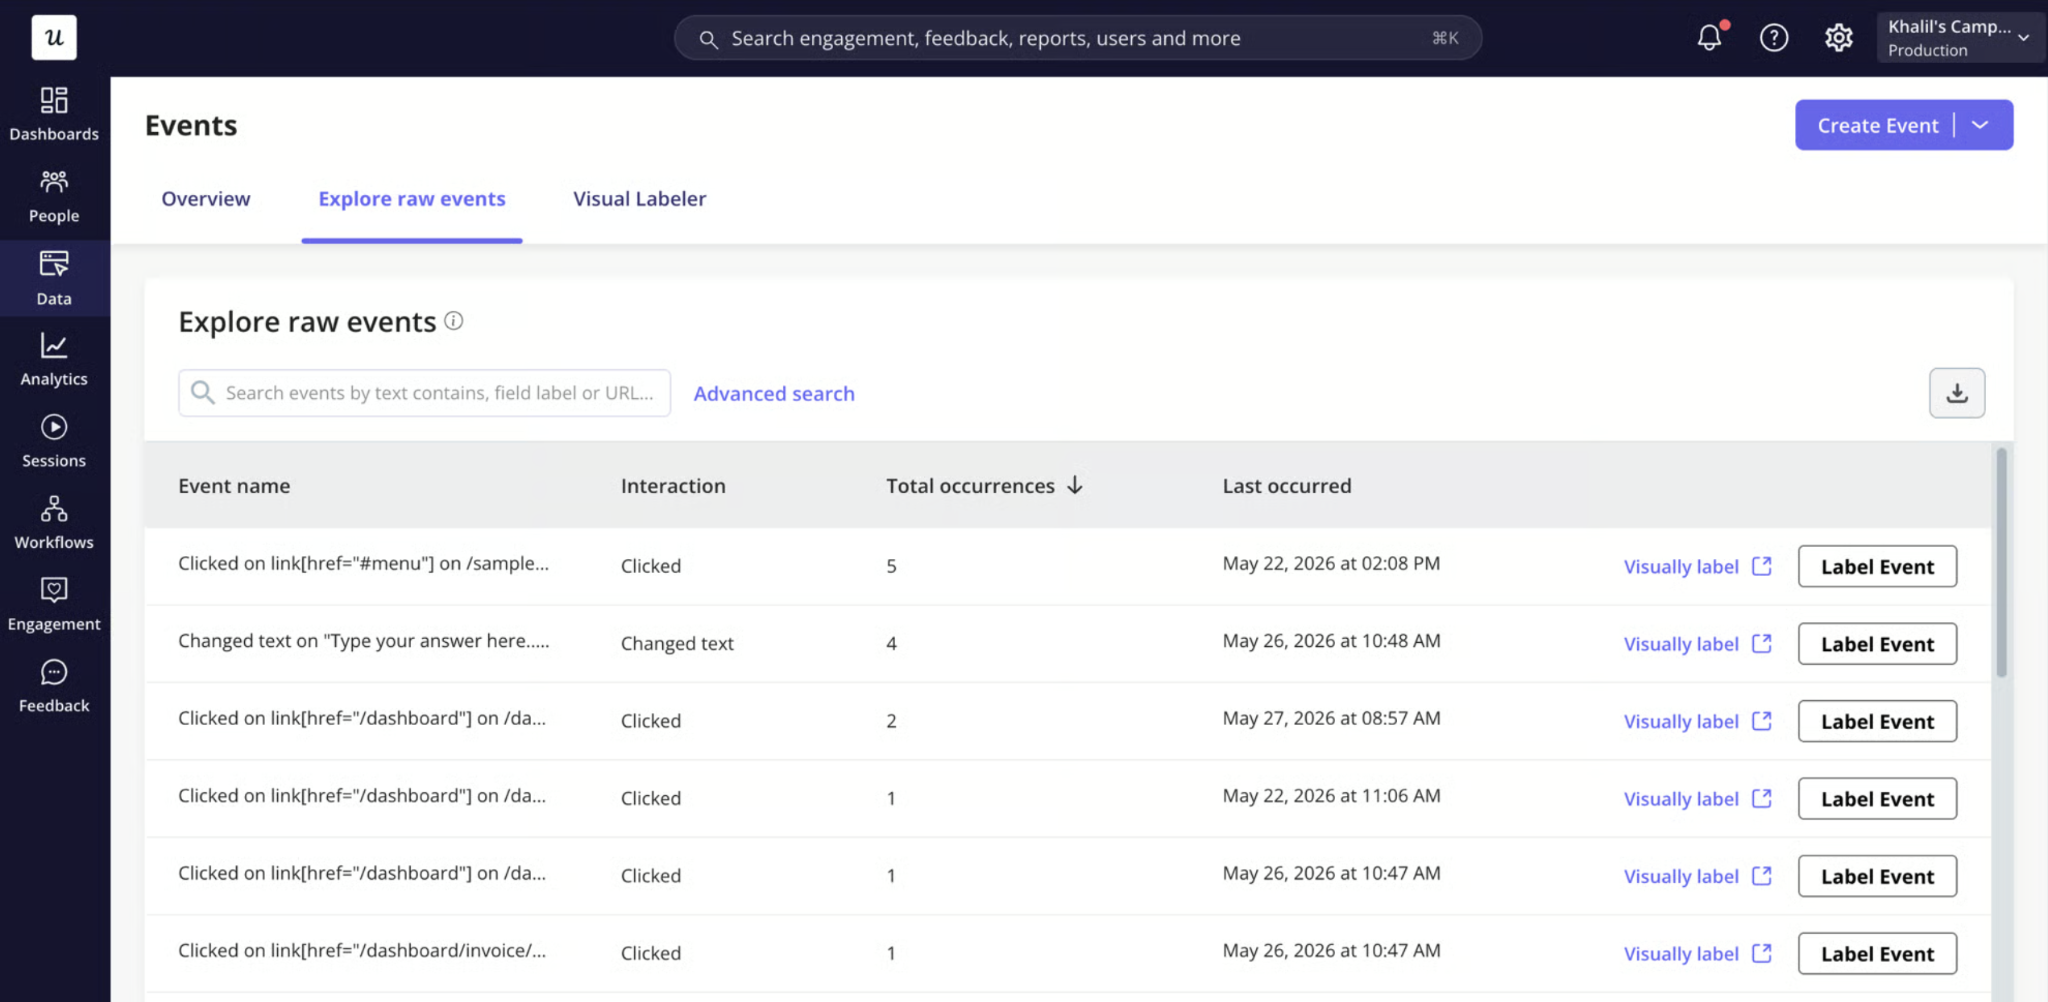
This is the main job Raw Events do: discover first, label second. They are not meant to replace Labeled Events, and treating them as a permanent tracking layer misses the point. You use Raw Events to understand behavior, then promote the interactions that matter into Labeled Events for ongoing reporting, behavioral segmentation, and automation.
On their own, Raw Events show only minimal data: the interaction type, the total occurrences, and when it last occurred. To make one genuinely useful, you label it, either through the Visual Labeler by browsing your live app, or by pointing at the element with a CSS selector. Both routes end in the same place: a named event you can reuse.
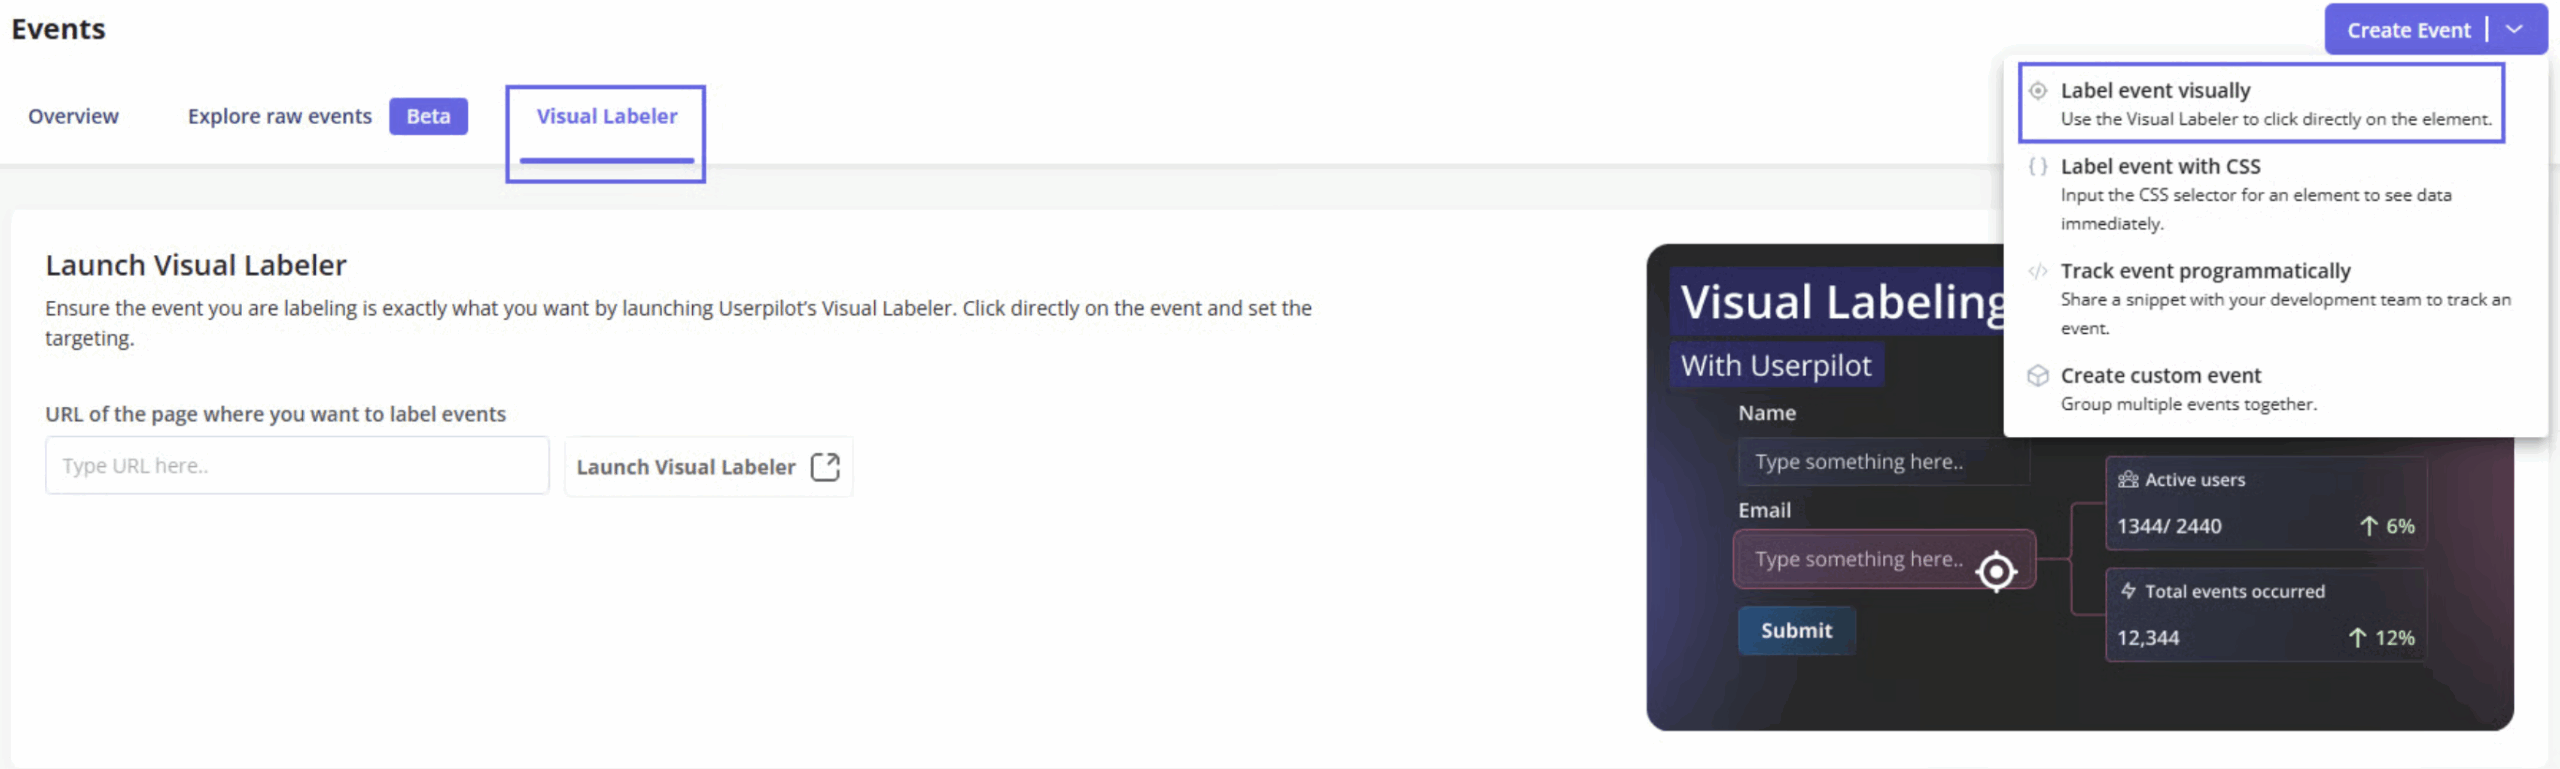
One rule about historical data is worth stating plainly, because it catches people out. Once you label an event, the data collected before labeling shows up in Event Overview and in Analytics reports, so your reporting sees history. Segments and Content Triggering, though, only use data collected after the label was applied, which means anything you plan to trigger from should be labeled early.
The plan detail matters here too. Labeling sits on the Growth and Enterprise plans, and once an event is labeled it joins your tracked and custom events in Overview. From there it can also be sent to HubSpot, Salesforce, and Webhooks, so the same labeled interaction can feed your CRM and your event based analytics pipeline, not just Userpilot.
Autocapture on web and mobile
Userpilot autocapture runs on both web and mobile, and the difference between them is what each platform can see. The workflow of review, label, and reuse is identical, so this section stays on the capture layer itself rather than repeating steps you already have.
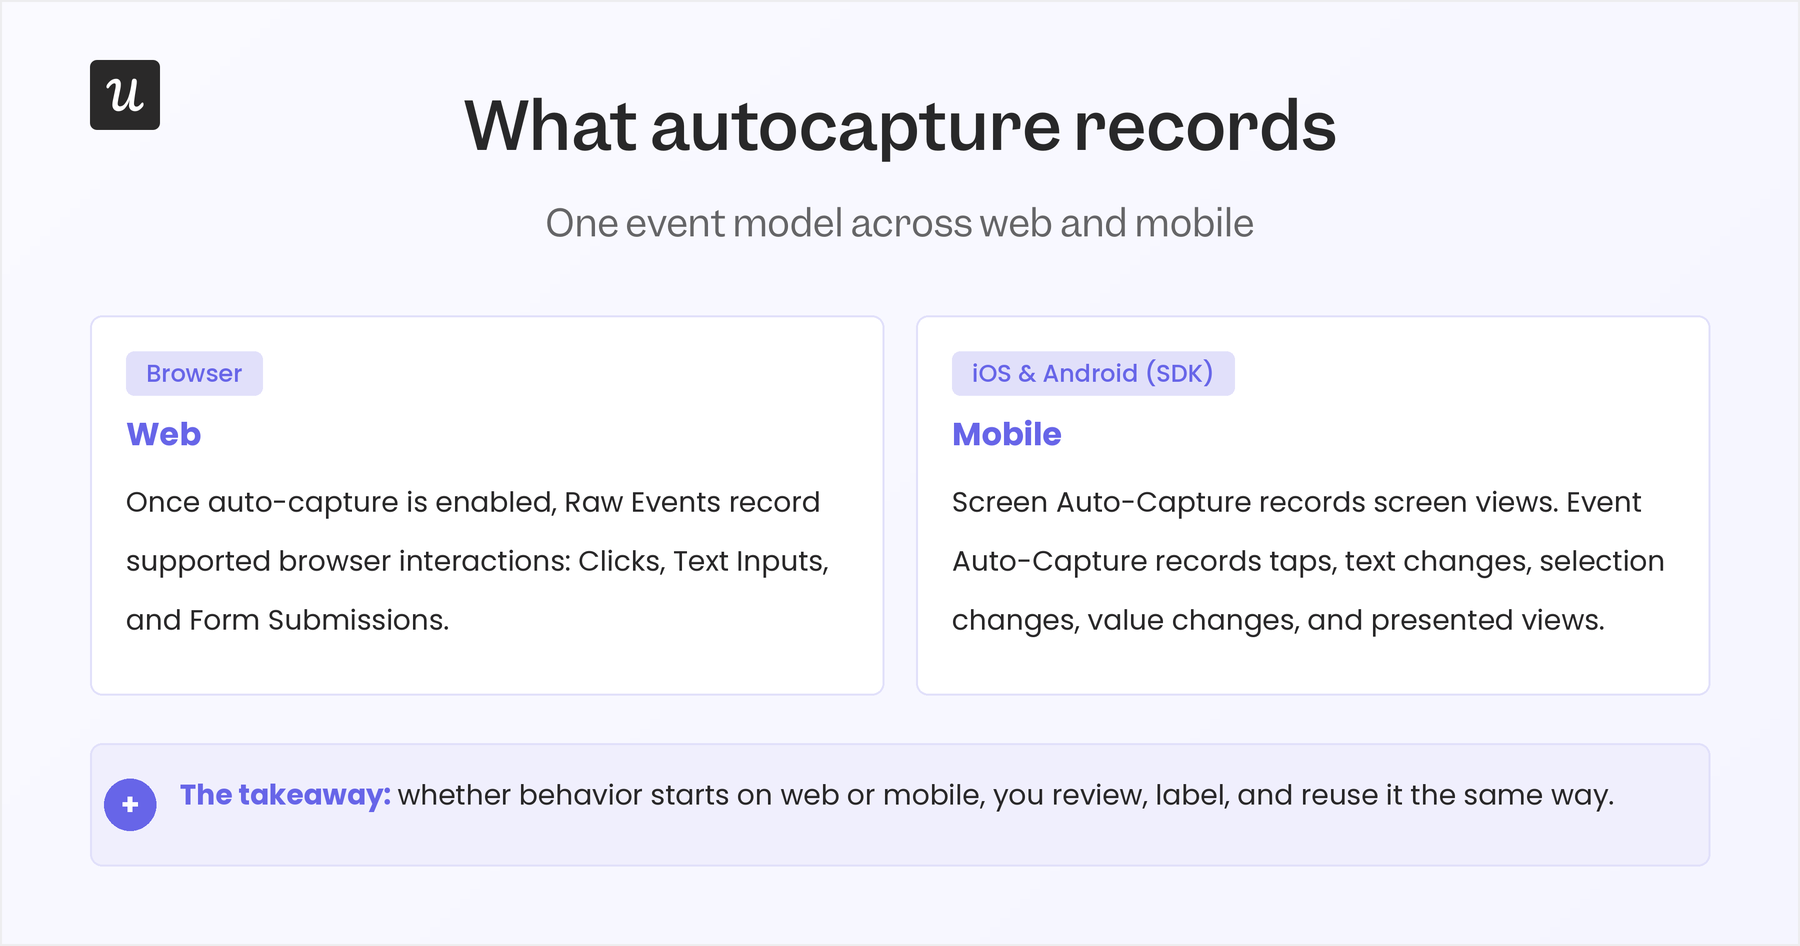
On web, Raw Events auto-capture records supported browser interactions once you enable it: Clicks, Text Inputs, and Form Submissions. That covers the actions most product teams care about inside a web app, from a pricing-page button to a signup form.
Mobile autocapture runs through the Userpilot mobile SDK and splits into two capabilities. Screen Auto-Capture records screen views automatically, which gives your analytics and your mobile experiences the context of where a user was. Event Auto-Capture records the supported interactions on top of that, including taps, text changes, selection changes, value changes, and presented views.
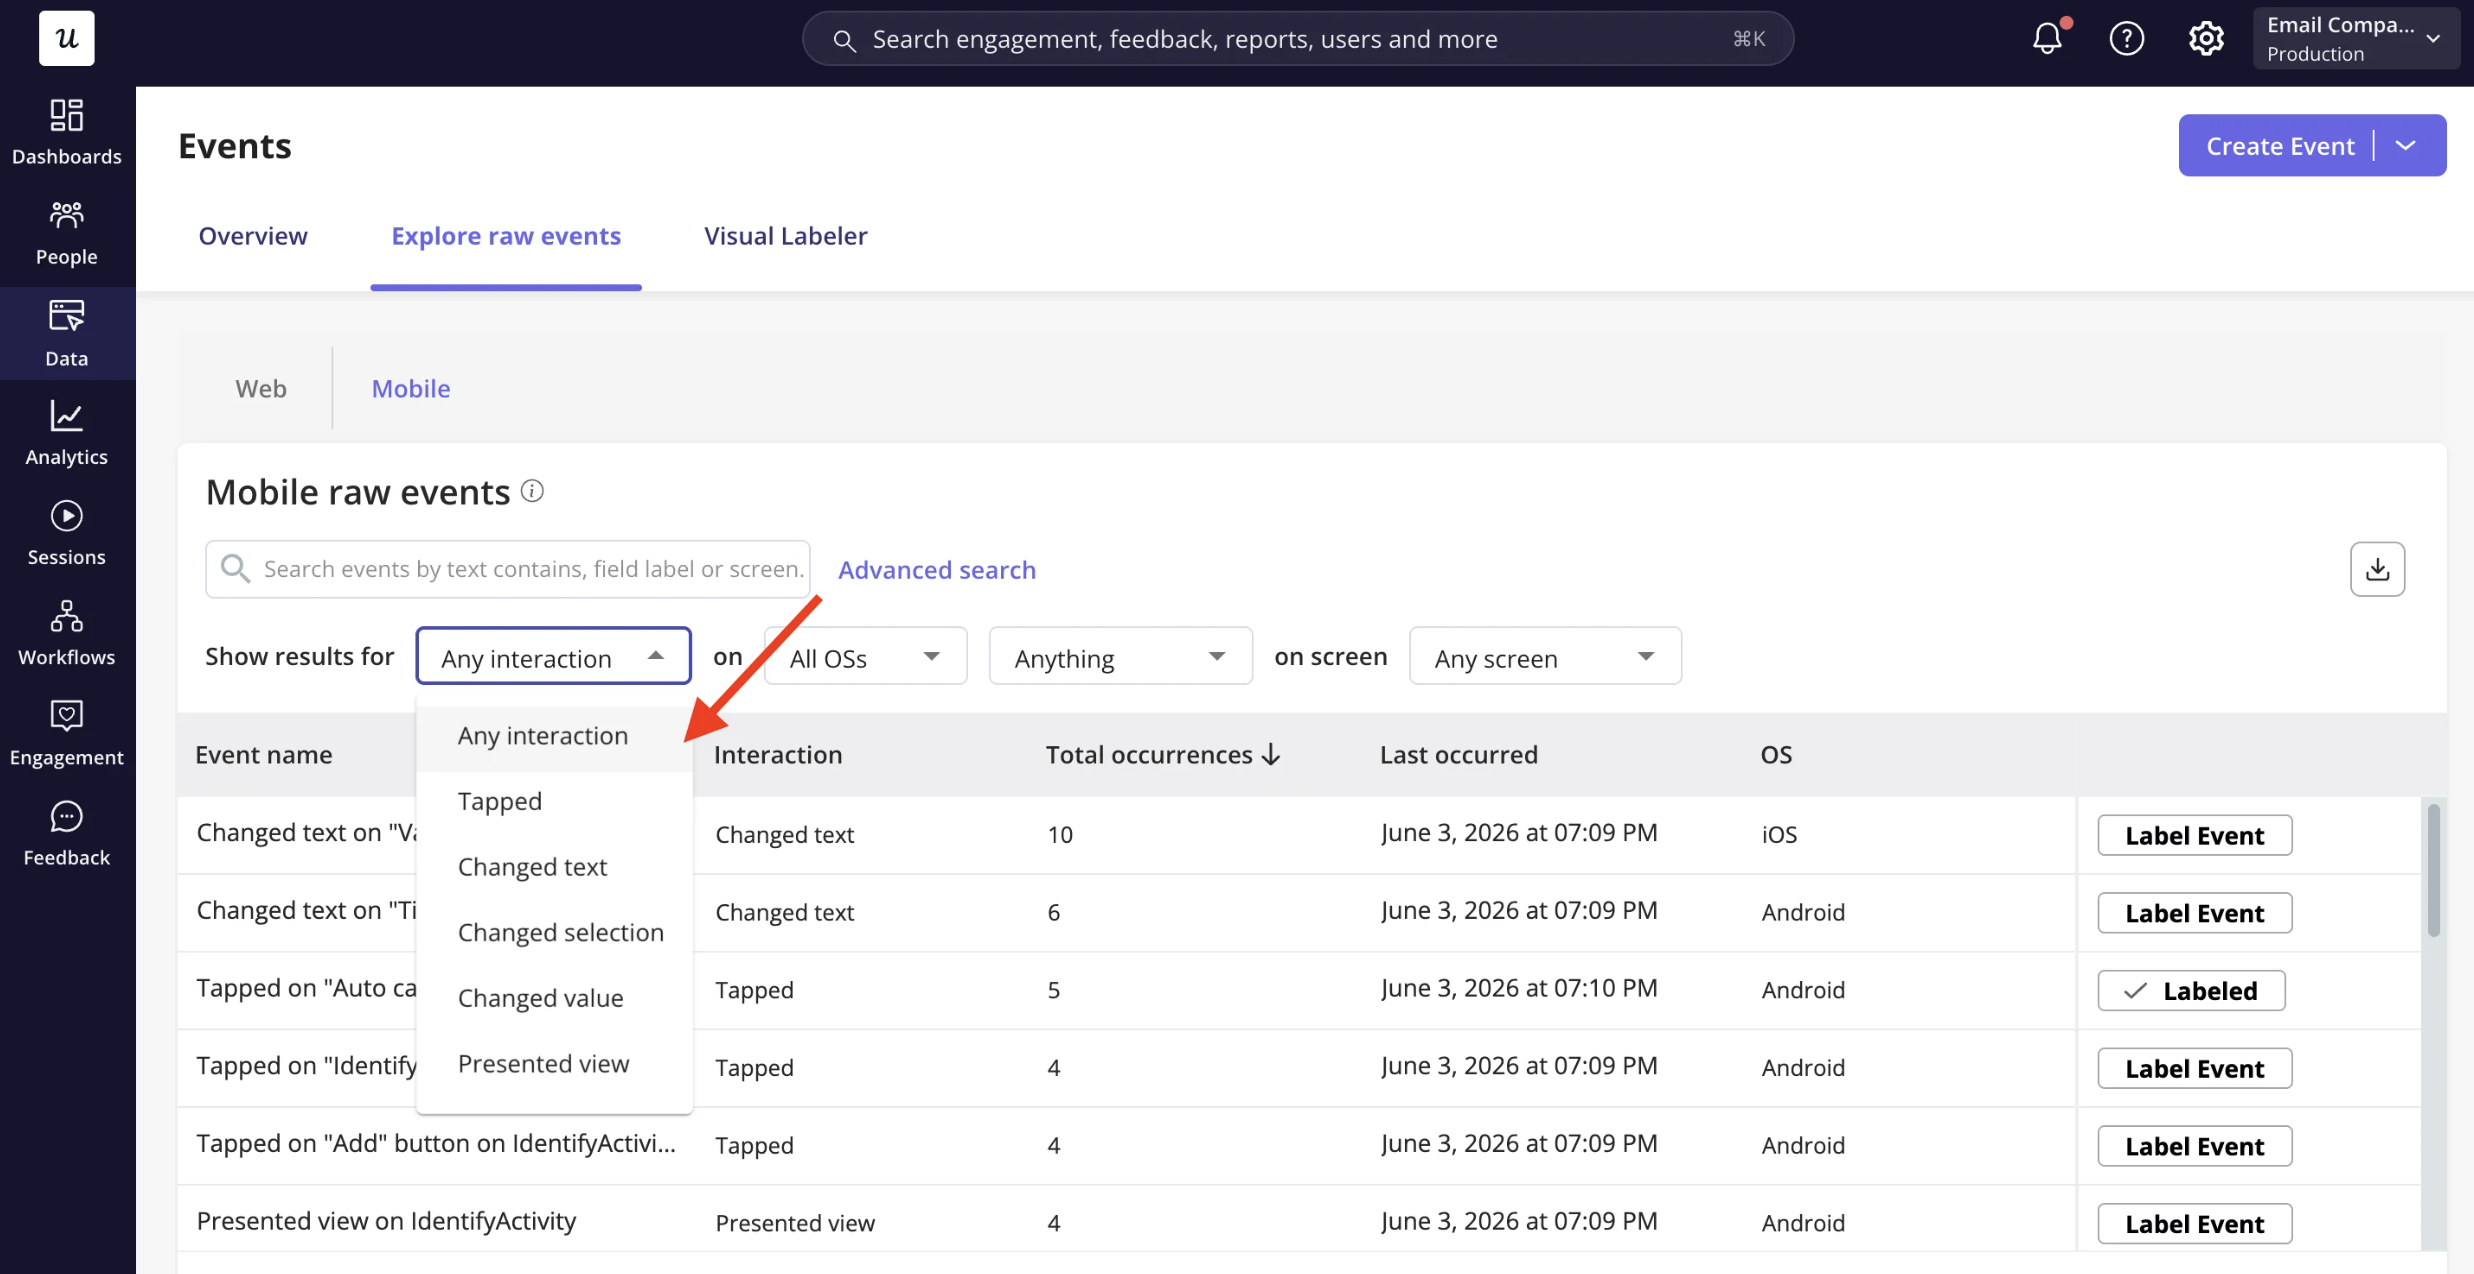
The practical read is that web captures browser interactions while mobile captures both screen views and in-app interactions through the SDK. You configure each surface once, and then you are working with the same kind of raw material on either side. Setting up capture in your mobile app is an engineering step, but only at install time.
Whether a behavior starts on web or in a mobile screen, Userpilot gives you one event model to work from. That means your team runs user behavior analysis and builds experiences across both platforms without maintaining two separate analytics workflows, which is usually where cross-platform tracking quietly falls apart.
What makes Userpilot different from dedicated analytics tools
Automatic event capture is standard across analytics tools now, so the interesting question is not who captures interactions. Amplitude, Heap, and PostHog all do it (Amplitude autocapture is the best-known example), and the capability alone no longer separates anyone. What separates Userpilot is what happens to a captured interaction after you label it.
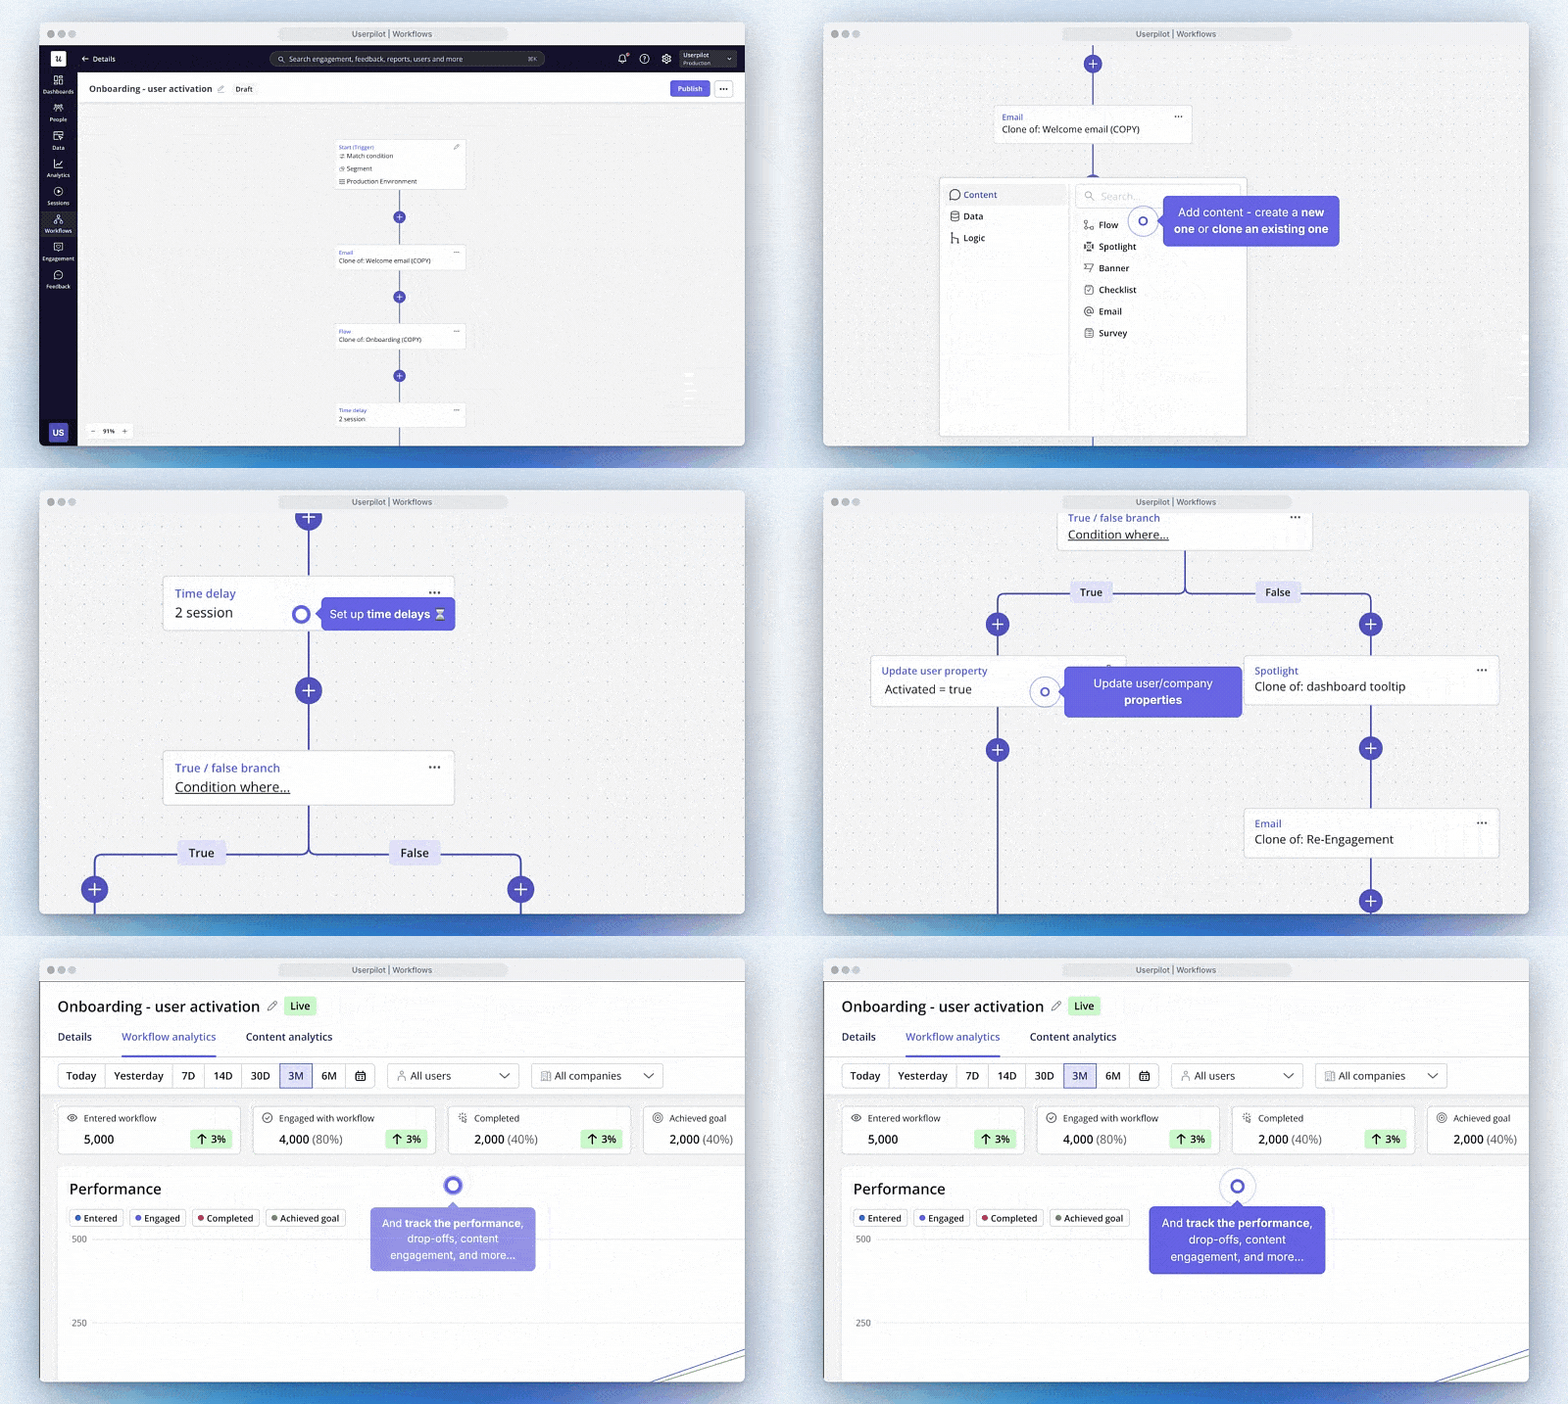
The first difference is that you capture and act in the same platform. A dedicated analytics tool helps you understand behavior and then stops, leaving you to export data or file an engineering ticket to do anything with it. Userpilot uses the same labeled events to power the wider set of Userpilot features, analytics, segmentation, content triggering, and in-app experiences like flows, checklists, and surveys, so the interaction you just labeled can change the product the same day.
The second difference is one workflow across web and mobile. On web, Raw Events capture clicks, text inputs, and form submissions, and on mobile the SDK captures supported interactions and screen views. In both cases you review Raw Events, label the ones that matter, and use those labeled events throughout Userpilot for reporting, segmentation, and experience triggering, rather than running two disconnected setups.
I will make this concrete with something that happened on my own team. When we launched Userpilot’s email feature, the funnel showed a sharp drop-off rate at domain verification, and the easy move would have been to file a ticket and wait. Instead, I read the drop-off in the data, then built a targeting tooltip and a checklist directly inside Userpilot to guide people through the correct steps.
“Within a few hours, I just created a targeting tooltip and showed it to users and highlighted the correct steps for them to make it clear what to do next. That helped a lot on reducing friction and supporting users in real time without involving our dev team.”
That loop is the difference in one story: the captured behavior showed me where users stalled, and the same platform let me act on it without leaving the tool. You can push the same idea further with Lia, Userpilot’s AI agent, which builds in-app experiences for you when you describe the outcome you want.
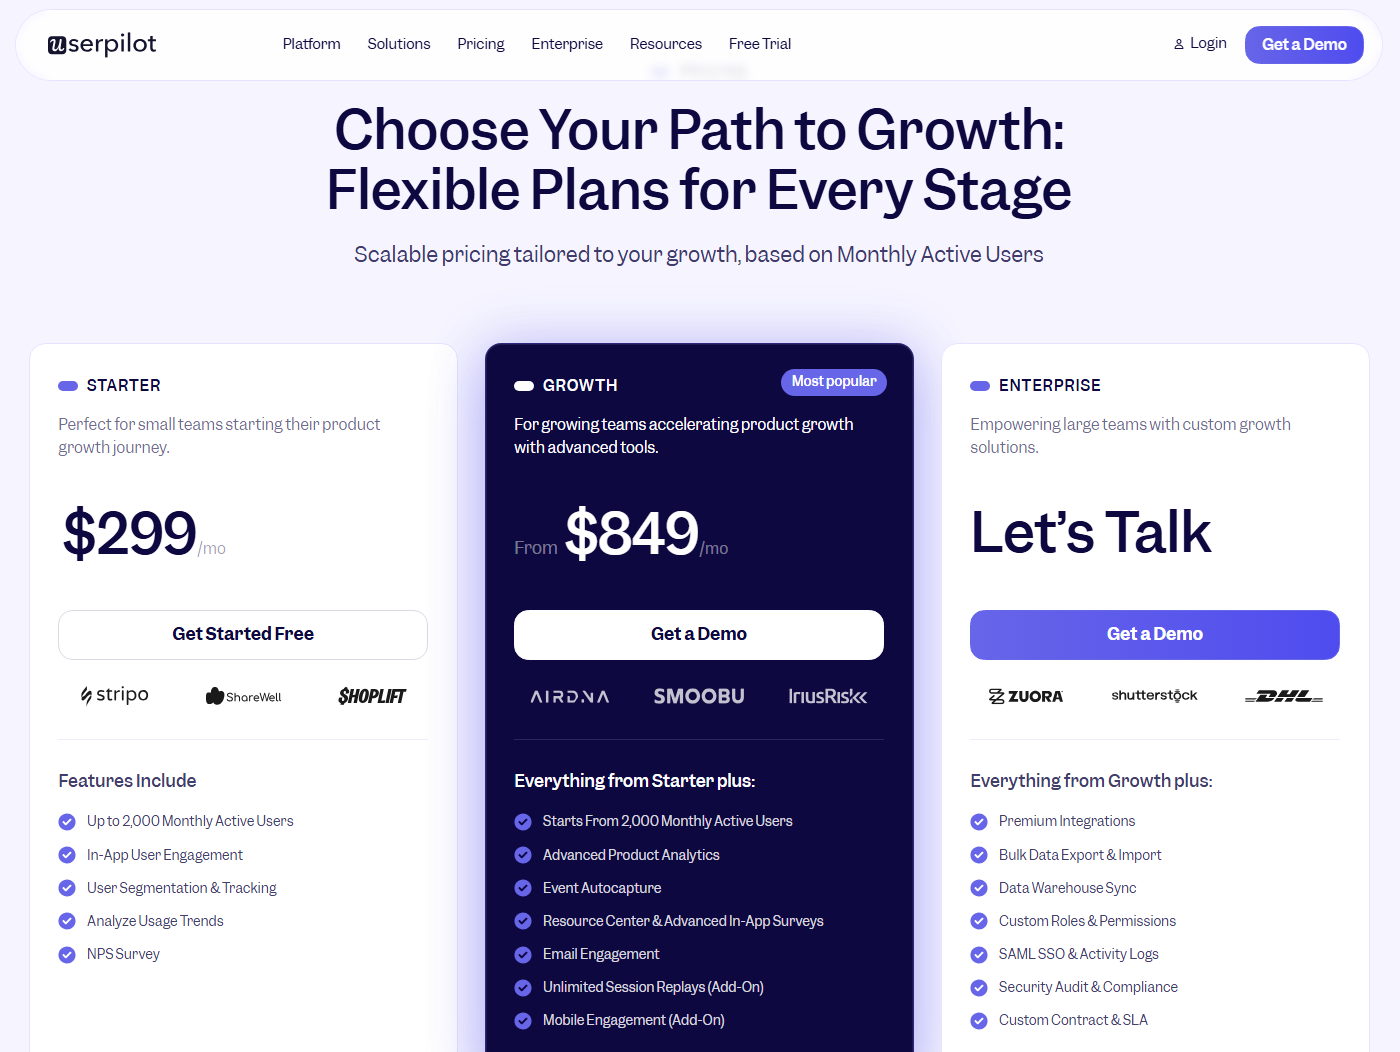
The third difference is predictable pricing. Userpilot prices based on monthly active users, so your costs are tied to product usage rather than the number of interactions you collect. That makes spending easier to forecast than event-based pricing models. As always, check the latest pricing pages before comparing plans across vendors.
Pricing and plans
Userpilot prices on MAUs, not on how many events you capture, which keeps your spend tied to how many people use your product. For most teams, that is far easier to forecast than an event-metered model.
Labeling raw events is available on the Growth and Enterprise plans. Once labeled, those events can be used across analytics, segmentation, reports, and event-driven experiences. If you’re comparing Starter with Growth, check the current Userpilot pricing page to confirm the latest plan details.
Turn captured behavior into product action
Autocapture gets the raw material into your hands fast, on web and on mobile, without an instrumentation project standing between you and your first look at real usage.
The value shows up when you label what matters and wire it into reports, segments, and in-app experiences inside the same platform. That is the gap between knowing what users did and doing something about it.
If you want to see how Userpilot turns automatically captured interactions into reports, segments, and in-app experiences, book a demo.
FAQ
What is autocapture, and how is it different from manual event tracking?
Autocapture automatically records supported interactions as users move through your product, so you do not have to instrument each event by hand before you can see it. Manual event tracking only records what someone remembered to tag in advance, which means gaps and a wait for data to accumulate. Autocapture removes that upfront guesswork and lets you decide what to keep after you can see real usage.
Does Userpilot autocapture work on mobile apps?
Yes. Mobile autocapture runs through the Userpilot SDK and includes Screen Auto-Capture for screen views and Event Auto-Capture for interactions like taps, text changes, selection changes, value changes, and presented views. You review and label mobile events the same way you do on web.
Do I need to be on Growth or Enterprise to use autocapture?
Labeling Raw Events, which is what makes captured interactions usable in analytics, segments, and triggering, is available on the Growth and Enterprise plans. Because plan details change, confirm the current gate on the pricing page before you commit.
What is the difference between raw events and labeled events?
A Raw Event is an automatically captured interaction with minimal data attached: the type, how many times it occurred, and when it last happened. Label that event, and it becomes reusable across reports, segmentation, and in-app experiences, which is the point where discovery turns into action.
About the author